Saturday, 17 October 2015

Peanut Butter and Jelly Brownies

Two of baking challenges that I like to take part in have the theme of  'America' this month. We Should Cocoa, which is guest hosted by It's Not Easy Being Greedy, wants participants to make something with an American theme, containing chocolate and the Formula 1 Foods challenge at Caroline Makes has reached the American leg of the F1GP circuit, so is inviting entries of any American inspired cooking.

On the face of it, American inspired baking, containing chocolate, is easy - I imagine almost everyone would suggest brownies at this point, but Devil's Food Cake and Mississippi Mud Pie spring to mind too. Once I'd decided to go with brownies (as they fitted in with my baking plans), I wanted produce a brownie with flavours that couldn't have come from anywhere else but America, which is why I ended up with the idea of adding peanut butter and jelly (jam) - a delicious combination which is rarely seen in Britain.

I looked at a few recipes online, and found various suggestions, such as making a batter with added peanut butter, or mixing it with cream cheese. I couldn't decide on the best approach until I found a blog post which said - take your favourite brownie recipe, and ripple in half a cup of peanut butter and half a cup of jam. Simple! So that's what I did.

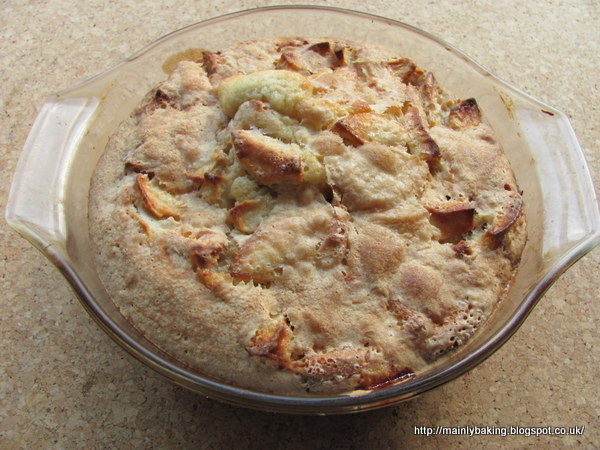
My favourite brownie recipe involves melting 140g each of butter and dark chocolate, stirring in 300g of light muscovado sugar, three eggs and a dash of vanilla extract, then folding in 160g plain flour and 3 tablespoons cocoa. Once the batter was made, I put roughly 3/4 of it into a 20cm(8") square baking tin (lined with baking parchment). Then I dotted teaspoonsful of smooth peanut butter and 'cherries and berries' jam onto the batter, using about 125g of each. The remaining brownie batter was drizzled over the surface, covering some of the peanut butter and jam, but not all of it. Lastly, I used the handle of a teaspoon to mix the peanut butter, jam and top layer of batter together in random swirls, and scattered over 30g of chopped roasted salted peanuts. The brownie tray was cooked at 180C until firm but not too dry. The end point was difficult to  determine as a probe hitting peanut butter or jam made the mixture seem underdone. I think, having given it 40 minutes, that I over-baked this batch slightly. Next time I'll try a few minutes less.

Over-baking aside, these brownies were really good. Using the peanut butter undiluted by cake batter or cream cheese meant that the flavour was still strong, and the cherries and berries jam added little bursts of tart fruitiness. The crunchy topping of salted peanuts added another layer to the complexities of flavour and texture.

I was particularly keen to try peanut butter and chocolate together, as I recently tried a pack of peanut butter flavoured Oreo biscuits. I've seen these cropping up in a lot of blog posts recently, so was intrigued enough to try them when I saw them in stock in my local supermarket. What a disappointment! I couldn't taste the peanut butter at all, so it was no surprise to read the ingredient list and find there were no real peanuts in the biscuit filling - only 'flavouring'!

It's also been National Chocolate Week this week, so my post is just in time to celebrate that, although chocolate is part of my everyday life - I don't need a special week to celebrate it!

We Should Cocoa (rules here) is the brainchild of Choclette, who writes the Tin and Thyme blog, although she often has guest hosts to share the duties of taking in the entries and compiling the end of month round up.

Caroline, at Caroline Makes, started the Formula 1 Food challenge at the start of this season, because her boyfriend is an avid motor racing fan. It hasn't gained a huge following, but I've had a lot of fun trying to find foods from the various countries where the races have taken place. It's sometimes been difficult to find something which I feel competent enough to tackle. The last three races of the season are in Mexico, Brazil and Abu Dhabi, the last of which sounds particularly challenging.


Wednesday, 14 October 2015

Date Gingerbread

More seasonal baking! Something dark and spicy this time. This recipe comes from one of my oldest baking recipes book, which was published in 1974, the year I got married.  It's so old that the weights and measures are just in ounces and pints (although it does provide American cup volumes too!), and the oven temperatures in Fahrenheit!

I'd usually translate to metric weights, but I was feeling lazy, so I switched my scales to 'lbs and oz' instead. The book gives the basic cake recipe, then suggests variations; I wanted to try the fig and walnut version, but couldn't find any figs in my slightly ramshackle storage system, so made the date version instead. I increased the ground ginger to 3 teaspoons instead of 2, and added an extra 2oz of crystallised ginger pieces too, to ramp up the ginger levels.

Ingredients
4oz butter
2oz light muscovado sugar
6oz black treacle
2oz golden syrup
1/4 pint milk
2 eggs
8oz plain flour
1 teaspoon bicarbonate of soda
1 teaspoon mixed spice
3 teaspoons ground ginger
4oz chopped dates
2oz crystallised ginger, in small pieces.

Method
Pre-heat the oven to 150C and line a deep 8" (20cm) square cake tin with baking parchment.
Melt the butter, sugar and syrups in a pan over a low heat, just until the butter has melted. Add the milk and cool.
Beat the eggs and add to the melted mixture.
Sift the flour, spices and bicarbonate of soda into a large bowl, then add the liquid and stir just enough to combine the ingredients - check there are no pockets of unmixed flour. Do not beat!
Fold in the chopped dates and crystallised ginger.
Pour into the prepared tin and bake for 75-90 minutes, until a test probe comes out clean. Cool in the baking tin, and leave for a day before cutting, to allow the top to become sticky.

Note - my cake cooked in only 60 minutes - I suspect modern ovens are more efficient than most of those around in the 1970s!

This cake was moist and spicy - sometimes the old traditional recipes can't be beaten! The little pieces of dates added a chewy caramel note and the crystallised ginger added extra heat.

Saturday, 10 October 2015

A Russian-inspired Meal

Kartoshnik
This weekend's challenge for Formula 1 Foods, over at Caroline Makes, is to produce food inspired by the cuisine or culture of Russia, to coincide with the Russian leg of the Formula 1 Grand Prix. I wanted to cook something which would fit in with my meal plans and not be too fiddly, or involve the expense of buying special ingredients, and I was pretty sure that I could find something in Russian traditional cooking to fit the bill. In the end, after discounting cakes with 15 layers, recipes which used whole jars of honey, and anything based on yeast dough,  I found two suitable recipes, both of which used simple everyday ingredients and methods. One was a savoury potato and cheese dish called Kartoshnik and the other was Sharlotka, sliced apples cooked in a sweetened egg-rich batter to make a cake or pudding. I decided to cook them both and have a meal inspired by Russia.

Kartoshnik
To be honest, I have my doubts that Kartoshnik is a traditional Russian dish. It's mentioned frequently on recipe websites, but there only seems to be one recipe in circulation. Usually traditional dishes get tweaked by generations of cooks, or regional variations in ingredients, so just one recipe, with no variations, suggests an invention by one cook, which has just spread by online repetition. However, it was surprisingly tasty, so if it hasn't been eaten  by past generations of Russians, it deserves to be enjoyed by those in the future.

Kartoshnik is a dish meant to accompany a meat dish, but in view of the amount of eggs and cheese used, I decided to treat it as a vegetarian main meal. Cooked mashed potato is mixed with eggs, onion, cheese and a little cream, with some baking powder added to lighten the mixture. When baked it becomes something like a quiche filling, both in taste and texture, so it was quite good as a main course. According to the recipe it is traditionally served with sour cream and chopped green(spring) onions, but I served mine with cabbage cooked with onions, apples and caraway seeds, which felt quite Eastern European to me.

Following this online recipe, I mixed 4 eggs, 75g grated Cheddar cheese, 75g mature Gouda cheese (in place of swiss cheese), 80mls double cream, a grated small onion, 1 teaspoon salt, 3 teaspoons baking powder, then stirred in 450g cooked and mashed potatoes (weighed after peeling). This mixture was spread into a 9" square greased baking dish and baked at 200C(fan) for about 30 minutes until golden brown and set. As the dish was removed from the oven, I brushed the top with a knob of melted butter, rather than serve with the larger amount of butter suggested.

Sharlotka
For dessert, I followed this recipe for Sharlotka, which baked the batter in a pudding dish. This wasn't entirely successful, as the depth of my baking dish meant that the dish took over an hour to cook properly. With the benefit of hindsight, it would have been better to use a larger, shallower cake tin, and serve the Sharlotka as a cake. Considering that the batter ingredients were just plain flour, sugar and eggs (with a 1/4 teaspoon baking powder, as suggested by some other recipes I looked at), I had no idea what the texture of the cake was going to be like. A sponge? a clafouti? a pancake? In fact, it was most like a dense sponge in texture, quite sweet but very plain and a good carrier for the sharp eating apples used in the recipe. When first baked, it had a crisp sugary crust, but this softened with time. I served the cooled cake with vanilla yogurt.

Although both these dishes are quite high in carbohydrates, neither of them seemed very heavy, so it didn't seem too much to serve them both as part of the same meal. The leftovers from the Kartoshnik were eaten with a chilli the following day, and suited that quite well too.


Tuesday, 6 October 2015

Pear, Chocolate and Hazelnut Cake

The recipe for this seasonal cake was inspired by this one from Hugh Fearnley-Whittingstall's River Cottage. I left out the orange zest (because I didn't have an orange handy), used hazelnuts instead of almonds and added 100g coarsely chopped dark chocolate. At this time of year we are foraging for hazelnuts and also had some pears from our neighbour's tree, so this cake really was a reflection of Autumn flavours.


Inevitably, the batter shrank away from the pears as the cake cooled after baking. This detracted a bit from the looks, but not the taste of the cake. I'm glad I added the extra chocolate chunks - it really boosted the chocolate content (25g of cocoa in this amount of cake batter is not a lot) and flavour.

The cooking juices from the pears must be cooked down to only a few tablespoons; any more and I think it would have created problems with too much liquid on top of the cake - as it was, it made me worry that the cake wasn't going to set properly, as the top looked very gloopy right up to the end of the cooking time. Using the juice didn't seem to much to the flavour - I guess that's where using the orange zest would have made a difference. Noted for next time!


Tuesday, 29 September 2015

Yuzu and Green Tea Madeira Cake

The Formula 1 Foods challenge, over at Caroline Makes, invites us to produce something that is either typical of the cuisine of the country where the latest round of the F1 GP is taking place, or is inspired by some aspect of life in that country. Baking for the Japanese race, held last weekend, proved quite difficult as bread, cakes and desserts do not play a large part in traditional Japanese cuisine.

However, Western foods are making a growing impression on the Japanese. They both adapt products to their own tastes - witness green tea or cherry blossom flavoured KitKats - and embrace a concept whole-heartedly and excel at producing it themselves. The range of bread and pastries available in department store food halls and specialist shops, ranging from baguettes, through almond croissants to tartes aux fruit and chocolate gateaux is some of the best I've seen (and tasted) outside France.

As I couldn't bake something Japanese, I decided to reverse the concept again, and bring popular Japanese flavours into something quintessentially British - the Madeira cake! I followed the traditional Madeira recipe - 175g each of butter and caster sugar, 3 eggs and 250g SR flour - and added 3 tablespoons of yuzu juice. Then I removed about 1/3 of the batter and stirred in 2 teaspoons matcha (green tea powder), to give a quite vividly coloured batter.

The two batters were layered into a 2lb loaf tin, starting and ending with the plain coloured batter, The cake was baked at 170C for 55 minutes, or until a test probe came out clean.
After the cake was cool, I made a thick glacé icing with icing sugar and 1 tablespoon yuzu juice, and drizzled it over the cake.

I made a few miscalculations about how much batter to use when building up the layers and ended up with a large green layer near the top of the cake, I also expected the two colours of batter to swirl naturally as the cake baked to make a classic marble cake, but this didn't happen, so the cut cake looks a little strange. All I needed to do was run a chopstick through the batter to swirl it myself - I'll know better next time!

The flavour of the cake was quite delicate, as befits a Madeira cake, which is usually only flavoured with a hint of lemon, and the slight bitterness of the green tea was a good contrast to the sweetness of the rest of the cake, especially the icing, where the flavour of yuzu was much stronger.

Sunday, 27 September 2015

Gluten-free Cornbread

We both really like cornbread, as an occasional alternative to rice, with a chilli, but I've yet to find the perfect recipe. The biggest problem is the bread being too crumbly, then there are recipes that are too sweet and recipes that are too bland. Flavours can easily be worked on, but it's getting the right balance of dry to wet ingredients which is proving elusive (although I have to admit that this recipe, from Ben Mims seemed pretty good the first time I tried it - I just forgot about it until now!). Add into the mix, the desire for a gluten-free cornbread and things get complicated.


It's fairly widely recognised that adding some wheat flour is better than 100% cornmeal, if a light cornbread is required, but this can't be used in gluten-free baking. This recipe, found on Jamie Oliver's website, uses equal volumes of a gluten-free flour mix and cornmeal, and allows for the use of non-dairy milk, if required. The only thing I didn't like, at first glance, was the amount of sugar added, so I cut this down from  80g to 50g. I added half a teaspoon of xanthan gum, just because I had it to hand, and it's meant to replicate the effects of gluten in wheat flour ie  cuts down on the crumbliness of baked products. I also used a mix of 50% polenta and 50% fine cornmeal instead of all cornmeal.

Converted to metric weights, I used: 200g gluten-free flour, 220g cormeal/polenta mix; 50g sugar, 2 tablespoons honey, 2 teaspoons baking powder, 1 teaspoon bicarbonate of soda, 1 teaspoon salt, 1/2 teaspoon xanthan gum, 2 large eggs, 360mls milk, 75g melted butter + another 10g to grease the skillet.

The method is fairly standard - mix dry ingredients in one bowl, wet in another, melt butter. Add wet ingredients and melted butter to dry ingredients and mix until just combined (don't overmix!). Pour into a pre-heated and well-greased skillet and bake in a hot oven. I used a fan oven at 160C and found that the cornbread was cooked in 25 minutes, rather than the 30-35 minutes suggested in the recipe.

The texture of this cornbread was good, but still a little crumbly. The Ben Mims recipe uses a much higher proportion of liquid, so it shouldn't spoil this recipe to increase the amount used, although it might need an extra egg too. I thought there was still a touch too much sugar in the recipe, so will cut it down even more in future. My next attempt will be to try a version of this recipe which is dairy-free too.

Wednesday, 23 September 2015

Jam-swirled Crumb Cake

Being away on holiday for most of the first half of the month has limited my entries to the various cooking challenges which I try to participate in regularly - I got an early entry into Belleau Kitchen's Simply Eggcellent, and the first of Caroline Makes' Formula 1 Foods, but the challenge from We Should Cocoa to use blackberries and chocolate together has fallen by the wayside due to lack of time.

Despite needing to lose the holiday weight, and get my diet back on track, I found time to make a simple crumb cake for the AlphaBakes challenge this month, which is to use the letter J, either for the first letter of a main ingredient, or the first letter of part of the name of the dish (eg J for Jalapeno or J for Jalousie). See the full set of rules here, for a complete explanation.

My J was for Jam - I swirled some reduced sugar 'cherries and berries' jam into the top half of a crumb cake batter, hoping the result would be colourful and add extra flavour to a fairly plain cake. My recipe is a slight adaptation of this one, found on the blog Bake or Break, which I've been reading for several years. I reduced the sugar a little, altered the topping to accommodate what I had available, and baked the cake in a 20cm (8") round tin.

Ingredients

Cake
210g plain flour
2 teaspoons baking powder
pinch salt
115g butter, softened
100g caster sugar
50g light muscovado sugar
1 teaspoon vanilla extract
1 large egg
120mls milk
1/3 cup jam

Topping
50g light muscovado sugar
2 tablespoons flour
1/4 teaspoon cinnamon
1 tablespoon ground almonds
25g cold butter, cut into small pieces
2 tablespoons chopped toasted hazelnuts

Method
Pre-heat the oven to 175C, and base line a 20cm springform tin.
Make the topping by putting the sugar, flour, almonds and cinnamon into a small bowl, then rubbing in the butter until the mixture looks like breadcrumbs. Stir in the hazelnuts, then set aside at room temperature.
Mix the flour, baking powder and salt together. In a large bowl beat the butter and sugars unril light and fluffy. Beat in the egg and vanilla, with a tablespoon of the flour mix. Then fold in the rest of the flour, alternately with portions of the milk, to make a stiff cake batter.
Spread about 2/3 of the batter into the cake tin, then spread on the jam, leaving a border of batter around the edge of the tin. Carefully spread on the remaining batter, then use a teaspoon handle to swirl through the cake batter, trying to keep in the top half of the mixture.
Sprinkle the topping over evenly, squeezing it together in your fingers to make it a little clumpier, rather than powdery.
Bake for 35 minutes, then reduce the temperature to 160C and bake until a tester comes out clean - about another 15 minutes (45-50 minutes in total). Cool in the tin.

Sadly, the finished cake didn't look as good as I'd hoped. It rose unevenly, sank back badly during cooling and when cut, it revealed that the jam layer had sunk during baking and lost a lot of it's vibrant colour. The hoped for swirls of colour in the top of the cake just didn't materialise! The crumb crust hadn't really adhered to the cake batter either, which made the cake difficult to cut and serve. It tasted fine though - the topping was sweet and nutty and the jam added a good fruity flavour to the cake. Overall, something that needs a little more work, but could be a good store-cupboard recipe!

The AlphaBakes Challenge is hosted alternately by Caroline, at Caroline Makes, and Ros, at The More Than Occasional Baker. Ros is this month's host, and will post a round-up of entries at the end of the month.