Showing posts with label xanthan gum. Show all posts

Saturday, 9 December 2017

Date Shortbread Squares

 - gluten-free, plus dairy-free option

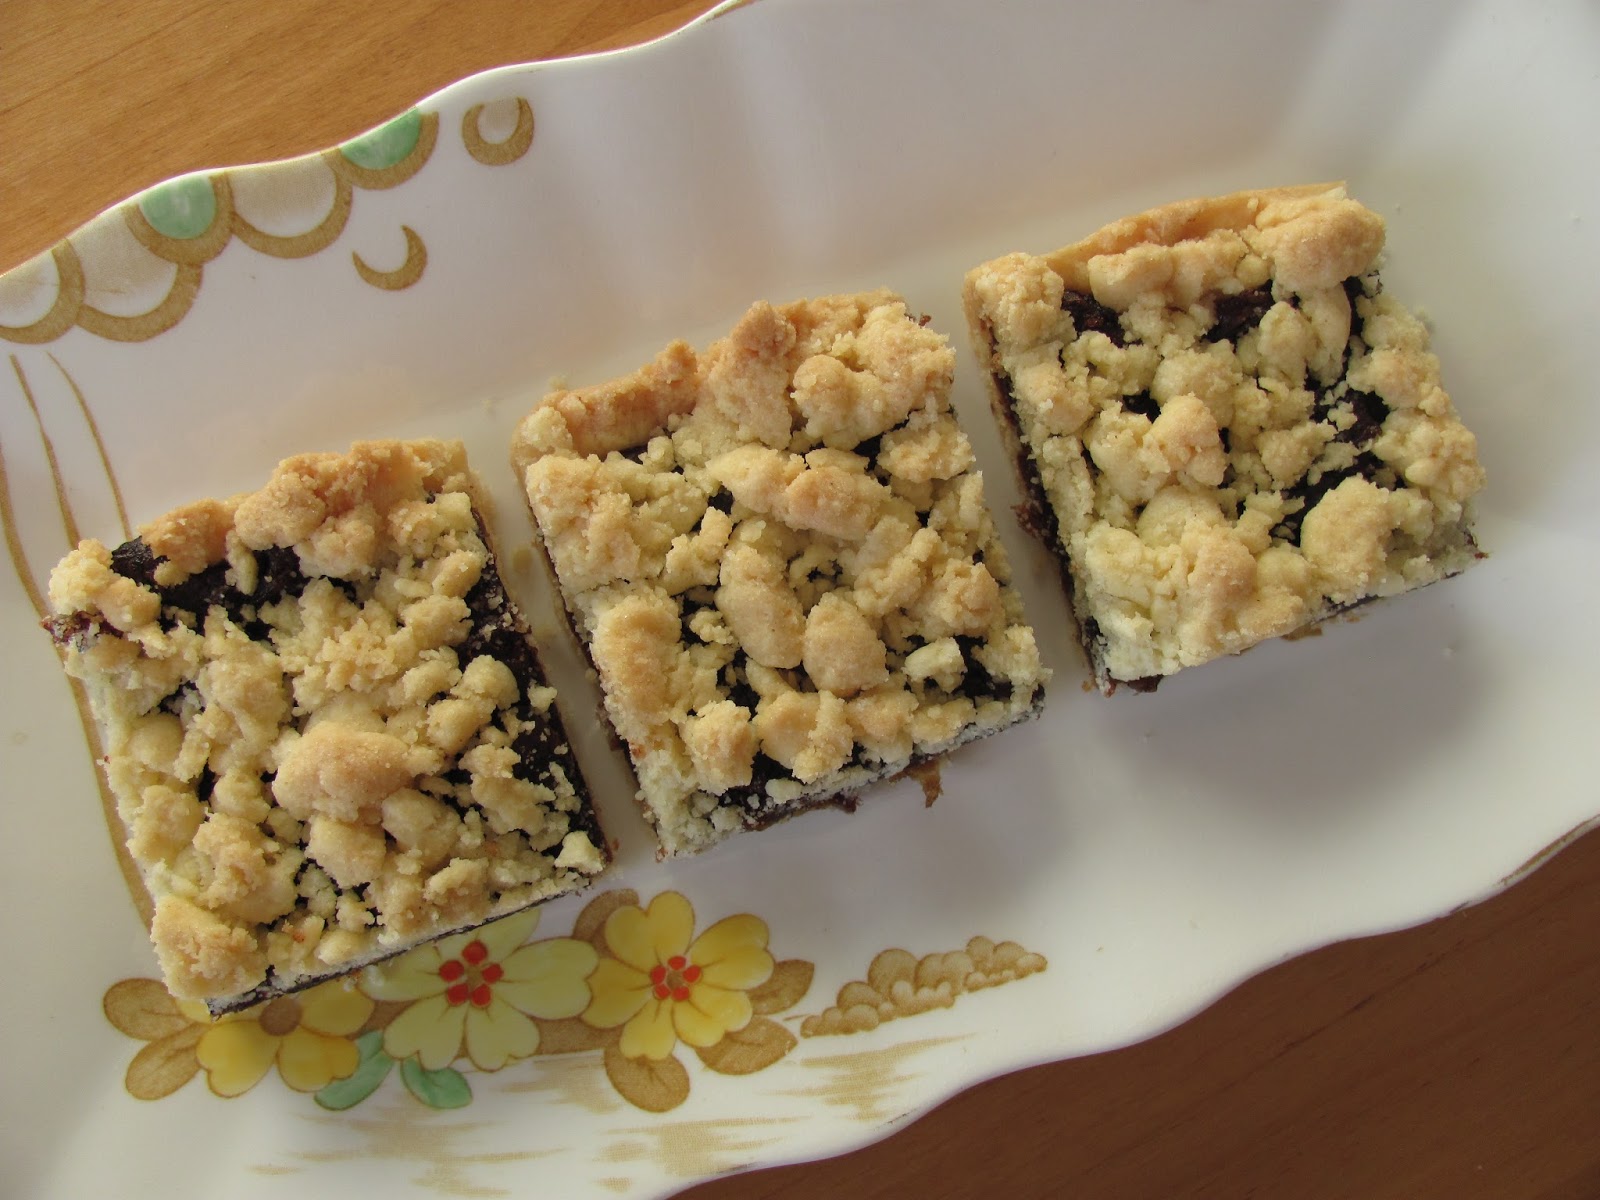
This is an adaptation of my favourite 'shortbread squares' recipe, which comes from 'On Baking' by Sue Lawrence, to make it gluten-free. Instead of wheat flour and semolina, I used a gluten-free flour, ground rice and added a little xanthan gum. It's the shortbread part of the recipe which is so good - quick to make, as it uses melted butter, and very crisp and light after it's baked. Any type of filling can be used, such as mincemeat or re-hydrated and cooked dried apricots - just make sure it's not too wet; for this version I made the filling from dates flavoured with pomegranate molasses, cinnamon and a little rosewater.

Ingredients
Filling:
225g dates - chopped
3 tablespoons pomegranate molasses
3 tablespoons water
1/2 teaspoon cinnamon
1/2 teaspoon rosewater

Shortbread:
255g gluten-free plain flour
85g ground rice
1/2 teaspoon xanthan gum
170g butter (or hard vegetable fat such as Stork*)
85g caster sugar

*see note at end of post

Method
Preheat the oven to 190C (170C fan)

Start by making the filling. Put all the ingredients into a small saucepan and bring to the boil. Cover the pan, turn the heat to low, and simmer for a few minutes until the dates are soft. At this stage you can blend the filling until smooth, but I prefer to just mash the dates with a fork, to make a rough purée. You may also need to add a splash more water to make the purée easy to spread, if all the added liquid has been absorbed during cooking.

For the shortbread, mix the gluten-free flour, ground rice and xanthan gum in a bowl.
Warm the butter and sugar together in a small pan, until the sugar has dissolved, then pour onto the flour mixture. Stir well to combine thoroughly - the mixture will form a crumbly dough.
Put 2/3 of the dough into a 20cm (8") square shallow tin, lined with baking parchment, spread evenly and press down firmly.
Spoon over the date filling, spread evenly, leaving a small margin around the edges.
Use your hands to crumble the remaining shortbread mixture evenly over the dates to cover as much as possible, and press down lightly with the palm of your hand.
Bake for 30 minutes until pale golden in colour. Cut into squares (16) while still hot, but leave the squares to cool completely before trying to remove them from the tin, as they are fragile when warm.

My only criticism of these is that the added flavourings were a little too subtle - both the cinnamon and the rosewater could have been increased.

* Dairy-free: I made a second batch of these date shortbread squares which were dairy-free as well as gluten-free, using Stork vegetable fat instead of butter. The shortbread was a little more crumbly than when using butter, for some reason, and they didn't taste as rich, but the recipe was largely successful.

Friday, 23 December 2016

Mincemeat Frangipane Tart

gluten- and dairy-free

The highlight of this recipe, for me, was making a really good gluten- and dairy-free pastry. I'd read that it wasn't easy, so it felt quite an achievement  to come up with a recipe which worked well first time (and was repeatable - I made this dessert twice!). After looking at many recipes and reading about gluten-free pastry, I based this recipe on my usual wheatflour sweet shortcrust pastry recipe, but added both a little xanthan gum for strength and baking powder for lightness. I'd read that gluten-free pastry needs more liquid than wheatflour pastry, so I made the dough wetter than usual.

There are reservations about this apparent success though - the pastry dough was very sticky and hard to handle, and I'm not sure I would have had as much success in other situations, for instance if the pastry needed baking blind, or if I was trying to make a pastry top crust too. This may have only worked because the filling was put straight onto raw chilled pastry, and the mincemeat and frangipane layers completely filled the pastry case, holding the sides in place until the pastry had set during baking and leaving no chance of any collapse. Obviously I need to try out the pastry in other situations before declaring it a total success.

Ingredients:
Sweet shortcrust pastry:
200g Dove's gluten-free plain flour
1/8 teaspoon xanthan gum
1/4 teaspoon baking powder
100g hard dairy-free baking fat (eg Stork)
50g icing sugar
1 large egg
2 tablespoons water

250g mincemeat (check it's gluten- and dairy-free, if this is important)

Frangipane:
100g caster sugar
100g ground almonds
100g dairy-free baking spread
1 tablespoon ground rice
2 large eggs
a few drops almond extract
flaked almonds for topping

Method
Sift the flour and icing sugar into a bowl and add the xanthan gum and baking powder.
Cut the baking fat into small cubes and add to the bowl. I find that Stork is not as hard as cold butter, so can usually be used straight from the fridge.
Rub or cut the fat into the flour mixture until the mixture resembles breadcrumbs, then mix in the egg and water to make a smooth sticky dough. Only knead enough to incorporate everything into an even dough. Put the ball of dough onto a large piece of clingfilm, wrap loosely and flatten the dough into a 3cm thick disc. Chill for 20 minutes.
Unwrap the dough, but leave it in the centre of the clingfilm, then cover with another large piece of film. Roll out the dough evenly, between the pieces of film, until it is about 30cm (12") in diameter and will fit into a shallow fluted flan tin, about 23cm (9") in diameter.
Remove the top piece of clingfilm carefully - the dough will still be sticky - and invert the circle of dough into the flan tin, so that the bottom piece of film is now on top. While this piece of clingfilm is still in place, ease the dough into place in the corners and flutes of the tin. Chill the pastry case again.
Remove the pastry case from the fridge, gently ease off the clingfilm and trim the dough around the top of the tin to give a neat edge. Any small holes can now be patched with small pieces of the dough trimmings, if necessary - just smooth a small piece into place with your finger.
Pre-heat the oven to 180C, and put a baking tray onto a middle shelf to heat.
Spread the mincemeat into the base of the pastry case.
Put all the ingredients for the frangipane, except the flaked almonds, into a bowl and beat until the mixture is smooth. This is easily done with a spoon, but you can use a hand-held mixer too, if you prefer.
Pour the frangipane over the mincemeat to fill the pastry case, and sprinkle with flaked almonds. Put onto the baking tray and cook for 40-45 minutes until frangipane is firm and golden brown.
Cool in the tin.

I was really pleased with this. I've made frangipane mincemeat tarts before, but never a gluten-and dairy-free version. I doubt anyone would be able to tell the difference as the strong flavours of mincemeat (I used a gluten-free variety with added cranberries) and almonds covers any deficiencies through not using butter in the pastry. The pastry was light and crisp too, and kept well over the three days it took to eat the tart.

I think this will be my last post before Christmas, so I'm fortunate it's a festive one. I'm not planning to cook anything new over the Christmas period, just old favourites. It's also hard to get photographs in the chaos of cooking and the bad light at this time of year, so I'll be back soon with something new.

Season's Greetings to you all!

Thursday, 12 May 2016

Chocolate Cake

Gluten-free and Dairy-free

This was a test cake, in my quest to find a 'tea-time' chocolate cake which was both gluten and dairy free. I've got several dessert recipes for rich, dense chocolate tortes which are both, but wanted something lighter and 'cakey-er'. 

Because I was just testing the recipe, I decided not to make a filling or frosting for the cake, adding just a dusting of icing sugar to make it slightly more photogenic. 

The recipe, another from the Waitrose website, worked out very well. I had expected the 200g of chocolate in the cake to make it quite dense but it rose well and was as light as a sponge-cake - just what I wanted. The cake wasn't too rich, either, considering the amount of chocolate it contained, but I think it really needed a fudgy frosting (or the ganache from the recipe) to elevate it from a 'plain' cake to something a bit more special.

We both really liked this cake, so I don't think I need to look any further for a good chocolate cake recipe that is both gluten- and dairy-free.

Sunday, 1 May 2016

Date, Banana and Rum Loaf

Gluten-free and dairy-free.

This Date, Banana and Rum Loaf, found on the BBC Good Food website, could be considered a healthy cake, as it has no added fat or sugar. The natural sweetness comes from almost 800g of fresh and dried fruit packed into the loaf, and the only significant fat is that which is contained in the nuts - 100g of pecans.

I was a little worried about making the cake, as some of the comments on the Good Food website said the cake was quite crumbly, but I needn't have worried. I followed the basic cake recipe closely and made a dense, very moist fruit cake, which even survived being dropped (in it's cake box); quite frankly I was amazed that just the puréed fruit, 100g of fine cornmeal and 2 egg whites made a batter that actually held everything together! In a slight departure from the recipe, I added 1/2 teaspoon of xanthan gum, as it's easy to get hold of now, although it wasn't when this recipe first appeared in 2008; I don't know if it made any difference but it couldn't have done any harm!

One other thing I did, not mentioned in the recipe, was to cut each date in half, cross-ways, before cooking them. I found two stones while doing this, so it's well worth the extra time spent, as unnoticed stones could damage food processor blades.  When I drained the cooked dates I didn't get enough liquid, so I added water to get to the 100mls needed for the recipe. I varied the topping, as I don't really like banana chips - I used the remaining pecans, chopped coarsely, and 4 crushed brown sugar cubes (optional if you don't want to add sugar).

I really enjoyed this cake, but I would leave the sugar off the topping next time. It only added a crunch when the cake was fresh, and quickly dissolved in the moisture from the cake. Unlike a lot of other recipes that rely on the natural sweetness of the ingredients, rather than adding any additional sugar, this cake did taste sweet enough. This is definitely a recipe I'll be using again!

One small criticism - sultanas and raisins are very similar in looks and taste; the cake might have been more attractive and even tastier if a different mix of dried fruit was used. Cranberries, cherries, chopped apricots and/or golden raisins could be used to replace some of the 400g of raisins and sultanas used in the loaf.

Thursday, 21 April 2016

Rhubarb and Ginger Polenta Cake

Gluten-free & Dairy-free

This is a recipe I've been using for years - two layers of shortcake-style dough enclosing some fresh fruit. I usually make it with butter and SR flour, but wanted to see whether the recipe worked if it was made both gluten- and dairy-free. I decided to use polenta in place of 1/3 of the flour, as in this Nigel Slater recipe, a commercial brand of gluten-free flour and a non-dairy spread instead of butter.

This recipe works well with any type of fresh fruit filling, but something like rhubarb, which releases a lot of liquid during cooking, needs to be cooked first, then drained. I roasted 500g of rhubarb (the first of the season, incidently), cut into 4cm lengths, with about 50g of sugar; you might need more sugar if you don't like really sharp fruit.

Ingredients
150g caster sugar
150g non-dairy spread, suitable for baking
100g polenta (I only had the instant kind)
200g gluten-free plain flour
1 teaspoon baking powder
1/2 teaspoon xanthan gum
1/2 teaspoon ground ginger
1 large egg
500g sweetened cooked rhubarb, drained of cooking juices
3 balls of stem ginger, finely chopped

Method
My usual method is to melt the butter, then stir in the sugar and egg, then lastly add the flour, but I didn't think this would work as well with the non-dairy spread. Instead I followed the method in Nigel's recipe, which is to put all the dry ingredients into a bowl, rub in the fat, then mix to a sticky dough with the egg. The gluten-free flour and polenta made a much stickier dough than usual, which was almost too soft to work with - next time I think I'll add another 25g of flour.

Pre-heat the oven to 180C.
Once mixed, 2/3 of the dough is spread over the base of a 20cm springform tin, which has been greased and base-lined with baking parchment. The dough needs to be worked up the sides of the tin to make a wall about 2cm high.
Spread the fruit onto the base, packing it closely together but leaving the 'wall' uncovered.
Sprinkle the chopped stem ginger over the rhubarb, then drop the remaining dough on top of the the fruit in small teaspoonsful, starting at the edges and working inwards. Use the spoon to flatten and spread the dough as much as possible, but it isn't necessary to completely cover the fruit.
(The method of assembling the cake is covered in more detail, and with photographs, in this post.)
Bake for about 55 minutes until the cake is golden and feels solid. Cool in the tin.
The cake can be served warm but this gluten-free version is quite fragile, so I'd recommend serving at room temperature.

If liked, the top can be sprinkled with flaked almonds or demerara sugar before baking, or the cooled cake can be dusted with icing sugar before serving. As I mentioned earlier, almost any fruit can be used as a filling - sliced apples and a handful of sultanas, for instance, or sliced plums - and complimentary spices can be used in the dough, rather than ginger.

Rhubarb and ginger is a classic combination which worked well in this cake. There was just a hint of ginger in the cake dough, but the stem ginger in the filling was more pronounced and added an extra texture too, along with the graininess of the polenta. This cake was softer and more fragile than the same cake made with the usual ingredients, but I was pleased with how well the 'conversion' to a gluten- and dairy-free version turned out.

Sunday, 27 September 2015

Gluten-free Cornbread

We both really like cornbread, as an occasional alternative to rice, with a chilli, but I've yet to find the perfect recipe. The biggest problem is the bread being too crumbly, then there are recipes that are too sweet and recipes that are too bland. Flavours can easily be worked on, but it's getting the right balance of dry to wet ingredients which is proving elusive (although I have to admit that this recipe, from Ben Mims seemed pretty good the first time I tried it - I just forgot about it until now!). Add into the mix, the desire for a gluten-free cornbread and things get complicated.


It's fairly widely recognised that adding some wheat flour is better than 100% cornmeal, if a light cornbread is required, but this can't be used in gluten-free baking. This recipe, found on Jamie Oliver's website, uses equal volumes of a gluten-free flour mix and cornmeal, and allows for the use of non-dairy milk, if required. The only thing I didn't like, at first glance, was the amount of sugar added, so I cut this down from  80g to 50g. I added half a teaspoon of xanthan gum, just because I had it to hand, and it's meant to replicate the effects of gluten in wheat flour ie  cuts down on the crumbliness of baked products. I also used a mix of 50% polenta and 50% fine cornmeal instead of all cornmeal.

Converted to metric weights, I used: 200g gluten-free flour, 220g cormeal/polenta mix; 50g sugar, 2 tablespoons honey, 2 teaspoons baking powder, 1 teaspoon bicarbonate of soda, 1 teaspoon salt, 1/2 teaspoon xanthan gum, 2 large eggs, 360mls milk, 75g melted butter + another 10g to grease the skillet.

The method is fairly standard - mix dry ingredients in one bowl, wet in another, melt butter. Add wet ingredients and melted butter to dry ingredients and mix until just combined (don't overmix!). Pour into a pre-heated and well-greased skillet and bake in a hot oven. I used a fan oven at 160C and found that the cornbread was cooked in 25 minutes, rather than the 30-35 minutes suggested in the recipe.

The texture of this cornbread was good, but still a little crumbly. The Ben Mims recipe uses a much higher proportion of liquid, so it shouldn't spoil this recipe to increase the amount used, although it might need an extra egg too. I thought there was still a touch too much sugar in the recipe, so will cut it down even more in future. My next attempt will be to try a version of this recipe which is dairy-free too.