Showing posts with label apple. Show all posts

Thursday, 26 November 2020

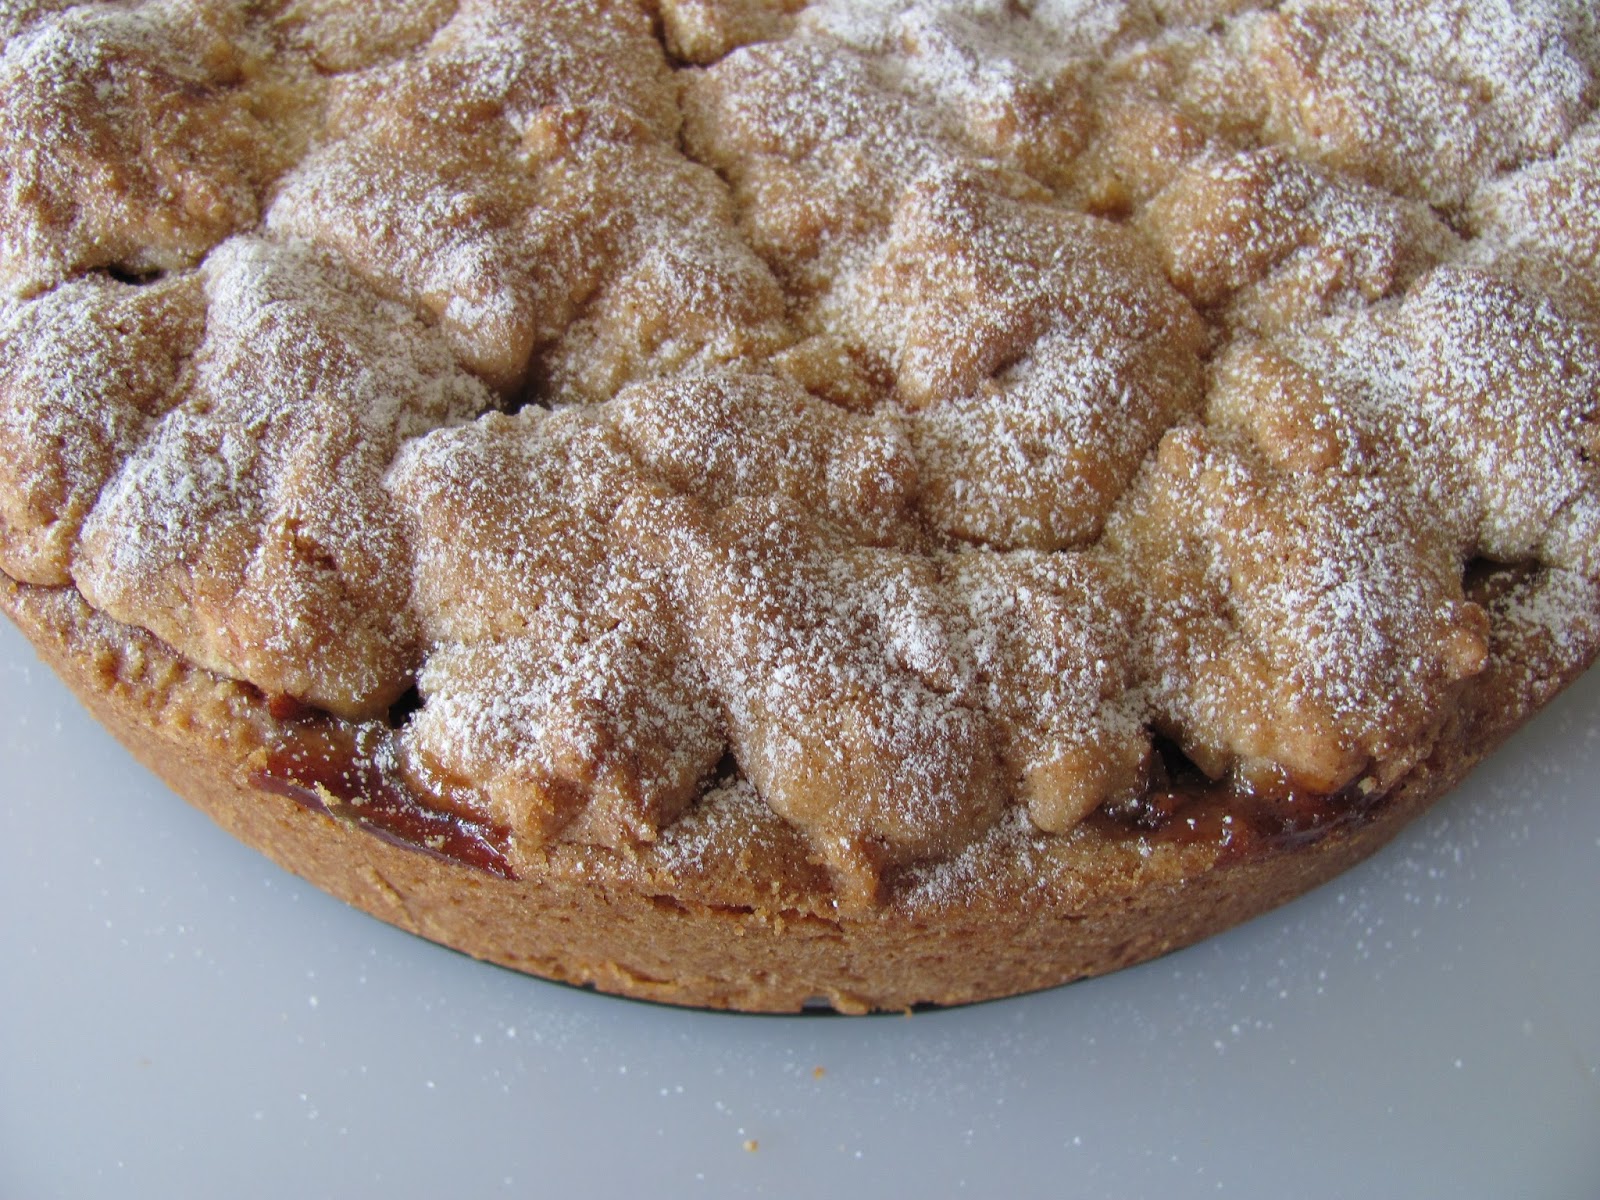
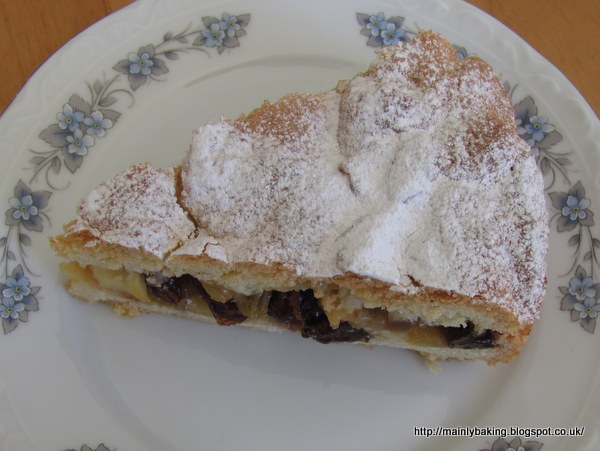
Apple and Cranberry Cake

I usually make this cake, which is two layers of a scone-like dough sandwiching a layer of fresh and/or dried fruit, as a dessert. I often make it when I haven't got time to fuss around with pastry, as the result is very similar to a pie, but much easier to make. 
This time, I wanted to capture some of the essential flavours of Autumn, which is one of my favourite times of the year for seasonal baking. So I used eating apples, dried cranberries and cinnamon in the filling, and some flaked almonds in the topping.

Ingredients

150g butter
150g caster sugar
1 large egg
300g SR flour
3 eating apples, peeled, cored and sliced* 
80g dried cranberries
1 teaspoon cinnamon
30g flaked almonds
icing sugar to dust
* I usually slice the apples into water to which I've added a little lemon juice or vinegar, to stop the fruit discolouring. When I'm ready to use the slices, I drain them well and pat dry on a clean tea towel. 

Method
Preheat the oven to 180C, and line the base of a 20cm (8") springform tin with baking parchment; grease the sides with a little butter if your tin needs it.
Melt the butter in a large mixing bowl, in the microwave, or in a saucepan on the hob - if you do this in a large pan you can mix the dough in it too. The butter doesn't need to be really hot - just completely melted.
Stir in the sugar, then beat in the egg.
Add the flour and mix in thoroughly - it should give a soft crumbly dough.

Put 2/3 of the dough into the cake tin, and spread evenly with your fingers, building up a little wall of dough around the edge of the tin, to contain any excess fruit juices.**
Mix the flaked almonds into the remaining dough.
Mix the prepared apples, dried cranberries and cinnamon together and spread over the dough base.
Crumble the rest of the dough over the top, then press down lightly, spreading the dough a little to give good coverage over the top. The dough will spread more during baking, so don't try to fill all the gaps.
Bake for 50-60 minutes until the top is firm and golden. Cool for about 10 minutes, then run a knife between the cake and the edge of the tin, to stop and leakages of fruit juice sticking to the sides.
Dust with icing sugar before serving; I like this at room temperature, and I usually leave it on the springform base as it's quite fragile, but  it can be moved to a serving plate if you have a large cake lifter.
** There's a photograph here which shows how the cake is assembled.

Tuesday, 1 October 2019

Autumn Fruit Frangipane Tarts

It's a measure of how little baking I do these days, that it's over three weeks since I last posted. When I do bake anything, however small, half of it usually ends up in the freezer, meaning there's always cake there if needed, but as a result I don't need to bake as often. My waistline doesn't need cake every day, either!

When making this tart I realised that I hadn't made any pastry since the festive baking at the end of 2018 - an indication that calorific desserts are also becoming something for special occasions; I usually just have fresh fruit and yogurt!

These Autumn Fruit Frangipane Tarts had plum jam in the base and fresh blackberries and pieces of eating apple embedded in the frangipane mixture. I made two small tarts instead of one big one, as I was taking one to my local Cake Club. The frangipane comes from this Jamie Oliver recipe, but I made half as much again, after seeing the amount the original ingredients gave.

I made sweet shortcrust pastry to this recipe, but this made enough for the two tart cases with quite a lot leftover: 300g plain flour, 1/2 teaspoon baking powder, 150g butter, 50g icing sugar, 1 medium egg, water as necessary to bind. If you reduce the quantities you could use just an egg yolk instead of a whole egg.

Once the pastry is mixed, rest in the fridge for 20 minutes, then roll out as thinly as possible to line 2 x  20cm (8") tart tins (or one 23cm tin if you're following the recipe). Refrigerate again while you make the filling - there's no need to blind bake with a frangipane.

Preheat the oven to 180C (160 fan) and put a baking sheet in to heat up too.

Put all the frangipane ingredients into a bowl and beat until well combined. I added just a few drops of almond extract, to give a better flavour, instead of the lemon zest in the recipe. Then prepare the fruit.

(I used one large eating apple, which I peeled and chopped into quite thin pieces, about 1cm square, and put into acidulated water so that the pieces didn't turn brown. I also used fresh blackberries, as I was worried that frozen would release too much juice and spoil the colour of the frangipane - I didn't weigh the amount I used but the quantity give in Jamie's recipe sounds about right.)

Spread a couple of tablespoons of plum jam (or whatever red jam you prefer) into the base of each pastry case. Divide the frangipane mixture between the two tarts, working from the edge inwards, and trying to get a good seal between the frangipane and the pastry, so that the jam doesn't boil out around the edge. Spread evenly and then dot the drained and dried apple pieces and blackberries over the surface, pressing down gently to embed them in the frangipane. Sprinkle over a handful of flaked almonds, then a little extra caster sugar.

Transfer to the heated baking sheet and bake for about 45 minutes until the frangipane is a good golden colour and feels firm. Cool on a wire rack.

I decorated the tart which I was taking to Cake Club with a drizzle of glacé icing, but it's not really necessary, and the icing soon dissolved where it was in contact with the pieces of fruit, so didn't really give the desired effect by the time it was eaten.

Adding fruit to a frangipane tart is a tasty bonus, although in this case the plum jam had a stronger flavour than the apples and blackberries - I should have looked for a blackberry jam, I think.

My tart looks darker than most frangipane because I was using almonds which had been ground with the skins still on; the jury is still out on whether this really gives a good look.

Wednesday, 17 January 2018

Apple and Raisin Muffins


Although I've lost a lot of weight over the last 5 years, I'm still a few kilograms short of getting into the 'healthy' BMI range, and I know that keeping weight off is going to be a lifelong struggle for me. Acknowledging that I'm always going to have to be careful about how much I eat means I'm still interested in TV programmes about weight loss, especially if cooking and providing recipes is involved. I'm watching Tom Kerridge's  current series (Lose Weight for Good) with interest, as he's also dealing, to some extent, with the psychological barriers to losing weight, as well as claiming to produce tastier low calorie recipes, using his knowledge and experience as a Michelin starred chef.

In view of all that, I really expected to like these Apple and Raisin Muffins, even though, in general, I don't like using low-calorie sweeteners in place of sugar. In his recipe, Tom reduces the sugar and fat content by using just a little honey, low-calorie sweetener and mashed bananas. He briefly cooks the apples in caramelised honey and adds spices and roasted sesame oil to give a boost to the flavour.

As I've used it in the past, and was relatively happy with it, I decided to buy Truvia (a no-calorie sweetener made from Stevia) to use as a sweetener, as it seems more natural to me than the other forms of sweetener available. Guided by the information on the pack, I used two teaspoons of Truvia, equivalent to 6 teaspoons of sugar. Other than that, I followed the recipe exactly. One point to note about the recipe is that you need to cook the apples in the honey ahead of any other preparation, as they take a while to cool down. Apart from this stage, the recipe is fairly standard and simple to follow. The muffins produced rose well and looked really good.

Unfortunately the looks promised much more than the muffins actually delivered! I found the texture quite stodgy, and the muffins stuck really firmly to the paper cases, to the extent that quite a bit of the muffin was lost (unless you want to scrape the case for every last crumb). I could have overlooked this if the flavour had been better, but I found the muffins quite bland; I couldn't taste the spices at all, even though I could still smell them in the baked muffin. In addition to that, the presence of the sesame oil was more of a scent than a flavour - after the first mouthful, I didn't really notice it. The pieces of apple were well flavoured, but didn't make up for the blandness of the crumb.

It's difficult to assess the claim that these are low calorie - 190 calories per muffin - as it's generally only muffins that claim to be healthy (and often found on diet and healthy eating websites) that give a calorie count. The nearest basic apple muffin recipe I could find, with no claims to reduced fat or sugar, contained 250 calories per muffin, but I'm afraid, even with a 20% reduction in calorie content, these disappointing muffins weren't worth the calories. 190 calories is quite a big chunk out of a restricted calorie diet, although I think Tom was suggesting eating them for breakfast, not as an extra treat. If you do want a treat there are a lot of tastier ways of using that number of calories - most involving chocolate, I have to say!


Thursday, 12 October 2017

Date, Apple and Walnut Cake

I bought walnuts for my last bake - Nigella's Emergency Brownies - and I know that they don't keep fresh for long, so decided to use them in this cake too. I added a twist to the traditional British autumnal flavours of dates, apples and walnuts by using date syrup in place of some of the sugar and adding a little rosewater too.

Ingredients
100g softened butter
75g caster sugar
3 tablespoons date syrup
*1 teaspoon rosewater
2 large eggs
150g SR flour
50g chopped soft dates
50g chopped walnuts
1 small eating apple, peeled cored and chopped
a sprinkle of demerara sugar for topping (optional)

*or to taste, depending on the strength of the brand you are using

Method
Preheat oven to 180C (fan 160C) and line a small 450g (1lb) loaf tin. I used a loaf tin liner, but baking parchment can be used too.
Put the butter, sugar, syrup, rosewater, eggs and flour into a large bowl and beat together until the mixture is smooth and light. If the batter seems too thick, add a little milk or water to give a dropping consistency.
Stir in the dates, walnuts and apple pieces.
Transfer the batter to the prepared tin, level the surface and sprinkle on the demerara sugar, if using.
Bake for about 60 minutes, until a test probe comes out clean.
Cool in the tin for a few minutes, then transfer to a wire rack to cool completely.

Using the date syrup intensified the date flavour, and deepened the colour of the cake crumb, which I was pleased about. I liked the flavour combination of dates, apples and walnuts with rosewater, but it became a summery cake rather than an autumnal one. Probably fitting, as we seem to be having a bit of an Indian summer at the moment, but for a really seasonal cake a little cinnamon or other spice would have been better than the rosewater.


Friday, 21 April 2017

Mincemeat and Apple Cake

Another outing for the cake I often make when I want a dessert with fresh fruit, but can't be bothered to fuss around with pastry. Because I hadn't checked supplies and found myself short of flour, I used a proportion of spelt flour in the recipe this time - it seemed to make the cake a little more crumbly.

Anything with mincemeat in it smells wonderful when it is baking; in this case the flavour was pretty good too. Adding the apples and orange zest cut back on the sweetness of the filling a little without changing the flavour much, as the mincemeat had it's own citrus notes. The dough has a texture somewhere between pastry and scone - what I imagine the old-fashioned American shortbread cakes to be like.

I'm pleased to say that this cake used the last of my winter mincemeat stocks!

Ingredients
150g butter
150g caster sugar
1 large egg
*100g SR flour
*200g white spelt flour
*1 teaspoon baking powder
250g mincemeat
2 eating apples, peeled, cored and chopped into small pieces
grated zest of 1 orange

* you can use 300g SR flour, in which case you won't need the baking powder

Method
Preheat oven to 180C. Grease and base-line a 20cm (8") springform cake tin.
Melt the butter in a large bowl in the microwave - it doesn't need to be very hot, just liquid. Stir in the sugar, then beat in the egg.
Add both flours and the baking powder and mix to a soft dough. Put 2/3 of the dough into the baking tin and spread out into an even layer with your fingers, building up a little wall around the sides of the tin.
Mix together the mincemeat, chopped apples and orange zest and spread onto the cake base.
Crumble the remaining dough evenly over the filling and press down lightly, spreading the dough as you do - it should more or less cover the top, but any small gaps will fill as the dough rises and spreads during baking.
Bake for 50-60 minutes until the top is firm and golden. Cool for about 15 minutes, then run a knife between the cake and the tin, in case any fruit juices have leaked from the cake and are sticking to the sides of the tin - this can sometimes happen with mincemeat.
Dust with icing sugar before serving, either warm or at room temperature. This cake can be quite fragile, so I always leave it on the springform base.

Friday, 11 November 2016

Apple, Date and Ginger Cake

I often fall back on this recipe when what I'd really like is a fruit pie, but either I haven't got time to make pastry, or it just seems too much effort. The fruit filling is infinitely variable, depending on season and availability - this time I used the last of the small eating apples from our own trees, a handful of dates and a couple of tablespoons of ginger preserves. Once the fruit is prepared the dough can be made, and the cake assembled, in about 10 minutes.The only time things get less simple is if the fruit produces a lot of juice when cooked - then it really needs cooking in advance, draining and cooling.

Ingredients
peeled cored and sliced eating apples - about 400g after preparation
50-100g chopped dried dates (or sultanas)
100g ginger preserves
150g butter
150g caster sugar
1 large egg
300g SR flour

Method
Preheat the oven to 180C/160C fan. Prepare a 20cm(8") springform tin - I grease the tin, then line the base with baking parchment.
Mix the fruit and preserves in a small bowl and set aside. (I usually stand the sliced apples in acidulated water for a few minutes during preparation, then drain well before mixing in the dried fruit and preserves.)
Melt the butter, either in the microwave or in a pan on the hob. It doesn't need to be hot - just liquified. Transfer to a large mixing bowl if necessary, then mix in the caster sugar, followed by the egg. When these are mixed to a smooth paste, sift in the flour and stir in thoroughly to make a soft dough - it will be softer than pastry, and still quite sticky.
Put 2/3 of the dough into the base of the springform tin and spread evenly, using fingers.  At the edge of the tin raise the dough to make a small wall about 2cm high - this will help to enclose any fruit juices.
Spread the prepared fruit over the dough.
Break small pieces from the remaining dough and place on top of the fruit, trying to get a fairly even coverage. Flatten the pieces of dough, to get them to join up - they may not completely cover the fruit, but the dough will spread during baking. There's a picture here of a similar cake, during assembly, to illustrate things.
Bake for 50-60 minutes, until the top is golden and the cake feels firm. Cool in the pan before removing the sides.
Dust with icing sugar before serving, if liked.

I seem to have posted a lot of apple recipes this autumn, but my store of home-grown apples is finished now, so this is probably the last apple-y bake for a while!

Saturday, 5 November 2016

Malted Apple Cake


At first glance, this recipe, from Country Living, doesn't look much different to most apple cake recipes, but the addition of just two tablespoons of malt extract makes a huge difference to the character of the cake. The flavour becomes more complex and the sweetness has a bitter edge to it. In addition, using wholemeal flour and muscovado sugar makes the cake look dark and mysterious - you just know that it's going to taste different! If you have a favourite apple cake recipe, try replacing some of the sugar (say 50g) with malt extract to see for yourself.

I have to confess that I didn't use Bramley apples, so my cake was probably a little sweeter than the recipe intended, as eating apples are naturally sweeter than Bramleys, but it certainly wasn't oversweet. I wanted to use eating apples as Bramley pieces have a habit of collapsing when baked into cakes, and just leaving little holes to show where they've been. I've also got a lot of small apples from the trees in my garden, which are really only useful for cooking, so I've been searching for new recipes to use them up.

The recipe wasn't completely trustworthy - I needed to add more than 2 tablespoons of milk to get a soft enough batter, the cake needed more like 75 minutes in the oven rather than the 45-60 minutes suggested, and I only sliced one apple for the topping and still had too many slices to use them all - perhaps my idea of a thin slice is different to Country Living's cook! When it came to cutting the cake, I found out why the apples used on the top needed to be peeled! I left the peel on to be sure the slices held together, but then couldn't cut through the apple to get neat slices of cake.

I realised, when I checked the recipe while writing this post, that I had used plain wholemeal flour instead of self-raising. If I'd read the recipe properly during baking, I'd have added extra baking powder, which would have made the cake a little lighter, although I didn't think it was too heavy as it was!

The photo of the cake, still in it's tin, isn't very good; there was no natural light by the time the cake came out of the oven, but I still wanted to photograph the cake before it was cut.

I think this cake recipe would also make a good traybake for a Bonfire party, topped with neat rows of apple slices - it would bake faster in a shallower tin, but it's pretty easy to check during baking so as not to overbake.

Tuesday, 18 October 2016

Apple Pie Flapjacks

Although these flapjacks, containing fresh apple, certainly filled the kitchen with the smell of apple pie while they were baking, to me, with the texture given by the oats, they were more evocative of apple crumble, as I always use oats in my crumble mixes.

I have to admit that I was dubious about this recipe. Would adding such a large amount of grated apple put too much moisture into the mix? Would it hold together? Would the flapjacks be crisp, chewy or just a soggy mess? The oat mixture made a good thick layer in the baking tin, which was a promising start, as thin flapjacks can become too crisp.

In fact, the flapjacks were fine, while they were fresh, but they didn't keep that well, becoming progressively more moist until they were much too soft for my taste. I like my flapjacks chewy, rather than biscuit-crisp, but I don't like them flabby. The flavour was excellent though, so if the flapjacks are going to be eaten all in one go, soon after baking - at a Hallowe'en or Bonfire party, for instance - then I'd say go for it!

Adding fresh apple reduced the 'almost too much' sweetness that you can get with flapjacks too, as well as making them seem more healthy, and the flavour of apples and cinnamon came through well. If there was any criticism it would be that 50g of walnuts wasn't enough to make a real impact.

Monday, 10 October 2016

Apple and Orange Fruit Loaf

When I'm short of inspiration, I sometimes look back over my blog posts to find cakes I thought were worth making again. I first tried this recipe back in October 2012, so it's taken me a while to get back to it, but it was worth making again!

When I originally made this Orange Frosted Apple Cake, I left out the nuts and just used an orange glacé icing on top. This time I made a few more changes: I used spelt flour instead of wholemeal, sunflower oil rather than rapeseed, walnuts instead of pecans, and a mix of dried vine fruits, berries and cherries. Instead of frosting the cooked cake, I sprinkled some crushed raw sugar cubes over the batter before baking to give a crunchy topping - I find the extra fat and sugar in frostings unnecessary in many cases, unless the cake is for a special occasion.

The grated apple and yogurt used in the cake add moistness, and mean that less fat - in this case, sunflower oil - can be used. Adding the apple also cuts down on the sugar needed, so this is a relatively healthy cake, especially without the frosting! The apple doesn't add much to the flavour of the cake, so in this case the walnuts and spices were the predominant flavours, with a subtle orange background note.

I really don't know why I waited so long to make this cake again, as it's a really good light fruit cake and can be varied according to which dried fruits and nuts are available.

Thursday, 11 August 2016

Apple and Orange Cake

In the absence of any better ideas, and with no inspiration to be found in any of my books, I fell back on this family favourite. The recipe makes a shortcake style dough which sandwiches a layer of fresh and/or dried fruits. Almost any fruit can be used, although fruit which releases a lot of juice during cooking is best cooked and drained first. This time the filling was three sliced eating apples, 100g mixed dried fruit (including raisins and cherries), 100g thick-cut orange marmalade and the zest of a large orange.

The dough is made by melting 150g butter and mixing in 150g caster sugar and 1 large egg. When everything is blended together tip in 300g SR flour and mix to a soft dough. Spread 2/3 of the dough into the base of an 8"(20cm) springform cake tin - just spread it out with your fingers, trying to get an even thickness. If you think the filling might release a lot of juice, you can build up a small wall of dough around the edge of the tin, but this isn't necessary with this particular filling as the dried fruit absorbs any juices from the apples. Mix all the ingredients for the filling together and spread out on the dough. The remaining dough makes the topping - break it into small pieces and drop on top of the fruit, then flatten the pieces to cover as much of the fruit as possible. There may well be small gaps but the dough spreads while baking, so most of these will fill up, and any gaps look quite attractive, anyway! There's a bit more detail on making this cake, with some explanatory photos, here.

Bake for 50 - 60 minutes at 180C until the cake is golden brown and feels firm. Cool in the tin for at least 15 minutes before removing the sides of the springform tin. Dust with icing sugar before serving, if liked. The cake can be served warm as a dessert, or at room temperature as a cake.

Adding the orange elements - marmalade and orange zest - gave this cake a light refreshing flavour and made the mixture of apples and dried fruit more suitable for a summer cake.

Sunday, 7 August 2016

Courgette Cake

There was nothing really wrong with this cake - it had a pleasant flavour and contained sultanas and pecans for variations of texture (chewiness and crunchiness) - but there was nothing there that excited me! It was just 'pleasant', which is low down on my judgement scale for cakes!

I used this recipe from Nigel Slater. The recipe was easy to follow, although my loaf took a few minutes longer to cook than the time suggested in the recipe.

I think the basic problem is that I want courgette cakes to be light and fluffy, like many carrot cakes I've tried, including my favourite from Good Food, but because there is so much more moisture in a courgette, even after squeezing out as much as possible, this just isn't going to happen. Adding apple probably only makes things worse, in this respect. If anyone has a recipe which does make a light sponge-like cake, please let me know!

Friday, 29 July 2016

Apple and Berry Crumble Cake

I've still got blackberries from last year, and also found a small container of frozen blueberries while assessing the space in the freezer, prior to this year's gooseberry harvest. I'd also got a couple of Bramley apples to use up, so something using all three seemed a good idea.

This recipe, for an Apple and Berry Crumble Cake, which I found on the Good to Know site, was quick to put together, as part of the base mixture was put aside for the crumble topping, rather than needing to make two separate mixtures. I used 300g total weight of mixed blackberries and blueberries as I had less than 100g of blueberries in my little pot in the freezer. I didn't bother thawing the berries ahead of use, either! In place of the mixed nuts in the topping, I used toasted chopped hazelnuts, but apart from these minor changes, I followed the recipe exactly. I didn't need to cover the cake while it was baking - even after the full cooking time it was only lightly browned.

I was worried that the combination of Bramley apples and frozen fruit would make the cake too wet but this wasn't the case, if anything the crumble topping was too dry and powdery. I think this would have made the cake quite unpleasant to eat on it's own, but it was fine as a dessert with vanilla yogurt. The fruit didn't have any extra sugar added to it, so it made a nice sharp layer between the sponge and the crumble.

Friday, 15 April 2016

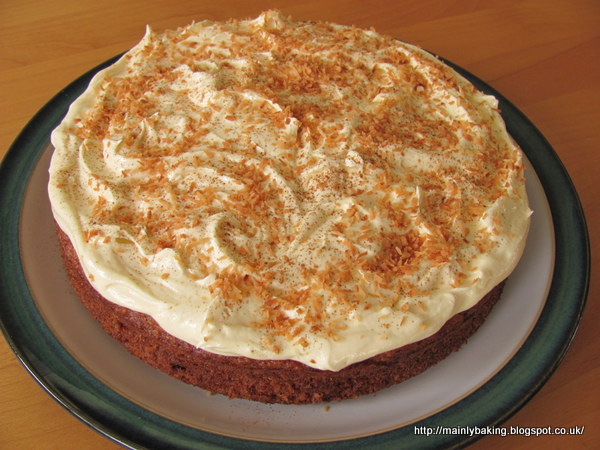
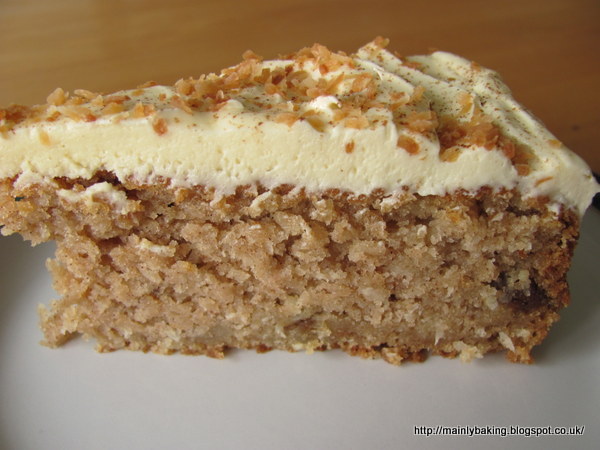
Cauliflower and Apple Cake

If your first thought on reading this post title is 'Why?', then I have to say that was my reaction too! Why use cauliflower in a cake?  The recipe featured in April's edition of Waitrose Food magazine as 'Dish of the Month' and comes from award-winning patissier and chocolatier Will Torrent. The introduction says that although baking with cauliflower may seem unusual, it works well with the flavours of apple, white chocolate and coconut. I discussed the recipe with a group of internet friends and the general opinion was that, although the photo of the cake looked attractive, using cauliflower in a sweet cake didn't sound very pleasant. I decided to take up the challenge!

The recipe is based on using a food processor, which I don't have, so I had to adapt the method a little. I also didn't want a layer cake, so baked the cake in a larger tin, and used 2/3 of the buttercream in the recipe, just as a topping

Ingredients
150g unsalted butter, softened, plus a little extra for greasing
150g cauliflower, in small florets
150g caster sugar
2 small braeburn apples, grated (I used 1 1/2 large apples and peeled and cored them, although the recipe doesn't specify peeling.)
2 eggs (mine were large)
175g plain flour
1 teaspoon cinnamon
1 teaspoon baking powder
1/2 teaspoon bicarbonate of soda
50g sultanas
50g desiccated coconut

*Buttercream (the amounts I used):
50g white chocolate, chopped
100g unsalted butter, softened
110g icing sugar, sifted
1 tablespoon milk
1/2 teaspoon vanilla extract
extra cinnamon (optional)
25g toasted desiccated coconut optional)

**My Method
Grease and base line a 20cm springform tin.
Simmer the cauliflower in boiling water for 16 minutes until very soft, cool under a running tap then drain, and dry on layers of kitchen towel.
Pre-heat oven to 180C, gas 4.
Sift together the flour, baking powder, bicarbonate of soda and cinnamon.
Process the cauliflower and grated apple in a small food processor to make a purée.
In a large bowl, using an electric mixer, beat the butter and sugar until well combined, then beat in the eggs, one at a time, with a tablespoonful of the flour mixture.
On the slowest mixer speed (or by hand) mix in the cauliflower and apple purée and the rest of the flour mixture.
Lastly, fold in the sultanas and coconut by hand.
Transfer the batter to the baking tin, level the surface and bake for about 45 minutes, until a test probe comes out clean. Cover after 35 minutes if it's getting too brown.
Cool in the tin for 15 minutes then transfer to a wire rack.
For the buttercream, melt the white chocolate with 25g of the butter and the milk, in a bowl over a pan of barely simmering water, stirring occasionally until smooth, then cool slightly. Meanwhile beat the rest of the butter, the icing sugar and the vanilla extract together until light and fluffy. Beat in the chocolate mixture, then spread the frosting over the cake. Decorate, if desired, with a light dusting of cinnamon and some toasted coconut.

**The food processor method was to first chop the cauliflower into small pieces, then pulse in the butter, sugar and apple. Gradually add the beaten eggs before sifting in the flour, cinnamon and raising agents. Pulse to combine, then fold in the sultanas and coconut. 
The original cake was baked in a 18cm tin for 45-55 minutes, then split in half when cooled. 

*A larger amount of frosting was made by melting the 75g white chocolate on it's own and stirring it into a buttercream made from 150g butter, 175g icing sugar, 1 1/2 tablespoons milk and 1/2 teaspoon vanilla extract, and used to sandwich and top the cake layers. I couldn't bring myself to melt the chocolate on it's own as I always have trouble melting white chocolate - hence my method of adding some of the butter and the milk to stop it getting too hot and seizing.


The result really surprised me! This odd assortment of ingredients produced a delicious, moist and incredibly light textured cake with a delicate cinnamon flavour. I couldn't taste either the apples or the cauliflower at all (fortunately, perhaps!) and even the coconut didn't come through strongly. The cake wasn't over-sweet, which meant that the very sweet white chocolate and vanilla frosting was a nice counterbalance to the cake. The one disconcerting note about the cake was that although I couldn't taste it in the raw batter or finished cake, there was a strong smell of cauliflower while the cake was baking!

Perhaps it was the subtle blending of all the ingredients which produced such a surprisingly tasty cake, but I think I'm still asking the question of why the cauliflower was used at all? Apart from the novelty value of telling people that there's cauliflower in the cake (and I didn't tell my husband until after he'd eaten it) the only reason I can come up with it that the apples and cauliflower add bulk, and perhaps moisture, but not so many calories. A similar sized cake would normally use more sugar, butter and egg.


Saturday, 26 March 2016

Apple Cake with Lemon and Chocolate Flecks

After being so impressed with a Honey & Co cake recipe I tried recently, I managed to borrow a copy of their baking book (called Honey & Co. The Baking Book) from the local library. The recipes looked every bit as appetising as I'd expected, and there are quite a lot that I'd like to try, so this book is definitely going onto my wish list.

This cake was first recipe I tried from the book, mainly because I had all the ingredients to hand. It was another amalgamation of flavours that you wouldn't necessarily think to put together  - I've never been convinced that lemon and dark chocolate works well together, let alone with apples in the mix. As before, the clever addition of unusual spices really made the cake something special, although I thought it might have had an even better flavour without the chocolate - and it's not often that I think chocolate is an ingredient too far! Technically, the cake wasn't a complete success either - it was a very liquid batter, which meant the apple pieces sank, and it was just a little too moist. It might have been more successful baked as a more shallow cake and served warm as a dessert!

Ingredients
2 tablespoons whiskey
zest and juice of 1 lemon
2 apples (200g once diced, skin on) - Pink Lady recommended, but I used Jazz, and only needed 1 1/2 apples.
40g plain (70% cocoa solids) chocolate
2 large eggs
160g caster sugar
120g/130ml vegetable oil - I used sunflower
150g plain flour
1 1/2 teaspoons baking powder
1 teaspoon ground nutmeg - about 1/3 of a whole nutmeg
1 teaspoon fennel seeds - ground in a pestle and mortar
a pinch of table salt

Method
Preheat the oven to 180C and prepare a 2lb/900ml loaf tin.
Mix the whiskey with the lemon juice and zest. Cut the apples into 1cm cubes, leaving the skin on, and toss them in the whiskey mixture to stop them discolouring.
Chop the chocolate into slivers - I shaved pieces off the block with a heavy knife to get flecks of chocolate - and put in the fridge to chill.
In a large bowl, whisk the sugar and eggs until light and fluffy, then slowly whisk in the oil to make an emulsion.
Fold in the flour, baking powder, spices and salt with a spoon, then stir in the apple mixture (with the liquid) and finally the chocolate flecks.
Transfer the batter to the loaf tin and bake for about 55 minutes, turning after 35 minutes to give an even bake.
Cool in the tin for 15 minutes before removing.


Friday, 1 January 2016

Festive Fruit Pie

Most of the Christmas leftovers have been dealt with by now. The last slice of ham, a few chunks of turkey and half a dozen chestnuts, together with a few mushrooms, in a mustard-y cream and white wine sauce, made a very tasty pie. What hasn't been eaten has been packed into the freezer, hopefully to make pies and curries over the next few weeks, and not just forgotten about. However, I am also determined not to leave too many half-used jars and packets of seasonal ingredients lurking about, as by springtime I'm past the point of wanting to eat things like mincepies and cranberry sauce.

Allow me a slight digression here - have you noticed that cream cheese is sold in 280g packs now, and not 300g? Luckily I was using a modern cheesecake recipe which took account of that, but many of my older recipes use multiples of 300g, so leftovers are inevitable, even if buying smaller packs, which are proportionally more expensive, to make up the weight.

Even so, as a result of scaling down a cream cheese frosting recipe, I was left with around half a pack of cream cheese and happened to read this recipe at Belleau Kitchen for a delicious sounding pastry using cream cheese, orange zest and ground almonds. It seemed perfect for the 'leftovers' fruit pie that I had decided to make. I made a slight adaptation to the recipe - I reduced the sugar to 50g and used icing sugar (which I think is incorporated more easily into pastry), and also used the zest of a small orange instead of a clementine, but otherwise I followed Dom's recipe, which originates from Dan Lepard's 'Short and Sweet'.

I used 2/3 of the pastry to line a deep pie dish, and the remainder to make a lattice for the top. I assembled the lattice on a sheet of baking parchment, and chilled it, along with the pie case, for about 20 minutes, before putting the pie together for baking.

For the filling I mixed together:
200g of mincemeat
roughly 125g of a good quality cranberry sauce (over 50% fruit)
two eating apples, peeled and cored and cut into small dice
80g of ready-to-eat dried dates, snipped into small pieces
1 teaspoon of ground rice to absorb excess fruit juices

I put the filling into the unbaked pie case, and placed the pre-made lattice on top. The excess pastry around the top of the pie case was folded over the edges of the lattice to seal the base and lattice together. The top was brushed with beaten egg white and sprinkled with caster sugar and the pie was baked at 180C for about 40 minutes until golden brown.

Both elements of this pie were very good! The pastry was very short and crumbly, but very easy to work with, and probably would have been even more delicious with a blander pie filling. The orange zest could be tasted in the pastry when eaten alone, but it was overwhelmed by the spices and other flavours in the mincemeat mixture. The pie filling still tasted predominantly of mincemeat but the addition of tart cranberries and apples cut through the usual sweetness and added a greater depth of flavour. The overall spice level of the mincemeat was reduced too, allowing the combination of dried and fresh fruits to dominate. Altogether, a successful experiment - the pastry is wonderful (thanks Dom!) it's worth buying cream cheese specially for it, and the filling mixture reduced my stock of opened jars while tasting much better than such a haphazard mixture might have done!

Wednesday, 23 December 2015

Apple and Mincemeat Cake

This is just the right sort of cake to make in the run up to the festive season. Although it's not the sort of rich or fancy cake that will be eaten around Christmas and New Year, the flavours are good enough to put you in the festive mood, without feeling you are over-indulging too early. It's also a really simple cake to make and one I often fall back on when I'm lacking in imagination or time, especially as my husband always comments on how good it is.

The filling in the middle can be adapted to suit the seasons and the recipe also works really well with fresh fruit, as long as it doesn't exude too much juice during cooking (although even that can be overcome by cooking and draining the fruit first). For a taste of Christmas I used a mixture of mincemeat, dried pears and fresh apples - adding apples cuts through the sweetness of the mincemeat. Using the dried pears was a waste of good ingredients, however, as their flavour was overwhelmed by the mincemeat.

Ingredients
200g mincemeat
2-3 eating apples (peeled cored and diced into pieces about the size of sultanas)
4 dried pear halves (snipped into similar sized pieces with scissors)
150g butter
150g caster sugar
1 large egg, beaten
300g SR flour
2 tablespoons chopped toasted hazelnuts
icing sugar for dusting

Method
Grease and base line a 20cm(8") springform tin. Preheat oven to 180C.

Mix the diced apples and dried pears into the mincemeat and set aside - the acidity of the mincemeat should stop the apples from discolouring.

Melt the butter (I find it easiest to do this in a large mixing bowl, in the microwave, then the dough can be mixed in the same bowl). The butter doesn't need to be hot, just completely liquid. Stir in the  caster sugar, then the beaten egg, then mix in the flour to make a soft spreadable dough.

Take roughly 2/3 of the dough and spread it evenly over the base of the cake tin. Push the dough up the sides of the cake tin a little way (about 2cm), to make a wall to contain the filling. This wall doesn't need to be any thicker than rolled out pastry for a pie - it just holds in any fruit juices.
Spread the mincemeat mixture evenly over the dough base.

Use the remaining dough to top the cake. (The easiest way is to flatten small pieces of dough with your fingers and put them on top of the cake filling, fitting them together as closely as possible but getting an even covering too. It doesn't matter about small gaps as the dough spreads and fills in the holes during baking. I usually start at the edge of the cake and work inwards - the dough is pliable enough to spread easily.)

Sprinkle over the chopped hazelnuts, then bake for 50-60 minutes until firm and golden brown.
Cool in the tin, then dust with a little icing sugar before serving.

This was my last baking session before starting on the Christmas desserts tomorrow, so I'll wish you all

MERRY CHRISTMAS
and
A HAPPY AND HEALTHY 2016!

Monday, 14 December 2015

Not so Magic Cake, and other bits and pieces!

There's nothing wrong with the 'tiffin' style dessert pictured at the top of this post. It was made to Delia Smith's recipe for Chocolate-crunch Torte with Pistachios and Sour Cherries, following the recipe exactly, apart from using dried cranberries instead of dried sour cherries.

It was made as an quick replacement for an attempt at a 'magic' cake which I somehow knew had failed before it was even out of the baking tin. Magic cakes are so called because one cake batter separates into three layers during cooking - a thin dense pastry-like layer at the bottom, a custardy layer in the middle and a light sponge on top.

I used the chocolate and hazelnut magic cake recipe featured in this recent newspaper article, and even though I can now see where I might have made a mistake (trying to incorporate the egg whites evenly into the batter, rather than leaving it in clumps) I don't think the finished cake would ever have looked as attractive as the photo in the article, or tasted good either. 100g of Nutella-type chocolate hazelnut spread is not enough to make a cake taste strongly of chocolate, nor give it a good deep colour. This is what mine looked like - you can just about see three layers, but it was a really unattractive shade of beige, the custard was dense and slimy and it didn't really taste of anything definite - certainly not hazelnuts or chocolate. After trying one mouthful, for research, it went into the food waste recycling - and, as I've often said, food has to be really awful for me to throw it away!

I didn't bake a cake last weekend; it was my husband's birthday, and he wanted a stollen, which I buy rather than make as my yeast doughs are very unpredictable. I made a very tasty seasonal fruit crumble though, using 3 eating apples, 100g fresh cranberries, the zest of a clementine and the clementine segments, cut in half, to make 4 portions of dessert. I also added a teaspoon of mixed spice to my usual crumble recipe of equal weights (75g) of butter, brown sugar, plain flour and rolled oats.

I also tried my hand at apple-chilli jelly recently, using the homegrown apples which were too small to peel and use in any other way. The beauty of apple jelly is that the fruit is just roughly chopped - peel, cores and pips included - before cooking with water and adding some vinegar. The cooked fruit is strained, then reboiled with sugar and sliced chillies, until the setting point is reached. I used this recipe from gardener Sarah Raven, using just the regular mixed red and green chillies sold as moderately hot in the supermarket.

After cooking the apples in water and straining the juice I had about 1.5 litres of liquid; I was a little worried, as despite my careful handling of the fruit, the liquid looked cloudy at this point. I needn't have worried though, as soon as it came to the boil with the added sugar it miraculously cleared - I just wish this had been mentioned in any of the recipes I read! I used a sugar thermometer, to be sure that the setting point had been reached. I didn't manage to distribute the chillies very evenly when potting the jelly - the jar in the photo got the most - and it looked as if all the chilli slices were going to float, until I remembered a tip I'd read somewhere about turning the sealed jars upside down for about 10 minutes, then back again, and repeating as the jelly cooled and set. This procedure eventually traps some of the chillies near the bottom, despite their inclination to float! I think the chilli slices are for decoration - there's certainly a lot of heat in the jelly alone, so even the jars without much visible chilli will taste the same.

Thursday, 10 December 2015

Norwegian Apple Cake (Eplekake)

I chose this cake recipe primarily to make a non-Christmas entry to this month's AlphaBakes challenge. The letter chosen is N, and Caroline, of Caroline Makes (who is this month's host, a duty she shares with Ros, of The More Than Occasional Baker) is graciously allowing entries where N = Noel, but would obviously like some more general entries too.

When consulting my baking books, I found that there were very few choices of ingredients beginning with N - nuts, nutmeg - and even fewer recipe names, especially once you ruled out Nutty as part of the title. Before resigning myself to going with nuts, I looked at the recipes from countries beginning with N, especially where the name of the country was used in the title of the dish; it didn't take long to find Norwegian apple cake. This recipe had the added bonuses of keeping my baking light in the approach to Christmas and using up some of my store of home-grown apples.

I used this recipe, which produced a cake small enough for two of us to eat quickly. Most of the online recipes are similar - some add a handful of raisins, or nuts, or make a bigger cake, but the differences are minor and go to prove that the basic recipe is authentic and tradional.

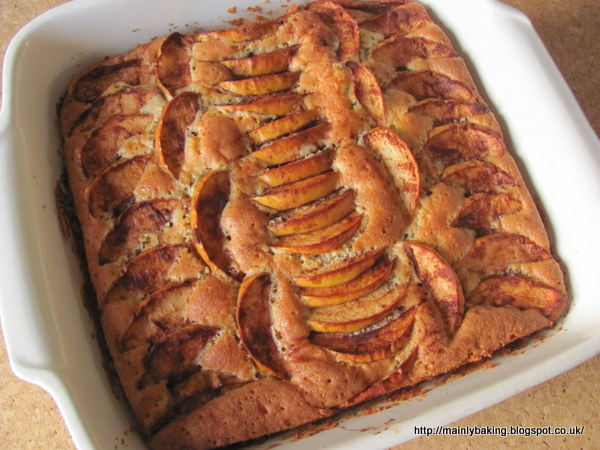
The cake is a vanilla flavoured sponge base with thin slices of cinnamon-sprinkled apples baked on top. It uses a slightly lower proportion of flour than a traditional British sponge cake recipe, and most recipes whisk melted butter and sugar together for the first step, as here, rather than creaming sugar with soft butter. These two steps make a more fluid batter than I'm used to, and I was worried that my springform pan would leak, so I changed to a ceramic baking dish at the last minute, which made a more shallow cake. I needed three of my small apples to get enough slices to cover the surface. Rather than sprinkling brown sugar and cinnamon over the surface of the cake, I tossed the apple slices in a sugar and cinnamon mixture before arranging them on the batter - I saw this in another version of the recipe and thought it a good idea, as it gets some of the cinnamon flavour into the batter mix, as it rises around the apple slices.

I thought this made a better dessert than a cake. When cold the sponge was moist but slightly too dense for my taste - it was best eaten warm, and would have been even better with cream or custard.  My apples were yellow-skinned; if I made it again, I think red-skinned apples would look prettier, but that's a minor quibble! It tasted good though - what's not to like about sweet apples mingled with vanilla and cinnamon?