Showing posts with label cinnamon. Show all posts

Thursday, 26 November 2020

Apple and Cranberry Cake

I usually make this cake, which is two layers of a scone-like dough sandwiching a layer of fresh and/or dried fruit, as a dessert. I often make it when I haven't got time to fuss around with pastry, as the result is very similar to a pie, but much easier to make. 
This time, I wanted to capture some of the essential flavours of Autumn, which is one of my favourite times of the year for seasonal baking. So I used eating apples, dried cranberries and cinnamon in the filling, and some flaked almonds in the topping.

Ingredients

150g butter
150g caster sugar
1 large egg
300g SR flour
3 eating apples, peeled, cored and sliced* 
80g dried cranberries
1 teaspoon cinnamon
30g flaked almonds
icing sugar to dust
* I usually slice the apples into water to which I've added a little lemon juice or vinegar, to stop the fruit discolouring. When I'm ready to use the slices, I drain them well and pat dry on a clean tea towel. 

Method
Preheat the oven to 180C, and line the base of a 20cm (8") springform tin with baking parchment; grease the sides with a little butter if your tin needs it.
Melt the butter in a large mixing bowl, in the microwave, or in a saucepan on the hob - if you do this in a large pan you can mix the dough in it too. The butter doesn't need to be really hot - just completely melted.
Stir in the sugar, then beat in the egg.
Add the flour and mix in thoroughly - it should give a soft crumbly dough.

Put 2/3 of the dough into the cake tin, and spread evenly with your fingers, building up a little wall of dough around the edge of the tin, to contain any excess fruit juices.**
Mix the flaked almonds into the remaining dough.
Mix the prepared apples, dried cranberries and cinnamon together and spread over the dough base.
Crumble the rest of the dough over the top, then press down lightly, spreading the dough a little to give good coverage over the top. The dough will spread more during baking, so don't try to fill all the gaps.
Bake for 50-60 minutes until the top is firm and golden. Cool for about 10 minutes, then run a knife between the cake and the edge of the tin, to stop and leakages of fruit juice sticking to the sides.
Dust with icing sugar before serving; I like this at room temperature, and I usually leave it on the springform base as it's quite fragile, but  it can be moved to a serving plate if you have a large cake lifter.
** There's a photograph here which shows how the cake is assembled.

Monday, 14 May 2018

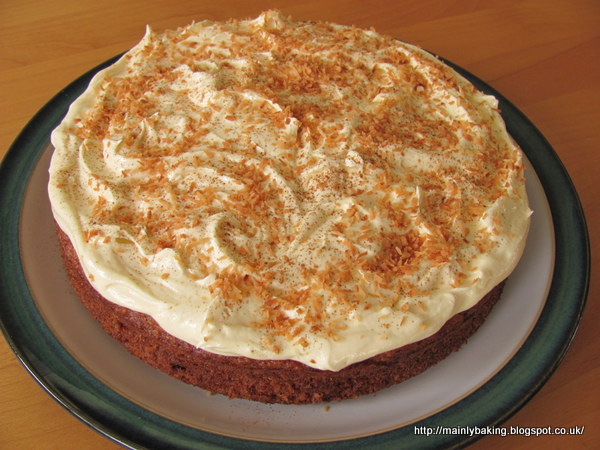
Molasses and Coconut Rum Cake

I'm so glad I decided to bake this Molasses and Coconut Rum Cake, even though it was too big for me, and I had to freeze half of it in slices. It's the best cake I've tasted for a long time!

The recipe, from the ever reliable and inventive Dan Lepard, popped up on my Facebook feed recently, as I follow the Australian Good Food site. A lot of the recipes there aren't immediately relevant, as the seasons are reversed, but a lot of cake recipes, like this one, aren't seasonal anyway.

As is often the case with Dan, the recipe has a slightly unusual method - it wasn't difficult, but there were one or two points worth remembering for next time. The recipe says to heat the sugar and molasses (I used black treacle) together until any lumps of sugar have softened, but not to boil the mixture. The butter is then melted in the warm sugar. I don't think I heated the sugar enough, as when it was tipped into my mixing bowl a layer set on the bottom, which was really difficult to mix back in, and the butter, which I had cut into small cubes, only just melted. Better to have a little more heat, I think, then wait for the sugar and butter mixture to cool a little, if necessary, before going on to the next stage of adding the eggs, so that the excess heat doesn't cook the eggs.

I used a 900g (2lb) loaf tin, which made a more shallow cake than the one shown with the recipe, but a 450g (1lb) tin would have been too small, and we don't have an in-between size in the UK, as far as I'm aware.

I added about 3 tablespoons of rum to the cake - all there was left in the bottle - and it soaked in easily. I'd probably add a bit more next time, as the flavour wasn't as strong as I'd expected.

Because I was going to freeze part of the cake, I didn't make the frosting. I don't often add frostings to everyday cakes, but I think I'd add one if I made this for a special occasion - and the cake is certainly good enough for that!

There was a relatively large amount of desiccated coconut in this recipe, compared to traditional British coconut cake recipes, but it was almost overwhelmed by the stronger flavours of the black treacle and the spices. The texture of the cake was soft but not too sponge-like; in some ways it was more like a gingerbread than a coconut cake, although it didn't get a sticky top when stored.

This is definitely a recipe to repeat!

Wednesday, 14 March 2018

Plum and Cinnamon Loaf

This cake was going to be a half-sized attempt at Dan Lepard's tried and tested Stone Fruit Yogurt Cake, until I realised that I was lacking the necessary semolina. Not one to be easily thwarted, I used polenta instead and carried on!

I wouldn't usually buy fresh plums at this time of year, as they have been trekked halfway round the world, but the checkout till at Waitrose kindly printed out a coupon for a pack of 6 'Perfectly Ripe' plums at half price. This recipe used three plums - they were quite large, weighing about 80g each, I seem to remember.

One of my baking books tells me that a 20cm round deep cake tin is equivalent to a 900g (2lb) loaf tin, so I hoped that half the quantities in Dan's recipe would be OK in a 450g(1lb) loaf tin. It was a near thing - the batter filled more of the tin than I was happy with, but fortunately the cake didn't rise too much. I made a couple of slight alterations to the recipe, but nothing that altered it substantially from the original.

Ingredients
90g caster sugar + 2 teaspoons extra
90g softened butter +15g extra
3 large ripe plums
1 large egg
1 teaspoon vanilla extract
80g full-fat Greek-style natural yogurt
40g polenta
85g plain flour
1/2 teaspoon cinnamon (optional)
1 teaspoon baking powder

Method
Line a 450g loaf tin with foil, pressing it well into the corners without tearing it, and grease with a little of the extra butter. Dot the remainder of the extra butter over the base, and sprinkle over 1 teaspoon of caster sugar.
Preheat the oven to 180C.
Halve and de-stone the plums, and cut each half into 4 slices. Arrange about 2/3 of the plum slices in the base of the loaf tin, and sprinkle over another teaspoon of sugar. Chop the remaining slices of fruit into small pieces.
Mix the flour, polenta, cinnamon and baking powder together in a small bowl.
Cream the butter and sugar together until light and fluffy, then beat in the egg and vanilla extract, adding a spoonful of the flour mix to prevent curdling.
With the mixer on it's slowest speed, stir in the yogurt, followed by the rest of the flour mix.
Fold in the remaining chopped plums with a spoon, then transfer the batter to the baking tin.
Bake for about 60 minutes, covering for the last 15-20 minutes if the cake seems to be browning too quickly. A test probe should come out clean of cake batter, although you might hit a piece of fruit which will make the probe look damp.
Leave for 10 minutes, then turn out onto a plate and carefully peel away the foil. If any of the fruit topping becomes dislodged, it can be gently put back into place. Cool before serving.

The slices of plums on top of the loaf were a really pretty pink colour - it was lovely to photograph something which wasn't brown! There was just enough cinnamon to taste, without it overwhelming the plums, which were both sweet and sharp and gave the cake a fresh taste which I've been missing all winter!

Incidentally, I was pleasantly surprised at how tasty the plums were, but I think I still prefer to buy fruit as locally and seasonally as possible.

Saturday, 9 December 2017

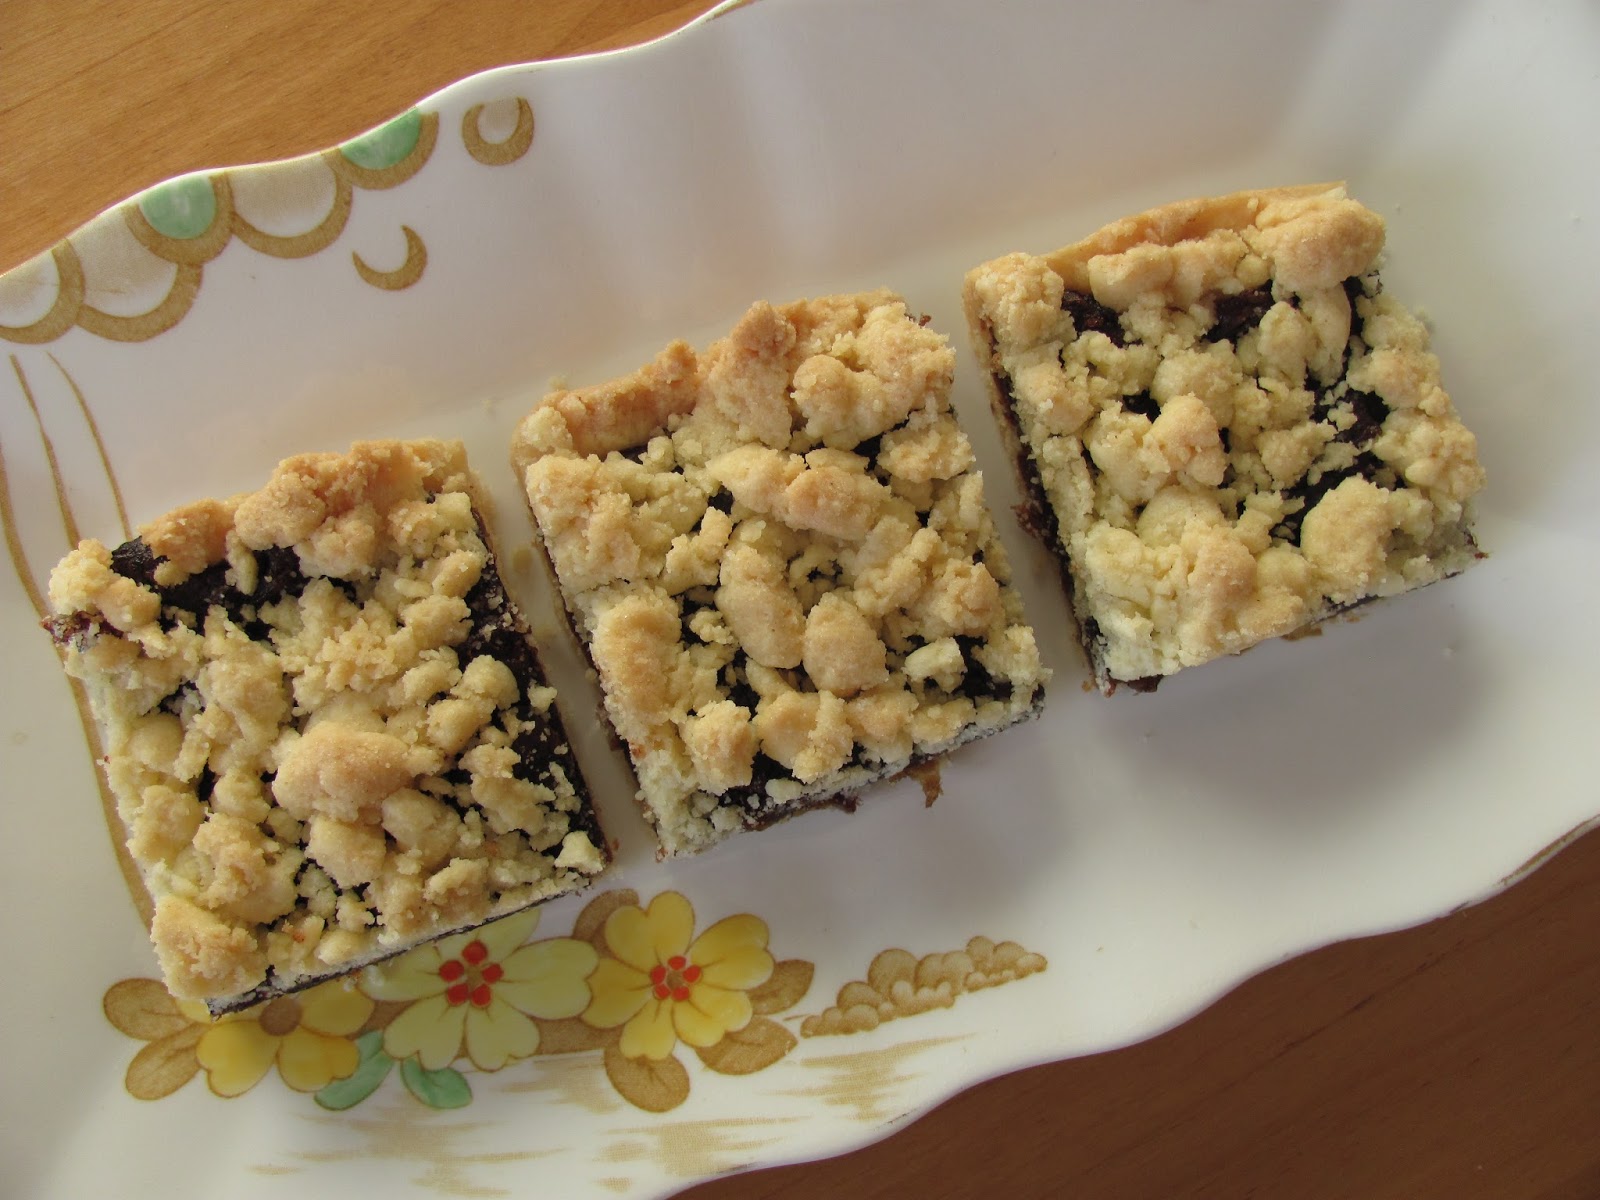
Date Shortbread Squares

 - gluten-free, plus dairy-free option

This is an adaptation of my favourite 'shortbread squares' recipe, which comes from 'On Baking' by Sue Lawrence, to make it gluten-free. Instead of wheat flour and semolina, I used a gluten-free flour, ground rice and added a little xanthan gum. It's the shortbread part of the recipe which is so good - quick to make, as it uses melted butter, and very crisp and light after it's baked. Any type of filling can be used, such as mincemeat or re-hydrated and cooked dried apricots - just make sure it's not too wet; for this version I made the filling from dates flavoured with pomegranate molasses, cinnamon and a little rosewater.

Ingredients
Filling:
225g dates - chopped
3 tablespoons pomegranate molasses
3 tablespoons water
1/2 teaspoon cinnamon
1/2 teaspoon rosewater

Shortbread:
255g gluten-free plain flour
85g ground rice
1/2 teaspoon xanthan gum
170g butter (or hard vegetable fat such as Stork*)
85g caster sugar

*see note at end of post

Method
Preheat the oven to 190C (170C fan)

Start by making the filling. Put all the ingredients into a small saucepan and bring to the boil. Cover the pan, turn the heat to low, and simmer for a few minutes until the dates are soft. At this stage you can blend the filling until smooth, but I prefer to just mash the dates with a fork, to make a rough purée. You may also need to add a splash more water to make the purée easy to spread, if all the added liquid has been absorbed during cooking.

For the shortbread, mix the gluten-free flour, ground rice and xanthan gum in a bowl.
Warm the butter and sugar together in a small pan, until the sugar has dissolved, then pour onto the flour mixture. Stir well to combine thoroughly - the mixture will form a crumbly dough.
Put 2/3 of the dough into a 20cm (8") square shallow tin, lined with baking parchment, spread evenly and press down firmly.
Spoon over the date filling, spread evenly, leaving a small margin around the edges.
Use your hands to crumble the remaining shortbread mixture evenly over the dates to cover as much as possible, and press down lightly with the palm of your hand.
Bake for 30 minutes until pale golden in colour. Cut into squares (16) while still hot, but leave the squares to cool completely before trying to remove them from the tin, as they are fragile when warm.

My only criticism of these is that the added flavourings were a little too subtle - both the cinnamon and the rosewater could have been increased.

* Dairy-free: I made a second batch of these date shortbread squares which were dairy-free as well as gluten-free, using Stork vegetable fat instead of butter. The shortbread was a little more crumbly than when using butter, for some reason, and they didn't taste as rich, but the recipe was largely successful.

Tuesday, 24 October 2017

Spelt Flour Gingerbread

I've alluded to health problems within the family in a few of my recent posts, which have cut down on my free time and resulted in very little baking taking place. I'm sad to say that I'm now entering a new phase of my life - living on my own for the first time ever. My husband was diagnosed with a brain tumour in June, after becoming ill while on holiday in France; an operation failed to halt its aggressive growth and he passed away last week, just 4 months after diagnosis.

I'm not sure what this will mean in terms of this blog - I love baking, but a small cake suitable for two to eat over a few days is too much for me to get through, especially as I'm prone to gaining weight easily. I could bake things suitable for freezing, but if I'm taking slices of cake, or rolls of biscuit dough, out of the freezer, that still means fewer opportunities to try new recipes. We'll have to see how things work out!

This gingerbread was baked when I was expecting family to visit over the weekend; what wasn't eaten was taken home by my children. It is as good as a traditional gingerbread, which gets a sticky top over time, but uses oil instead of butter. My original recipe uses plain flour, but this time I used a mixture of plain wheat flour and spelt flour - only because I haven't managed to keep my storecupboard well stocked lately, and didn't have enough plain flour. Because of the strong flavours of the spices and treacle in the gingerbread, I don't think the flavour of the spelt was evident at all, but it's nice to know the recipe worked with one of the more 'fashionable' grains.

Ingredients
150g plain flour
200g spelt flour
1 1/2 teaspoons bicarbonate of soda
3 teaspoons ginger
1 teaspoon cinnamon
1/2 teaspoon ground cloves
1/4 teaspoon salt
6 tablespoons sunflower oil
150g caster sugar
1 large egg
250mls of roughly equal amounts of golden syrup and black treacle, mixed with 250mls hot water (ie 500mls liquid in total)

Method
Preheat oven to 170C (150C fan), and line a 20cm (8") square deep cake tin with baking parchment.
Put the flours, bicarb, spices and salt into a medium sized bowl and whisk together to distribute the spices evenly.
In a large bowl whisk the oil, egg and sugar to a smooth emulsion.
Add alternate portions of the flour mix and the syrup mixture to the emulsion in the large bowl, stirring just enough to blend the mixture together - no need to beat.
Transfer the batter to the cake tin and bake for 50-55 minutes until a test probe comes out clean.
Cool the cake in the baking tin.

Wednesday, 15 February 2017

Norwegian Spiced Chocolate Cake

for Clandestine Cake Club

The theme for a recent meeting of my local Clandestine Cake Club (CCC) was 'How to Hygge', which seems appropriate for mid-winter, as Hygge cooking concentrates on warming spicy flavours and 'comfort' food. Even though Hygge is a Danish word, the Swedes and Norwegians have the same concept of warmth and cosiness, particularly during the long dark winters. This meant I didn't feel constrained to search for only Danish recipes, fortunately. The problem with Scandinavian baking, from a CCC point of view, is that Scandinavians seem to be hotter on the types of baking that can't be taken to CCC - yeasted buns, small pastries, biscuits and tarts etc.

I have The Nordic Bakery Cookbook, and tried out the basic cake recipe in there, making a ginger cake, and although it was delicious, I felt that it was too dry and plain for a CCC meeting. Finding no relevant recipe books in the local library, I resorted to what I could find online - which was mostly recipes from The Nordic Bakery or Scandilicious. Signe Johansen's recipe for Spiced Chocolate Cake, from Scandilicious, soon caught my eye, but I was disappointed that the recipe made a very stodgy cake when I tried it (see photo, above) The batter was difficult to marble too, as it was so shallow - I hoped the layers would swirl more as they cooked.

At that point I was running out of time to try other recipes, so decided to embrace the concept of this Spiced Chocolate Cake (also known as Tropisk Aroma), by keeping the flavourings used in Johansen's recipe, which I'd really liked, but using an ordinary sponge cake recipe as a base. I also decided to make the three layers as a sandwich cake, as in this recipe, rather than layer the batters into one pan, and swirl them before baking, as in the original recipe, pictured here. While I was making changes, I also decided to use a rich chocolate fudge frosting and filling, rather than buttercream, which I find is sometimes too sickly.

Ingredients
225g butter, softened
225g caster sugar
4 large eggs
250g SR flour
1 teaspoon baking powder
1 tablespoon instant coffee, dissolved in 1 tablespoon milk
1 1/2 teaspoons cinnamon
1 1/2 teaspoons freshly grated nutmeg

50g melted plain chocolate, cooled to lukewarm
2 tablespoons cocoa

extra milk, as necessary

*Frosting: 200g plain chocolate (70% cocoa solids), 35g butter, 50mls milk, 2 generous tablespoons golden syrup.

Method
Prepare 2 x 20cm (8") sandwich tins, at least 4cm (about 1 1/2") deep, and preheat oven to 180C, fan 160C.
Put the butter, sugar, eggs, flour, baking powder, coffee-flavoured milk, cinnamon and nutmeg into a large bowl and beat with an electric mixer until well blended and aerated. Add a little extra milk if necessary, to give a dropping consistency.
Weigh 500g of this batter into one of the sandwich tins and spread evenly.
Beat the melted chocolate and cocoa into the remaining portion of batter, again adding milk if necessary.
Spread this chocolate batter into the second sandwich tin.
Bake both cakes for 25-30 minutes, until risen and firm.
Cool in the tins for a few minutes, then turn out onto wire racks to finish cooling.
Make the frosting by melting the chocolate and butter together, either in a bowl over a pan of simmering water, or in a thick bottomed pan directly over a very low heat, stirring occasionally. Remove from the heat and  beat in the milk and golden syrup. Cool until the fudgy frosting holds it's shape.
Split the coffee sponge layer in two horizontally, and place the bottom layer on a serving plate.
Using roughly 1/4 of the frosting each time, sandwich the chocolate layer between the two thinner coffee layers.
Spread the rest of the frosting on top of the assembled cake and decorate as you wish - a dusting of cocoa seems to be traditional, but I just marked a pattern using a fork.

* most versions of this cake that I've seen online completely cover the cake in a thick layer of chocolate buttercream. To do that with this frosting recipe I think you would need twice the amount I've given here!

I really liked the combination of flavours here! Chocolate and coffee always work well together but the combination of nutmeg and cinnamon added a very subtle warm spiciness. If I made this again I think I'd increase the spices to 2 teaspoons of each - the flavour was perhaps a little too subtle!

Monday, 6 February 2017

Ginger Cake

This highly spiced cake, from The Nordic Bakery Cookbook (recipe here except that you only need 1 1/2 teaspoons ginger, not 16!), might be called a 'ginger' cake, but the spices that dominated were cardamom and cloves - spices that aren't to everyone's taste. I really liked the mix of spices - cinnamon, ginger, cloves and cardamom - but would probably swap the amounts of ginger and cardamom if I made it again - just to make it more 'gingery'.

I found that following the recipe exactly made a very stiff batter, but went ahead and baked it anyway, despite my misgivings. I used a 20cm (8") springform tin, after putting the batter into the suggested tin size and worrying that it would overflow; the baking time was still the same. Even the larger tin made a very high cake, so I wouldn't try it in the smaller tin in the future; what I would do is add a few tablespoons of milk to the batter to loosen it and try and make the cake a little moister. The cake had a lovely close texture and wasn't too sweet, but it was a little on the dry side. This made it a good cake for everyday use - perfect with a cup of tea or coffee, but not the sort of thing you'd produce for special occasions. This is not a bad thing - you certainly don't want fancy baking all the time!

Wednesday, 7 December 2016

Date and Walnut Squares

The recipe for the base and topping layers of these squares is perfect - the top is crisp, the bottom layer holds together well but is still very light, and it's really quick to make as the butter and sugar are melted together before being poured onto the flour mixture.

I've used the recipe before, for these Date and Ginger Squares, but wasn't entirely happy with the filling that time. This time, I used just dates, leaving out the currants, and added finely chopped walnuts instead of ginger. This combination was really tasty, but this is one of those recipes where I can imagine a wide variety of fillings working as well - at this time of year, mincemeat springs to mind, but dried apricots cooked in orange juice, or even a thick apple purée would be worth trying too!

Ingredients
250g pack of chopped dates
2 tablespoons honey
3 tablespoons water
1/2 teaspoon ground cinnamon
75g finely chopped walnuts
170g SR flour
170g semolina (I used 50:50 mix of semolina and ground rice, as I didn't have enough semolina)
170g butter
85g caster sugar

Method
Preheat the oven to 190C, and line a 20cm(8") square baking tin with parchment.
Put the dates into a small saucepan with the honey, water and cinnamon. Bring to the boil, cover the pan, then lower the heat and simmer until the liquid is absorbed - 10 minutes at the most, so keep an eye on it! Turn off the heat.

In another small pan, melt the butter and sugar together and stir until the sugar has mostly dissolved. Tip this onto the flour and semolina mix and stir in with a spoon. It will make a crumbly mixture which looks as if it might hold together if you kneaded it, but there's no need to do this!
Put 2/3 of the dough mix into the baking tin, spread evenly and press down firmly.
Spread the date filling on top of the dough base, leaving a very small margin around the edge of the tin.
Crumble the remaining dough over the top, as evenly as possible, and press down lightly with your hand. Don't worry if there are gaps where the filling shows through.
Bake for 25-30 minutes until the top is golden brown. Mark into squares or fingers as soon as the bake is removed from the oven, but leave in the tin until completely cold - they are very fragile while warm.

Tuesday, 18 October 2016

Apple Pie Flapjacks

Although these flapjacks, containing fresh apple, certainly filled the kitchen with the smell of apple pie while they were baking, to me, with the texture given by the oats, they were more evocative of apple crumble, as I always use oats in my crumble mixes.

I have to admit that I was dubious about this recipe. Would adding such a large amount of grated apple put too much moisture into the mix? Would it hold together? Would the flapjacks be crisp, chewy or just a soggy mess? The oat mixture made a good thick layer in the baking tin, which was a promising start, as thin flapjacks can become too crisp.

In fact, the flapjacks were fine, while they were fresh, but they didn't keep that well, becoming progressively more moist until they were much too soft for my taste. I like my flapjacks chewy, rather than biscuit-crisp, but I don't like them flabby. The flavour was excellent though, so if the flapjacks are going to be eaten all in one go, soon after baking - at a Hallowe'en or Bonfire party, for instance - then I'd say go for it!

Adding fresh apple reduced the 'almost too much' sweetness that you can get with flapjacks too, as well as making them seem more healthy, and the flavour of apples and cinnamon came through well. If there was any criticism it would be that 50g of walnuts wasn't enough to make a real impact.

Sunday, 7 August 2016

Courgette Cake

There was nothing really wrong with this cake - it had a pleasant flavour and contained sultanas and pecans for variations of texture (chewiness and crunchiness) - but there was nothing there that excited me! It was just 'pleasant', which is low down on my judgement scale for cakes!

I used this recipe from Nigel Slater. The recipe was easy to follow, although my loaf took a few minutes longer to cook than the time suggested in the recipe.

I think the basic problem is that I want courgette cakes to be light and fluffy, like many carrot cakes I've tried, including my favourite from Good Food, but because there is so much more moisture in a courgette, even after squeezing out as much as possible, this just isn't going to happen. Adding apple probably only makes things worse, in this respect. If anyone has a recipe which does make a light sponge-like cake, please let me know!

Wednesday, 3 August 2016

Gingerbread Cake

This is a recipe that I found when I first started baking with oil instead of butter. Health messages have changed since then, although low saturated fats are still advised by many dietitians when cholesterol levels need to be managed. I'm happy to bake with butter, but I really like this recipe, as it is quick and easy to put together, and makes a light but traditional tasting gingerbread - one where the top get stickier with time!

My recipe is an adaptation of this recipe for a Molasses and Olive Oil Gingerbread Cake, which I found to be too bitter and not spicy enough when I first tried it. I substituted golden syrup for some of the molasses/black treacle, increased the ginger and used sunflower oil rather than olive oil, as the flavour of olive oil is lost in a strongly flavoured cake.

Ingredients
350g plain flour 
1 1/2 teaspoons bicarbonate of soda 
3 teaspoons ground ginger 
1 teaspoon cinnamon 
1/2 teaspoon ground cloves 
1/4 teaspoon salt 
90mls (6 tablespoons) sunflower oil 
150g caster sugar 
1 egg
250mls of roughly equal parts golden syrup and black treacle and 250mls hot water (mixed together in a measuring jug).


Method
Pre-heat the oven to 170C and line a deep 20cm (8") square cake tin with baking parchment.
In a small bowl, whisk together the flour, spices, bicarbonate of soda and salt.
In a large mixing bowl, whisk together the egg, sugar and oil until emulsified.
Add alternate portions of the flour mix and the diluted syrups to the egg mixture, stirring just enough to mix evenly, but not beating.
Transfer the batter to the baking tin and bake for 50-55 minutes, until a test probe comes out clean.
Cool for a few minutes in the tin, then transfer to a wire rack.

Friday, 29 July 2016

Apple and Berry Crumble Cake

I've still got blackberries from last year, and also found a small container of frozen blueberries while assessing the space in the freezer, prior to this year's gooseberry harvest. I'd also got a couple of Bramley apples to use up, so something using all three seemed a good idea.

This recipe, for an Apple and Berry Crumble Cake, which I found on the Good to Know site, was quick to put together, as part of the base mixture was put aside for the crumble topping, rather than needing to make two separate mixtures. I used 300g total weight of mixed blackberries and blueberries as I had less than 100g of blueberries in my little pot in the freezer. I didn't bother thawing the berries ahead of use, either! In place of the mixed nuts in the topping, I used toasted chopped hazelnuts, but apart from these minor changes, I followed the recipe exactly. I didn't need to cover the cake while it was baking - even after the full cooking time it was only lightly browned.

I was worried that the combination of Bramley apples and frozen fruit would make the cake too wet but this wasn't the case, if anything the crumble topping was too dry and powdery. I think this would have made the cake quite unpleasant to eat on it's own, but it was fine as a dessert with vanilla yogurt. The fruit didn't have any extra sugar added to it, so it made a nice sharp layer between the sponge and the crumble.

Monday, 30 May 2016

Date and Ginger Shortbread Squares

After trying many different recipes for layered bars with a filling of jam or softened dried fruit, I think I've at last found the perfect recipe for the dough layers. This recipe for Date and Ginger Squares, from Sue Lawrence's book 'On Baking' uses an easy shortbread dough made from equal parts of SR flour and semolina, which makes a really crisp, but melt-in-the-mouth biscuit. I adapted the recipe slightly by adding a little lemon zest to the filling, and adding the stem ginger in pieces, rather than blending it with the rest of the filling.

Filling - 175g dates, roughly chopped to check there are no stones left in
60g currants
1 tablespoon of ginger syrup from a jar of stem ginger
1 tablespoon honey
1 tablespoon lemon juice
zest of half a lemon
good pinch of ground cinnamon
3 tablespoons water
2 balls of stem ginger, finely chopped

Dough - 175g SR flour
175g semolina
175g butter
85g caster sugar

For the filling, place all the ingredients except the stem ginger into a small pan and simmer together, for about 10 minutes, until all the liquid is absorbed and the dates soft. Purée with a stick blender or in a food processor, then stir in the chopped stem ginger.

For the shortbread dough, melt the butter and sugar together on a gentle heat until the sugar has dissolved, then  tip it over the flour and semolina, and combine well. The mixture will be crumbly, not a smooth dough. Put 2/3 of this mixture into a 8" square shallow baking tin lined with baking parchment, spread evenly and press down firmly.

Spread the filling over the base, leaving a small margin around the edges. Crumble the rest of the  shortbread mixture over the filling, then press down lightly with the palm of your hand. There may still be a few gaps where the filling shows through, but this is fine!

Bake at 190C for 25 minutes, until the shortbread is golden brown. Cut into 16 squares as soon as the  tin comes out of the oven, but cool completely in the tin before trying to move the squares - they will be too fragile while still warm.

Although the biscuit dough for these squares was perfect, and the filling was very tasty, these squares didn't really live up to the name of 'Date and Ginger'. There certainly wasn't enough ginger in the recipe and I'm not sure the currants added anything to the taste experience. Next time I will try several things to increase the ginger flavour - more stem ginger, some ground ginger as well as cinnamon, and more ginger syrup instead of honey. I will also leave out the currants and increase the amount of dates.

I'll also be using the shortbread recipe in other types of bars - it would be interesting to see how the crisp biscuit stands up to using fresh fruit in the filling, which often produces a 'soggy bottom' result.

Friday, 15 April 2016

Cauliflower and Apple Cake

If your first thought on reading this post title is 'Why?', then I have to say that was my reaction too! Why use cauliflower in a cake?  The recipe featured in April's edition of Waitrose Food magazine as 'Dish of the Month' and comes from award-winning patissier and chocolatier Will Torrent. The introduction says that although baking with cauliflower may seem unusual, it works well with the flavours of apple, white chocolate and coconut. I discussed the recipe with a group of internet friends and the general opinion was that, although the photo of the cake looked attractive, using cauliflower in a sweet cake didn't sound very pleasant. I decided to take up the challenge!

The recipe is based on using a food processor, which I don't have, so I had to adapt the method a little. I also didn't want a layer cake, so baked the cake in a larger tin, and used 2/3 of the buttercream in the recipe, just as a topping

Ingredients
150g unsalted butter, softened, plus a little extra for greasing
150g cauliflower, in small florets
150g caster sugar
2 small braeburn apples, grated (I used 1 1/2 large apples and peeled and cored them, although the recipe doesn't specify peeling.)
2 eggs (mine were large)
175g plain flour
1 teaspoon cinnamon
1 teaspoon baking powder
1/2 teaspoon bicarbonate of soda
50g sultanas
50g desiccated coconut

*Buttercream (the amounts I used):
50g white chocolate, chopped
100g unsalted butter, softened
110g icing sugar, sifted
1 tablespoon milk
1/2 teaspoon vanilla extract
extra cinnamon (optional)
25g toasted desiccated coconut optional)

**My Method
Grease and base line a 20cm springform tin.
Simmer the cauliflower in boiling water for 16 minutes until very soft, cool under a running tap then drain, and dry on layers of kitchen towel.
Pre-heat oven to 180C, gas 4.
Sift together the flour, baking powder, bicarbonate of soda and cinnamon.
Process the cauliflower and grated apple in a small food processor to make a purée.
In a large bowl, using an electric mixer, beat the butter and sugar until well combined, then beat in the eggs, one at a time, with a tablespoonful of the flour mixture.
On the slowest mixer speed (or by hand) mix in the cauliflower and apple purée and the rest of the flour mixture.
Lastly, fold in the sultanas and coconut by hand.
Transfer the batter to the baking tin, level the surface and bake for about 45 minutes, until a test probe comes out clean. Cover after 35 minutes if it's getting too brown.
Cool in the tin for 15 minutes then transfer to a wire rack.
For the buttercream, melt the white chocolate with 25g of the butter and the milk, in a bowl over a pan of barely simmering water, stirring occasionally until smooth, then cool slightly. Meanwhile beat the rest of the butter, the icing sugar and the vanilla extract together until light and fluffy. Beat in the chocolate mixture, then spread the frosting over the cake. Decorate, if desired, with a light dusting of cinnamon and some toasted coconut.

**The food processor method was to first chop the cauliflower into small pieces, then pulse in the butter, sugar and apple. Gradually add the beaten eggs before sifting in the flour, cinnamon and raising agents. Pulse to combine, then fold in the sultanas and coconut. 
The original cake was baked in a 18cm tin for 45-55 minutes, then split in half when cooled. 

*A larger amount of frosting was made by melting the 75g white chocolate on it's own and stirring it into a buttercream made from 150g butter, 175g icing sugar, 1 1/2 tablespoons milk and 1/2 teaspoon vanilla extract, and used to sandwich and top the cake layers. I couldn't bring myself to melt the chocolate on it's own as I always have trouble melting white chocolate - hence my method of adding some of the butter and the milk to stop it getting too hot and seizing.


The result really surprised me! This odd assortment of ingredients produced a delicious, moist and incredibly light textured cake with a delicate cinnamon flavour. I couldn't taste either the apples or the cauliflower at all (fortunately, perhaps!) and even the coconut didn't come through strongly. The cake wasn't over-sweet, which meant that the very sweet white chocolate and vanilla frosting was a nice counterbalance to the cake. The one disconcerting note about the cake was that although I couldn't taste it in the raw batter or finished cake, there was a strong smell of cauliflower while the cake was baking!

Perhaps it was the subtle blending of all the ingredients which produced such a surprisingly tasty cake, but I think I'm still asking the question of why the cauliflower was used at all? Apart from the novelty value of telling people that there's cauliflower in the cake (and I didn't tell my husband until after he'd eaten it) the only reason I can come up with it that the apples and cauliflower add bulk, and perhaps moisture, but not so many calories. A similar sized cake would normally use more sugar, butter and egg.


Saturday, 6 February 2016

Morning Glory Yogurt Loaf

an Anna Olson recipe

I'd never heard of Morning Glory Bread, until I started looking for a recipe for a loaf-shaped cake using yogurt in the batter. It seems that it's a quick breakfast 'bread', of the type popular in America and Canada - the sort of thing that's often called a tea-bread over here, as we haven't really embraced the habit of eating what seems like cake for breakfast, yet! It's raised with baking powder rather than yeast, and is packed full of whatever the cook has available in the way of fruit and nuts. This Anna Olson recipe adds tinned pineapple (or fresh peaches), raisins, coconut and orange zest, but on further investigation I found recipes adding things such as bananas, walnuts and even grated carrots too.
I had already decided to make a coconut flavoured loaf, as that was just about all I had in my store of cake 'add-ins', and had found a couple of possible recipes, but when I came across this recipe, with it's extra flavour elements, I knew I had to try it. Luckily I also had the remains of a bag of sultanas, that I could use instead of raisins, and there was a tin of pineapple rings in the larder, which I could blitz to turn into crushed pineapple. I used unsweetened desiccated coconut; I didn't think it would make too much difference as there was quite a lot of sugar in the loaf.

Most yogurt cakes use oil instead of butter, so are made by simply mixing wet ingredients in one bowl, dry in another and combining the two. Because this recipe used butter there was the added stage of creaming it with the sugar before adding the wet ingredients,  but it was still an easy recipe to follow.

The only problem I had was one of baking time - I've no idea how long the loaf spent in the oven, as I gave up keeping note after 90 minutes. I eventually took it out when my digital thermometer read 94C as I thought that was as near to 100C as the cake was going to get, and I needed the oven at a different temperature by then! The huge discrepancy between the recipe and my experience may have been down to a differently proportioned loaf tin (mine was short and deep), or the moisture in the tinned pineapple.

This was a very moist, close-textured loaf, because of the juicy pineapple. Although it was packed with fruit, and hadn't risen much it still seemed quite a light cake. The flavours of the pineapple and coconut were the most dominant, with the orange and touch of cinnamon providing subtle background notes. I treated this loaf as a cake, but it would also have made a good dessert, perhaps heating slices in a griddle pan and serving with poached fruit and yogurt.

The reason I wanted to bake a cake containing yogurt was that this month's AlphaBakes challenge is the letter Y. My imagination failed to come up with anything out of the ordinary for either an ingredient or a recipe name beginning with Y, so yogurt will have to do! AlphaBakes is hosted by Caroline, at Caroline Makes, and Ros, at The More Than Occasional Baker, and it is Caroline who is hosting this month's challenge.


Thursday, 10 December 2015

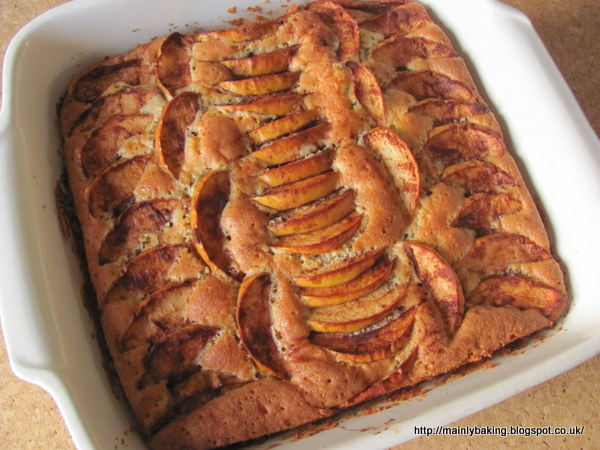
Norwegian Apple Cake (Eplekake)

I chose this cake recipe primarily to make a non-Christmas entry to this month's AlphaBakes challenge. The letter chosen is N, and Caroline, of Caroline Makes (who is this month's host, a duty she shares with Ros, of The More Than Occasional Baker) is graciously allowing entries where N = Noel, but would obviously like some more general entries too.

When consulting my baking books, I found that there were very few choices of ingredients beginning with N - nuts, nutmeg - and even fewer recipe names, especially once you ruled out Nutty as part of the title. Before resigning myself to going with nuts, I looked at the recipes from countries beginning with N, especially where the name of the country was used in the title of the dish; it didn't take long to find Norwegian apple cake. This recipe had the added bonuses of keeping my baking light in the approach to Christmas and using up some of my store of home-grown apples.

I used this recipe, which produced a cake small enough for two of us to eat quickly. Most of the online recipes are similar - some add a handful of raisins, or nuts, or make a bigger cake, but the differences are minor and go to prove that the basic recipe is authentic and tradional.

The cake is a vanilla flavoured sponge base with thin slices of cinnamon-sprinkled apples baked on top. It uses a slightly lower proportion of flour than a traditional British sponge cake recipe, and most recipes whisk melted butter and sugar together for the first step, as here, rather than creaming sugar with soft butter. These two steps make a more fluid batter than I'm used to, and I was worried that my springform pan would leak, so I changed to a ceramic baking dish at the last minute, which made a more shallow cake. I needed three of my small apples to get enough slices to cover the surface. Rather than sprinkling brown sugar and cinnamon over the surface of the cake, I tossed the apple slices in a sugar and cinnamon mixture before arranging them on the batter - I saw this in another version of the recipe and thought it a good idea, as it gets some of the cinnamon flavour into the batter mix, as it rises around the apple slices.

I thought this made a better dessert than a cake. When cold the sponge was moist but slightly too dense for my taste - it was best eaten warm, and would have been even better with cream or custard.  My apples were yellow-skinned; if I made it again, I think red-skinned apples would look prettier, but that's a minor quibble! It tasted good though - what's not to like about sweet apples mingled with vanilla and cinnamon?

Friday, 20 November 2015

Buttermilk Fruit Cake

When I decided to make a chocolate and banana cake, and was looking for recipes, I initially decided on a chocolate chip cake using buttermilk. When I changed my mind, I was left with a carton of buttermilk which needed using quite quickly, as it didn't have a long 'use-by' date. Another search for a recipe was on! This time I wanted something seasonal, not too big, and not too fancy.

This fruit cake recipe, found on Joy of Baking, which adds dates, spices and other dried fruit to a buttermilk cake batter, fit the bill perfectly. The recipe didn't need any eggs, which was quite intriguing, just relying on the action of bicarbonate of soda with buttermilk to raise the cake. I didn't have currants or raisins needed to follow the recipe exactly, but used 100g sultanas and 100g of a mix of chopped dried apricots, sour cherries and crystallised ginger instead.

Making the cake was straightforward - just mix wet ingredients into dry ingredients, then stir in the dry fruit, so only a saucepan, a couple of bowls and a spoon was needed. As my buttermilk was cold, I melted the butter in a saucepan, then added the buttermilk and just warmed it slightly. I also dropped my dates into the measured flour, then cut them into small pieces with scissors, rather than chopping them on a board - much easier.

The thing I really enjoyed about this cake was the spice mix; allspice isn't something I use often but it really worked well with cinnamon and nutmeg to give a warm and peppery background flavour to the dried fruit. Overall the cake was moist and well textured - the absence of eggs wasn't obvious.

Baking the cake in a 9" x 5" tin made what my mother would have called a 'slab cake' - something deeper than a traybake but shallower than normal for a cake. I think a smaller baking tin would have made a cake with better proportions, but it may not have cooked as well; I'm sure there was a good reason for that sized tin being used.

Monday, 2 November 2015

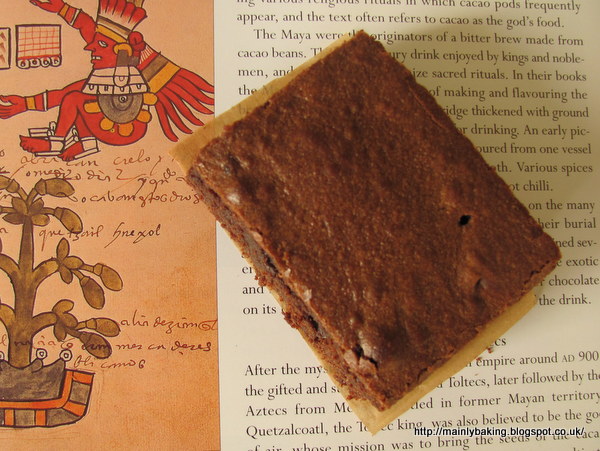
Spiced Brownies

inspired by the history of chocolate in Central America and Mexico

I think most chocolate devotees will know that the first record of cocao trees dates back to the Olmec civilisation, which was to be found in the forests on the Gulf of Mexico as long as three thousand years ago. One of the first known uses for cacao beans was in a spicy bitter drink made by the Mayans, another ancient civilisation in Central America, around AD 300.

The Mayans used local spices to flavour the drink made from the cacao bean; one of the most often used spices was chilli, but vanilla, cloves, allspice, pepper plus nuts and flowers were also used. The sweeter spices such as cinnamon and aniseed started to be used when the drink was sweetened with sugar, around the 16th century. Nowadays, chocolate products flavoured with chilli and cinnamon are often given names alluding to their Mexican or Mayan heritage.

It was with this in mind that I decided that a spiced chocolate brownie was the best thing to make for the Mexican round of the culinary challenge called Formula 1 Foods, over at Caroline Makes. The idea is to make either a traditional dish eaten in that country or something inspired by the culture, traditions and ingredients found in that country.

I made my usual brownie recipe and added some suitable spices. I decided to go with subtle hints of chilli rather than a blast of heat, as well as using some of the less common spices used by the Mayans.

To a brownie batter made by melting 140g each of butter and plain chocolate together, then adding in turn, 300g light muscovado sugar, three eggs, 160g plain flour and 3 tablespoons of cocoa, I added a teaspoon of vanilla extract, 1/2 teaspoon of ground ancho chilli pepper, 1/2 teaspoon ground cinnamon, 1/4 teaspoon ground aniseed and a pinch of ground cloves. This was baked for 25-30 minutes at 180C, in a 20cm square tin.

This combination of spices proved to be just what I intended - warm (my jar of ancho chilli powder was described as warm and earthy rather than hot), and well balanced, with none of the flavours overwhelming the others. I think most people would be hard-pressed to identify any of the individual spices used, unless they had a well trained palate - even the chilli blended well with the other spices used.