Showing posts with label cheesecake. Show all posts

Saturday, 2 November 2019

Cherry Cheesecake Brownies

I've made these Cherry Cheesecake Brownies once before; an attempt which was delicious, but not altogether successful, because the cherry jam sank through the (reduced fat) brownie batter, and ended up in pools on the liner of the baking tin.

This time I went back to my favourite brownie recipe, made with butter. It's the one I've been using for more than 20 years, with a small reduction in sugar being the only modification I've made to the recipe in that time.

This time the recipe worked perfectly! The swirls of tart cherry jam balanced the sweetness of the cheesecake and both were a good contrast to the dense, chewy brownie.

Which makes it all the more annoying that I didn't get any photographs before some of the brownies were eaten, and the rest distributed between my children, for them to take home after dinner. I was left with this one portion for myself - a remarkable feat of restraint on my part!

Ingredients
Brownies: 140g butter
140g plain chocolate - about 70% cocoa solids
300g light muscovado sugar
1 teaspoon vanilla extract
3 large eggs
160g plain flour
3 tablespoons cocoa
Cheesecake: 180g full fat cream cheese
50g caster sugar
1 large egg
1/2 teaspoon vanilla extract
Plus: 125g cherry jam

Method
Line a 20cm(8") square baking tin with baking parchment. Pre-heat oven to 180C/160C fan.

To make the brownie batter: Melt together the butter and chocolate in a large bowl, over a pan of simmering water. Cool to around 40C if necessary (so that the eggs don't start to cook) then mix in the sugar and vanilla extract, followed by the eggs, one at a time. Finally sift in the flour and cocoa, and fold in until thoroughly mixed. Put 3/4 of this batter into the baking tin, reserving the rest for the swirls in the topping.

For the topping: Beat together the cream cheese, caster sugar, vanilla extract and egg until smooth. It will be quite runny. Pour this over the brownie layer in the baking tin. Dot the cherry jam over the surface, about a teaspoon at a time, then do the same with the reserved brownie batter, putting the blobs between the areas of jam. Use the handle of a teaspoon, or something like a chopstick, to swirl the jam and brownie batter blobs into the cheesecake mixture - you get a better pattern if you swirl deep enough to get into the lower brownie layer just a bit.

Bake for 40 minutes until just firm, then cool in the pan before cutting into the desired sizes. I cut into 16 squares, but less greedy people might prefer smaller bars.

Friday, 3 May 2019

Chocolate Orange Cheesecake

This is a really good cheesecake recipe, in so many respects, that it's a pity the topping lets it down a little. The base has just the right proportions of plain chocolate digestive biscuits and butter, so that it isn't too crumbly nor does it set too hard to cut. The cheesecake mixture is light and delicate in texture and flavour, and doesn't crack while cooling (although I did run a knife around the edge as soon as it came out of the oven to help prevent that).

The idea of the topping, which is a mixture of orange flavoured chocolate, and chocolate with almonds in it, is lovely, and it tasted delicious, but the chopped (or grated) chocolate melted on the hot cheesecake, then set to a crisp brittle layer, which made it difficult to cut and serve neatly. What is even more annoying, is that this didn't happen the first time I made the cheesecake - then the tiny pieces of chopped chocolate stayed as a 'rubble' across the top and didn't hamper cutting it at all. I suppose I must have used a different brand of chocolate this time.

I didn't experience any problems with the recipe for this Chocolate and Orange Cheesecake, apart from the issue with the topping. I don't have a large food processor, so mixed with a hand-held electric beater, on a slow setting, after the eggs has been whisked thoroughly. As usual, even a double layer of foil failed to prevent a little water getting between the foil and the springform tin - perhaps it was condensation, as I was using extra-strong foil, which shouldn't have got holes in it with my careful handling.

I've been trying to think of a different way to top the cheesecake. Piped and set chocolate shapes or a thin layer of ganache, left to drip down the sides, are two options to keep the chocolate flavour. Another possibility is orange curd swirled into lightly whipped double cream or mascarpone. Overall, though, this is a recipe worth repeating.

Wednesday, 3 May 2017

Zebra Cheesecake

I decided on cheesecake for an Easter dessert; more specifically, chocolate cheesecake, as I think the family would feel cheated if chocolate didn't make an appearance at Easter! A few weeks ago I saw a link to a recipe for a Zebra Cheesecake in an excerpt from Lorraine Pascale's latest book "Bake: 125 Showstopping Recipes, Made Simple" which looked ideal.

The recipe was simple to follow, and involved layering measured quantities of vanilla and chocolate cheesecake mixture onto a biscuit base. As the layers build, the cheesecake mixture gradually spreads to the edges of the baking tin, and this forms an attractive pattern in the baked cheesecake.

That's the theory! In practice it didn't work quite that way.

Firstly, the cheesecake mixture was very reluctant to spread, even with quite vigorous tin tapping. Although I did manage to get the mixture to the edges of the tin eventually, it was still domed in the centre when it went into the oven. Fortunately it levelled out before it set (with a little extra shaking).

Secondly, after 35 minutes baking - the time suggested in the recipe - the cheesecake still looked as raw and wobbly as when it went into the oven. It took well over an hour until I was satisfied that the cheesecake was cooked - set at the edges but still wobbly in the middle.

Thirdly, my cut cheesecake didn't look much like the photo accompanying the recipe. I followed the instructions, making each layer with about 2 tablespoons of mixture; this gave me, as far as I can make out from my photos, 14 or 15 alternating layers of vanilla and chocolate. I'm not sure why the layers in my cheesecake look so much thinner than those in the published photo, if that cheesecake was made following the same recipe exactly. Fewer layers - perhaps 8, using a quarter of each mixture in each layer - would give a more attractive result, I think.

After all that, this cheesecake wouldn't feature amongst the best I've ever made in terms of eating quality either! It tasted pleasant enough but it was very solid and quite dry in texture.

On the positive side - the pattern does look zebra-ish, and the cheesecake didn't crack during cooking or cooling. You can see from the photos that I made one slight departure from the recipe - I made the base using 200g plain chocolate digestive biscuits and only 80g butter. I've found that using half the quantity of butter to the weight of biscuits can make the base too solid and difficult to cut - I prefer the biscuit layer to be a little looser and crumblier.

I was disappointed that the cheesecake didn't look as attractive inside as the recipe suggested it would but even more disappointed that the baking time was so inaccurate and that the recipe didn't make a better cheesecake. This is the first recipe from Lorraine Pascale that I've tried, and it doesn't give me much confidence to try others!

Saturday, 26 December 2015

Chocolate Orange Cheesecake

Although I love a traditional Christmas Pudding, the rest of the family are not so keen - especially the younger generation. For many years our tradition has been something with chocolate for dessert on Christmas Day. This dessert, from the 2015 Christmas (November) issue of Good Food magazine (the only issue I buy now), fit the bill, although the chocolate was very much in a minor role to the deliciously creamy baked orange cheesecake.

This recipe for Chocolate Orange Cheesecake was simple to make. I don't have a large food processor, so made the base by hand - crushing the biscuits with a rolling pin and mixing in the melted butter - and mixed the ingredients for the filling with a hand-held electric mixer, on slow speed. I chopped the chocolate for the topping in a mini-processor - much simpler and faster than grating. The only issue I had was leakage of the very sloppy cheesecake mixture out of my springform tin - I think it's time for a new one, hopefully with a tighter leak-proof fit between sides and base. Fortunately the wrapping of foil which was designed to stop the waterbath water seeping in also contained the mess, and the heat of the waterbath set the cheesecake quickly around the edges to prevent too much loss.

Although no-one wanted to eat much  dessert after Christmas Day dinner, CT and I both tried a small piece. I expected the topping to be difficult to cut, but the chocolate rubble had stayed as such, and hadn't set into a hard layer, as melted chocolate spread on top would have done. An excellent idea which I will remember for the future! In fact it was the base which was hard to get through - after serving two small slices, I realised I hadn't actually cut through the base at all, but had lifted the cheesecake off the biscuit layer! After that was sorted, subsequent slices were easier to serve!

As a baked cheesecake, this was deliciously soft and creamy - only just set, but just right! The orange flavour of the zest and liqueur in the cheesecake mixture shone through, highlighted by the orange flavoured milk chocolate in the topping. Adding a proportion of almondy milk chocolate to the topping added extra crunch and flavour, and the base was thin and crisp. All round, an excellent dessert, and one I will use again.

I promised to mention FB's mincepies in my post. It was her first attempt at making pastry, and an excellent attempt it was too! She used this Mary Berry recipe which added orange zest to the pastry, chopped dried apricots to the mincemeat and topped the pies with grated marzipan. They were really good - tasty adaptations to bought mincemeat to make the pies extra special. My thanks go to her for taking on some of the Christmas cooking.

The use of many eggs in this cheesecake means I can enter it into Belleau Kitchen's Simply Excellent link-up for December. Dom's theme this month is Anything Goes, so I'm expecting to see a lot of Christmas desserts!


Chocolate in the base and topping also makes this cheesecake eligible for this month's We Should Cocoa event, a blog cooking challenge originated by Choclette at Tin and Thyme and hosted this month by Munchies and Munchkins, who has chosen the theme of Christmas.

Monday, 15 June 2015

Gooseberry and Elderflower Cheesecake

While checking around the garden recently, I noticed how quickly the gooseberries were growing. That reminded me that there were still some of last year's gooseberries in the freezer, which ought to be used before this year's excess fruit went in. So when I needed a dessert to take to lunch with friends, something that could be made with frozen gooseberries seemed the best idea.

The biggest problem with taking desserts to other people is carrying them with no damage. It's also a good idea to take something ready to serve, so you're not doing last minute cooking in someone else's kitchen, or taking up oven space at an inconvenient time. A cold dessert, which was not likely to spill while travelling, seemed ideal and I eventually decided on cheesecake. After looking at several very different recipes, I chose a Mary Berry recipe (from her book 'Ultimate Cake Book') for a set gooseberry and elderflower cheesecake using gelatine. A gelatine based cheesecake could be transported still in the springform tin in which it was made, and the sides removed when ready to serve.

I never like to make an untried recipe for other people, so I had a trial run with the cheesecake the weekend before it was needed.

I adapted the recipe slightly so that I could use leaf gelatine, which I find much easier to use than powdered. I also made a few other changes, such as leaving the sugar out of the biscuit base, using the whole 250g tub of cream cheese, rather than having 25g left over, and leaving off the whipped cream decoration, as extra cream didn't seem necessary for the trial run. All I needed to do, to use leaf gelatine, was to soften nine leaves in cold water, then add them to the sieved gooseberries while the purée was still warm.

As with the rhubarb meringue pie I made recently, the addition of cream to the fruit seemed to mute the flavour. It was good, but decidedly 'delicate', and not as sharp as when using gooseberries in a pie or crumble. The crumb base was thin but this was good, as thick bases can be too hard to cut and eat easily. The set cheesecake mixture had bonded with the base well, so there wasn't any danger of things falling apart. The texture was very light and aerated - very mousse-like - so it didn't really seem like eating a cheesecake at all.

Because I was a little worried about the lack of flavour, I decided to make a tangy gooseberry sauce to eat with the cheesecake when I made it the second time, for those who liked the sharpness of gooseberries. I made this by simmering 550g of gooseberries with 80g of sugar until softened. I strained the juices back into the pan and reduced them by about half, until syrupy, while I sieved the cooked gooseberries to remove the pips. The concentrated juices were stirred back into the purée - more sugar could be added at this stage, to taste, but I decided to leave the sauce quite sharp.

By the time I made the second cheesecake, the elderflowers were almost out, so I decorated the cheesecake with small sprigs of flower buds and gooseberry leaves, rather than whipped cream, and served it with creme fraiche. Unfortunately, as I had to leave it in the springform tin for transportation, I couldn't get a good photo of the second cheesecake.

As the mousse-like texture of this cheesecake relies on beaten egg whites, I'm entering this into Belleau Kitchen's Simply Eggcellent bloggers link-up for June, which is for recipes where free-range eggs feature heavily. Dom hasn't set a theme for this month - anything goes - but a light cheesecake with seasonal fruit is perfect for this time of year.

Sunday, 5 April 2015

Chocolate Cheesecake

An Easter Eggstravaganza!

Easter wouldn't be Easter, in this household, without chocolate. Not Easter Eggs though - our children quickly caught on that you didn't get much chocolate for your money in an Easter Egg, so our tradition became a Terry's chocolate orange (or something similar) and a chocolate dessert for the weekend. Now that they are adults we've stopped buying chocolate presents, but the tradition of a chocolate dessert lingers on.

I decided on a baked cheesecake because it's fairly light on added sugar, compared to some of the desserts I could have chosen. I picked this recipe from Good Food, because it sounded quite light (despite some of the reviews claiming it was too rich!). The recipe uses cocoa and relatively small amount of plain chocolate to get a good flavour, rather than a lot of chocolate.

As usual, I only used the recipe as a guide to the correct quantities for the cheesecake mixture. I introduced a hint of nuts by adding finely chopped toasted hazelnuts to the biscuit base, and Amaretto liqueur to the cheesecake mix instead of a coffee liqueur. I also used plain chocolate instead of one with coffee flavour.

The base was made from 170g of chocolate and oat biscuits from IKEA, 50g toasted hazelnuts and 60g butter. I reduced the butter a little from the usual 50% of the weight of biscuit because I wasn't sure how absorbent the biscuits would be, and I didn't want the base to be too heavy - I prefer a slightly crumbly base rather than one which is dense and crisp. I followed the recipe for the cheesecake mixture as far as quantities of ingredients were concerned, just making the changes I've already mentioned.

I was rather concerned about how liquid my cheesecake mixture was - the recipe said to smooth the top after pouring it onto the base, but my mixture flowed like custard and certainly didn't need any help from me to become smooth and level. Perhaps because of this, the cheesecake took a little longer to cook than stated in the recipe. It also cracked badly, with one deep crack going right down to the base (which explains why there's no photograph of the whole cheesecake!). When cold, I decorated the top with a drizzle of plain chocolate, rather than the cream and chocolate sauce suggested in the recipe. I thought it better to serve cream as an optional extra, rather than force everyone to eat some.

Although I'd expected this cheesecake to be light, it was very different in texture to what I had hoped for. It was more like a set cheesecake or a mousse than other baked cheesecakes I've made. It still tasted good though, which is the main consideration. The hint of nuttiness was just right, and the chocolate flavour was strong enough without being too rich at the end of a meal.

I didn't really manage to get any good photographs after the cheesecake was cut. By the following morning the remnants were a bit worse for wear  - the chocolate topping was a bit weepy, and the cheesecake was crumbly to cut straight from the fridge. I think this bottom photo shows the texture quite well, despite all that.

I'm entering this cheesecake into the April 'Simply Eggcellent' link-up set by Dom (of Belleau Kitchen); with due consideration for our priorities at Easter, his theme for this month is chocolate.


Sunday, 6 April 2014

Lemon Cheesecake Bars

There was only one thing wrong with these bars - their size! The finished traybake was less than 1cm deep - so each bar was not much thicker than a digestive biscuit. The idea was great - a lemon cheesecake filling between two layers of biscuit crumb - and the flavour was fine, but the thin layers meant that the crispness of the biscuit and the softness of the cheesecake blended into one, with not enough differentiation of textures.


I followed this recipe, which was also in one of my cookery books (The Ultimate Cookie Book). The only difference was that I used hazelnuts instead of pecans. The recipe says it makes 18-24 bars, depending on size. It says a lot for portion sizes that I cut the bar into 8 pieces, and still thought them stingy! Smaller bars would be a dainty addition to a tea table, where people want to try a little of everything, but as a dessert I want a decent sized portion!

We're off to Japan for a touring holiday in a few days time, so I'm unlikely to have time to take part in any of my usual baking challenges this month. Hopefully things will get back to normal next month. Last time we were in Japan, we actually lost weight - unheard of when holidaying, usually, but I think the portion sizes in restaurants reflect the fact that the Japanese tend to be much smaller than the average British person. If things go the same this time, at least I won't be worrying about losing the extra weight when I get back!

Monday, 6 January 2014

Chocolate and Orange Meringues

The time between Christmas and the resumption of normal eating (otherwise known as the diet, in my case!) often calls for ingenuity in using up things leftover from catering for visitors, or just making more than usual to give people choice.

I was pleased with myself this year for making a Gooseherder's Pie with shredded goose meat and a mashed potato topping, as well as some really tasty vegetable patties using all the leftover root vegetables which accumulated over the festive period.

This dessert was another successful use of bits and pieces lurking in the fridge - leftover egg whites and crème fraiche from the Christmas Day dessert, excess cream cheese from  making a smoked mackerel pate and a couple of oranges reaching the end of their life. All I needed to add was a 300g tub of mascarpone cheese.

I made the meringues with 4 egg whites, 200g of caster sugar and two teaspoons of sifted cocoa. I spread the meringue into 6 nest shapes about 10cm across and baked at 150C for about 90 minutes, then left them to cool in the oven.

The cheesecake-style filling was made from a tub of mascarpone cheese, about 100g full fat cream cheese and a few tablespoons of crème fraiche mixed with 50g icing sugar, the zest of 2 oranges and the juice from one of them. This set quite firmly when chilled, and was enough to fill 4 meringues.

The chocolate sauce was made by melting 100g of plain chocolate into 150mls double cream and leaving to cool a bit.

The dessert was assembled just before serving, to avoid the meringue getting soggy.

The second photo is awful - my apologies - bad light and rushing to get a photo while everyone was waiting to start eating!

Tuesday, 23 April 2013

Honey Cheesecake, with a hint of Chocolate

If more than two years of the We Should Cocoa challenge has taught me anything, it is that I am no longer of the opinion that anything can be improved by the addition of chocolate. The idea for We Should Cocoa is that we should make something containing chocolate and an additional specified ingredient - a spice, fruit, nut or other flavour component. Over time, I've realised that I'm more of a purist than I thought, and although I've found new flavour combinations that I unexpectedly enjoy, I've also found a lot of combinations that just don't work for me.

 This month's challenge to use honey is a case in point. I tried to think of recipes where the flavour of the honey would be prominent, as that is surely the aim of the challenge - there's no point using an ingredient if you can't taste it in the finished article. There was the added problem that baking with large amounts of honey can be problematic too, as I found with a batch of biscuits that ended up like a lace curtain across the baking tray. The pieces tasted great, when I eventually got them to harden and set, but it was impossible to half-coat them in chocolate, which had been my intention.

Eventually, using leftovers from Easter, I decided to make a cheesecake, using chocolate coated oat biscuits for the base, and adding a chocolate sour cream layer on top. Unfortunately, although each component worked well on it's own (apart from a slightly soggy base!), the honey cheesecake mixture just didn't taste right with the two chocolate layers. It may just have been the particular honey I used - my current favourite is a Romanian Lime Blossom honey which has a distinctive citrus flavour, and I'm always wary of pairing citrus, other than orange, with chocolate.

I couldn't find a recipe for a cheesecake mixture which was exactly what I wanted, but in the end I used this recipe from Canadian Living as the basic inspiration. I had to reduce the quantities a little to accomodate the fact that I only had 400g cream cheese, and I cut back the honey even more - to 100g - as I didn't want it to be too sweet.

Ingredients
180g chocolate coated biscuits - I used IKEA Kakor Chocladflard (double chocolate crisps) but would have used chocolate coated hobnobs if these weren't sitting in my storecupboard approaching the use-by date!
90g melted butter
400g full fat cream cheese
100g Lime Blossom honey
2 medium eggs
60g sour cream
rind and zest of 1 small lemon
140ml tub sour cream
2 tablespoons caster sugar
25g finely grated 100% cacao block
Method
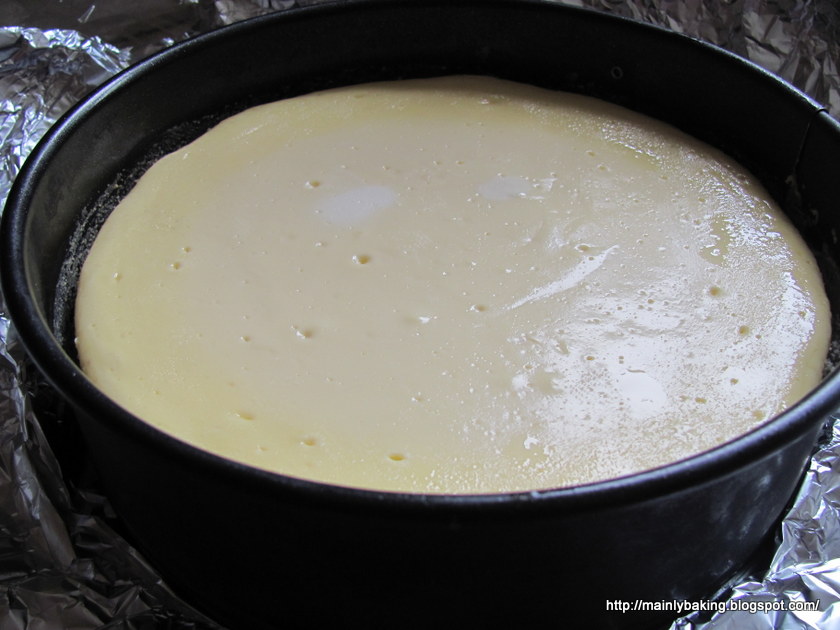
Use a 7" springform tin and cover the outside with several layers of aluminium foil, so that it can go into a bain-marie. Heat oven to 180C.
Crush the biscuits to fine crumbs, stir in the butter and use to make an even, compressed base in the springform tin. Bake for 10 minutes, then cool.
Beat the cream cheese with the honey, until smooth, then mix in the eggs, lemon and the 60g quantity of sour cream until well combined. Pour onto the crumb base and bake in a bain-marie for 45 minutes or until set but still wobbly. Remove from oven, but leave in bain-marie.
Combine the tub of sour cream with the sugar and grated cacao, spread over the cheesecake and return to the oven for 15 minutes. Turn off the heat, open the oven door slightly and leave the cheesecake for 30 minutes. Remove from oven, and run a knife between the cheesecake and the sides of the tin (may help prevent cracking).
When the cheesecake is cooled to room temperature, refrigerate for at least 6 hours before serving. Don't cover the cheesecake until it is fully chilled as you may get condensation on the surface!

As I said earlier, apart from a soggy bottom in the centre of the cheesecake, each of the three parts were very good. The base was well flavoured with chocolate and oats, the cheesecake mixture was smooth with a hint of citrus alongside the honey flavour, and the set sour cream topping with added chocolate was delicious. They just didn't work together.

So, not a great success, but I was really pleased with the chocolate sour cream topping, which I'm sure to use again.

We Should Cocoa is a baking challenge started by Chele from Chocolate Teapot, and Choclette from Chocolate Log Blog. Each month a different ingredient is chosen to be paired with some form of chocolate in our cooking. This month's choice of honey was made by Choclette, who will be posting a round-up at the end of the month.
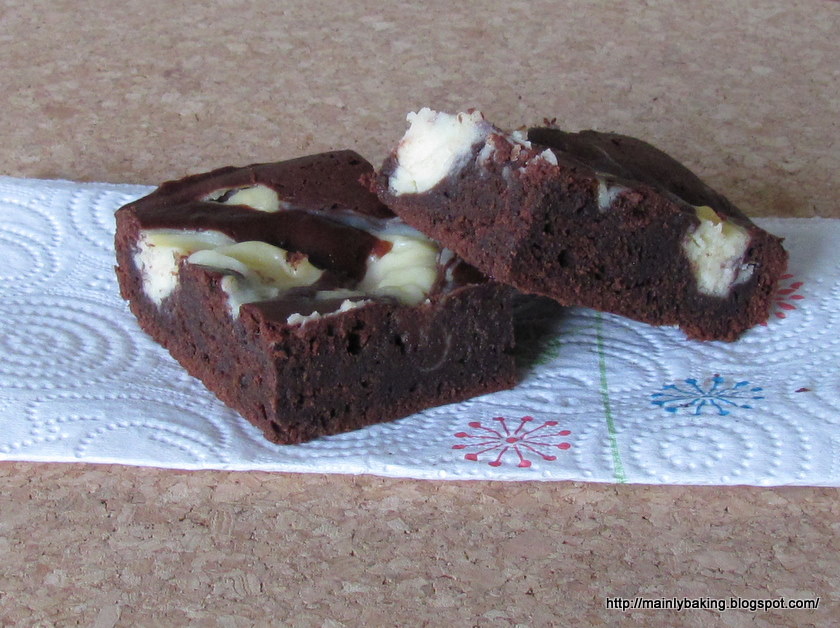
Saturday, 13 April 2013

Cherry Cheesecake Swirl Brownies

This was a recipe which didn't quite work, but which was so tasty that it will be worked on to achieve an improvement. The only problem was the brownie batter - I chose one of my favourite low saturated fat recipes which was too thin to support the weight of the cream cheese mixture and the blobs of morello cherry jam.

I've previously had success with making cheesecake swirl brownies using a brownie batter made with mayonnaise, but I didn't have enough mayonnaise in stock to use it this time. All I wanted to do was repeat this recipe adding some teaspoons of cherry jam swirled into the brownie mix with the cheesecake, but you can see from the second picture that although the cheesecake swirls weren't too bad, most of the jam sunk straight to the bottom of the tin, and sat in separate blobs after the brownies were cooked.

To be honest with you, the only way we could eat the brownies easily was to serve them upside down, and a lot of the jam had to be scraped off the non-stick baking paper and put back into the holes left in the baked brownies.

But they were delicious - the flavour of the rich, sweet cherry jam was stronger than the brownie flavour, but the plainer cheesecake swirls in the brownie helped balance the flavour and sweetness. Definitely a recipe worth working on, particularly as I know exactly what went wrong.

Thursday, 3 January 2013

Lime & Lemon Curd Ripple Cheesecake

I didn't intend to post about this cheesecake; it was a complete disaster on so many levels. a) it took ages longer to cook than the recipe suggested b) it cracked badly as it cooled c) the curd ripples weren't discernible within the cheesecake - only those on top could still be seen, and I used too much curd for them to look good and d) to cap it all, it broke in half while I was trying to plate it for presentation.

It did, however, have two redeeming features - it tasted fantastic and had a gorgeous texture. My sister said it was the best baked cheesecake she had tasted for years! This just about outweighed the problems, and made me decide to post about it.

So - this is the recipe, from Epicurious.

I used my usual crumb base - 200g crushed digestives and 100g melted butter - which from previous experience, is exactly the right amount for a 24cm springform tin. The amount in the recipe would have given a very sparse coverage.

I used 300g of citrus curd, from a batch made from the juice of 4 limes, the zest of one lime and the zest and juice of two lemons (100mls juice), 4 egg yolks and 1 whole egg, 150g butter and 150g sugar. This was slightly too much when divided as suggested by the recipe - the cheesecake needed less than half of this amount on top to have better defined swirls.

Other than those changes, I made the cheesecake mixture as per the recipe, using vanilla paste with seeds.

It took 90 minutes before the cheesecake got to the slightly wobbly in the centre stage, but by then the edges were very solid and puffed up, and the start of cracks could already be seen across the surface. These deepened as the cheesecake cooled. The cheesecake breaking was my own fault - I should have left it on the base of the springform pan, as I usually do.

As I said previously, the ripples of curd within the cheesecake had all but disappeared, but I think the butter and eggs in the curd was what added so much to the texture of the cheesecake - it was smooth, creamy and very rich without being heavy. The flavour was more of lemon than lime, but overall it was well balanced and not very tart - although I like sharp tasting lemon desserts, not everyone does!

I'm not sure I would make this recipe again, as I don't know what to do to correct the faults. The cooking time is an insurmountable problem - at 45 minutes the whole thing was still liquid! A longer cooking time causes cracks! Rippling the citrus curd didn't work well either, but I'm not sure just folding it in would have had the same effect.

Sunday, 3 June 2012

Vanilla Cheesecake

LOOK! No cracks!
This first picture isn't pretty, but I just had to prove that I made a cheesecake that didn't split open as it cooled - a rarity for me!

The recipe is a Gordon Ramsay one, which has only been published online in the Times, so is no longer available unless you are a subscriber. It's a fairly standard mix of cream cheese, sour cream, eggs, sugar and vanilla, on a digestive biscuit crumb base, and I originally chose it because it used the same amount of cream cheese (500g) and sour cream (300g) that I had leftover after Christmas baking one year! Add 200g sugar, 3 eggs, 2 tablespoons cornflour and a splash of vanilla extract, et voila! After an hour's baking at 150C, it is supposed to be golden brown on top, but I've never achieved that effect with this recipe - it stays pale and interesting.

Vanilla Cheesecake
In fact, after an hour the cheesecake is always still very wobbly, and usually I bake for a bit longer, but this time I decided to be more courageous and  switched off the oven. I left the cheesecake for 30 minutes in the closed oven, then ran a knife between the tin and the cheesecake to free it from the tin, and left it to cool completely in the oven with the door open slightly. I don't know if it was the shorter baking time, or freeing the cheesecake from the tin which stopped it cracking, but it's the first time I've made this particular recipe without the cracks appearing.

This is one of my favourite baked cheesecake recipes; the proportions of cream cheese, sour cream and eggs gives a lovely texture which isn't too heavy or claggy. The only criticism is that as a vanilla cheesecake, it's a little too sweet. Previously I've always made it as a lemon version, so hadn't really noticed how sweet it is, as the lemon has cut through the sugar.

Take your pick...
add strawberries, roasted rhubarb or chocolate sauce.
We have a variety of tastes in this family - CT eats hardly any fresh fruit, if he can avoid it, and is a chocoholic, while the rest of us like fruit, but don't always want the same fruit at the same time, or the same amounts of fruit in relation to cheesecake. To cater for everyone, I decided to leave the cheesecake plain, and offer strawberries, roast rhubarb or chocolate sauce as an accompaniment.

It's a long weekend, to celebrate the Queen's Diamond Jubilee, so we felt deserving of a more luxurious dessert than I usually make. CT and FB are enjoying extra time to relax away from work, and Hubs and I, being retired, are carrying on as usual. We're not exactly anti-royalists, but we're not really celebrating or taking part in any organised events either; I tried to come up with a red, white and blue dessert, to stay with the spirit of things, but the rest of the family told me not to bother - taste was more important than looks to them!

I've just realised that Vanilla Cheesecake could be a contender for this month's Alpha Bakes Challenge - bake something with a 'V' in the name or ingredients list - but I'll  hold it in reserve for the moment, as I'd like to find something more interesting than V for Vanilla.

Monday, 6 February 2012

Cheesecake Swirl Brownies

I think I've cracked the puzzle of how to make good looking Cheesecake Swirl Brownies. Previous attempts have foundered on the problem of how to get a quite thin cheesecake batter to stay in blobs on the surface of the brownie batter, and then be mixed into it in artistic swirls. The disparity between the thicknesses of the two mixtures makes this really difficult!


This time I got around the problem by putting only 3/4 of the brownie mx into the baking tin, then putting the cheesecake mix on top and allowing it to flow over the whole surface. Then the last of the brownie batter was added in 9 blobs and swirled into the cheesecake mix. This worked much better and allowed me to make some attractive looking swirls at my own pace, rather than struggling to control a cheesecake batter which just wants to run everywhere!


For the brownie part of the recipe I followed my favourite low saturated fat recipe from Good Food, for brownies made with mayonnaise. For the cheesecake part, I beat together 200g of full fat cream cheese, 50g caster sugar, 1 egg and a few drops of vanilla extract. I used a 20cm(8") square tin - slightly larger than specified in the recipe. Even with the extra cheesecake mixture, the brownies still cooked in 30 minutes.


I've been using this brownie recipe for so long now, that I've almost forgotten that I really prefer a denser chewier brownie. These taste quite rich and chocolatey, and have a lovely moist texture, but they are also quite light. However, in this case, that really suited the addition of the cheesecake mixture, as it is quite light too.


The addition of cream cheese makes these brownies little higher in in saturated fat than usual, but they are still low saturated fat in comparison to other cheesecake brownies.

Sunday, 1 January 2012

Marbled Chocolate Cheesecake

One last decadent dessert, before returning to my usual style of baking, with lowered saturated fat content. This was made to use up the cream cheese bought 'in case' before Christmas. I chose this recipe because it suited the amounts of cream cheese and sour cream I had in the fridge. One change I made was to use gingernut biscuits and 2 teaspoons of cocoa for the crumb crust, instead of the Australian biscuits specified. The other change was a mistake - I inadvertently picked up half-fat sour cream, which was a bit of a worry when I realised (as I was pouring it on top of the cream cheese!).

Chocolate wouldn't be my first choice for flavouring a cheesecake, but when I asked FB what she would like, chocolate is what she chose! I was considering a refreshing lemon, or even a tongue-tingling ginger, but it was not to be.

This is the first time I've made a cheesecake in a full crumb case, rather than just on a base, and I'm pleased at how well it turned out, although I only just built up the sides high enough. The crumb crust was very thin, and it wouldn't hurt to use a few more biscuits - another 50g, perhaps - but a thin crust is easy to cut and keeps the calories down a little.

Another thing I need to learn is to recognise the end-point when cooking a cheesecake. When I opened the oven door at 1 hour, the mixture was still very wobbly, and 7 minutes later it was still wobbling a lot! However, after another 5 minutes the cheesecake was solid, which inevitably lead to cracking as it cooled, so the mid-point is where I should have stopped cooking and turned off the heat.

This overcooking, and the use of half-fat sour cream, didn't seem to affect the texture too badly - the cheesecake was still soft and creamy, with enough chocolate to give it a good flavour.

Monday, 30 May 2011

Chocolate Swirl Cheesecake - Take 2

With the last bank holiday for a few months looking like being a long wet weekend, FB decided to spend a little time in MY Kitchen! I'm not sure how I feel about this; I don't like others in the kitchen when I'm cooking, and I certainly don't like Hubs leaning over my shoulder giving 'advice', when the last time he cooked was about 15 years ago! But FB can cook properly, and theoretically wouldn't need me around, once she had all tools and ingredients to hand. In the event it all went smoothly, with minimal input from me; she cleared up after herself properly, and in addition to other things, produced this gorgeous cheesecake for tonight's dessert.

I've made this Gordon Ramsay recipe before, but I had trouble swirling the chocolate topping, as the chocolate was too hot and liquid, as you can see here. FB works more slowly than me, and benefitted from my advice to melt the chocolate first and give it time to cool. By the time she was ready to add the chocolate to the top, it was thick enough to stay in place when piped, and she managed to make this beatiful spider's web design. In a slight change to the recipe, she used plain chocolate digestive biscuits for the base, to give an extra dimension of chocolate, and left out the almonds.

Once again, the cheesecake had a lovely clean flavour and light texture, while still tasting quite rich. It also didn't crack while cooling, cofirming it's status as my favourite baked cheesecake recipe!

In case the Times link ever disappears, I'm going to make a brief note  here of the filling ingredients and method - 600g cream cheese (full fat Philadelphia), 250mls sour cream, 2 eggs, 150g caster sugar, 1 teaspoon vanilla extract. Beat everything together and pour onto a 23cm base, bake at 140C for 30-35 minutes. Cool in switched off oven, then chill.

Monday, 31 January 2011

Black Bottom Cupcakes

I'm more excited about my new plate than I am about these cupcakes. Do you like it? I'm always on the look-out for pretty plates for my photographs but I don't very often see individual plates - even the charity shops usually sell sets, or part sets, which they don't want to split. So I was quite excited to find this Doulton tea plate from the 1930s, looking forlorn on a shelf, surrounded by unrelated bric-a-brac - not a matching cup in sight! I just couldn't leave it there, could I?

The cupcakes are a different matter. One look at the online recipe and photograph will pinpoint the main problem - the recipe says scoop out the cheesecake mixture; mine was pourable! In consequence, instead of the chocolate sponge rising round the cheesecake blob, the cheesecake spread over the top, and looked like a frosting when baked. The recipe is from the Hummingbird Bakery Cookbook, and it's the second recipe I've tried which has been disappointing.

The second potential problem, for me, was that the chocolate sponge base was one of those eggless mixtures, raised by the action of bicarbonate of soda on vinegar. I didn't realise this until I'd reached a point of no turning back, and I was quite worried, as the last time I made one of this type of cake it was so awful we had to throw it away! Happily, this batter rose nicely and didn't taste too bad - just a few random air-pockets to spoil a photograph!

Like Choclette, I had a problem with the consistency of the chocolate batter and had to add more water - about 30mls, which is quite a lot extra on 125mls. I also didn't bother with the frosting - it doesn't  really fit in with lowering the fat content of things!

Although CT was happy to eat these, Hubs didn't like them, and I don't think I'll be making them again - or not from this recipe at least. I still like the idea of these, but would like to find a recipe which works better, and a reason why my cheesecake mixture turned liquid.


Saturday, 1 January 2011

Chocolate Swirl Cheesecake

Hooray! I've baked a cheesecake which didn't crack as it cooled. I used the cheesecake mixture from this Gordon Ramsay recipe, although I made my own biscuit crumb base from 150g crushed HobNob biscuits and 60g unsalted butter, which I chilled instead of baking.

The cheesecake took 45 minutes to cook, but the difference might have been because I poured the mixture into a chilled tin, which wouldn't have happened if I'd baked the base, as in the original recipe. It still looked quite wobbly at that stage, but I often overcook cheesecakes, so decided to risk it and switch off the oven! It was the right decision - the cooled and chilled cheesecake had a really good texture - light and creamy without that mouth-gumming texture that some baked cheesecakes have.

As you can see from the photo, there wasn't much swirling of the chocolate - 75g  of melted chocolate almost covered the surface, and however much I tried I couldn't get it to swirl into the cheesecake mixture - it stayed stubbornly on the surface. It might have been better to mix the chocolate with some of the cheesecake mixture, but that would probably alter the texture of the cheesecake, which I wouldn't want to do. Perhaps the chocolate was still too warm and liquid - if it was cooler and thicker it might not have spread so far, and allowed a more swirly effect to be achieved.

Wednesday, 1 December 2010

Cheesecake Brownies

What is the point of a recipe which leaves a single egg white lurking forgotten in the fridge? I can understand a recipe using say, 6 egg yolks - at least then you have a decent amount of whites to use up in a different recipe. But one egg white hangs around until you finally throw it out three days later, or find it at the back of the freezer a year later, along with all the other single egg whites you froze, intending to use eventually. By then, they are so old that you still throw them out!

It was this annoyance which made me adjust the quantities of ingredients in David Lebovitz's recipe for Cheesecake Brownies, to incorporate what would be a leftover egg white (from the cheesecake mix) into the brownie batter. It worked really well too! The unintended change to the recipe was finding the packet of chocolate chips still under my oven gloves, while I was clearing up!! I chose this particular recipe because David Lebovitz uses metric measurements as well as cups, in his recipes. There are plenty of other Cheesecake Brownie recipes around - all very similar.

So, this is how I made Cheesecake Brownies

For the Brownie batter:
90g unsalted butter
125g dark chocolate - I used 75g of 85% chocolate and 50g of 72% chocolate
140g caster sugar
2 whole large eggs plus one egg white
80g plain flour
2 tablespoons cocoa
1 teaspoon vanilla extract
1/8 teaspoon salt
For the Cheesecake mixture:
200g cream cheese, at room temperature
1 large egg yolk
75g caster sugar
a few drops vanilla extract

Method
Line a 8"(20cm) square cake pan with baking parchment. Pre-heat oven to 180C.
Melt the chocolate and butter in a large bowl, over a pan of simmering water, then beat in the sugar, followed by the eggs.
Fold in the flour, cocoa, vanilla extract and salt. Transfer the batter to the prepared tin. (The original recipe added 80g of chocolate chips to the batter.)
Beat together all the cheesecake ingredients until smooth.
Spoon the cheesecake mixture, in 9 blobs, onto the brownie batter. Use a blunt knife to swirl the cheesecake into the chocolate mix.
Bake for around 35 minutes, until the centre is just set. Cool in tin, then cut into portions - I cut into 12 generous pieces.

This looked really alarming when it came out of the oven, as the cheesecake mixture had risen well above the surface of the brownie. Fortunately, everything settled down to the same level as it cooled. There were one or two cracks in the surface where the cheesecake and brownie should have fused together, but nothing too disastrous. The brownie had a smooth fudgy texture and the cheesecake mixture added a clean, almost lemony flavour, to the brownie - a great contrast to the rich brownie. I'm not sure they really needed the chocolate chips!

Naughty, naughty - no eating and drinking at the computer!