Showing posts with label coconut oil. Show all posts

Sunday, 11 February 2018

Coconut Cake

Dairy-free

I was tidying my box of baking supplies when I noticed that I had three packs of desiccated coconut - must have been on special offer at some point. They were still within the 'best-before' date, but obviously something had to be done to reduce the coconut mountain before time did run out.

I decided make a plain coconut cake and to use coconut oil, to make it dairy-free. I could have added dried cherries, dried apricots or chocolate chips, all of which are good in combination with coconut, but sometimes something simple really fits the bill!

Ingredients
175g SR flour
40g desiccated coconut
80g coconut oil
80 - 100g caster sugar*
2 medium eggs
1 teaspoon vanilla extract
water to mix

*(I used 80g, but thought the cake needed to be sweeter)


Method
Pre-heat the oven to 180C and line a 450ml (1lb) loaf tin, either with baking parchment, or a loaf tin liner.
Put the flour, coconut oil, desiccated coconut and sugar into a large bowl and use a fork to cut in the oil, until it is in very small pieces. (This recipe originally used butter and the rubbing-in method, but you can't really rub-in coconut oil by hand, although it should be OK if you're using a food processor).
Add the eggs and vanilla extract, and mix with a spoon until the batter is smooth, adding water as necessary to give a dropping consistency.
Transfer the batter to the baking tin, level the surface and bake in the centre of the oven for 60 minutes, or until a test probe comes out cleanly.


Friday, 25 November 2016

Coconut, Apricot and Cranberry Cake

This was a small loaf cake, quickly put together from storecupboard ingredients. I used coconut oil, but a slightly larger quantity of butter could be used instead.

Ingredients
200g SR flour
40g desiccated coconut
100g caster sugar
100g coconut oil (or 115g butter, cut into small cubes)
1 large egg
60g dried cranberries
60g dried apricots, chopped into pieces of similar size to the cranberries
about 100mls semi-skimmed milk to mix

Method
Preheat the oven to 180C and line a small 1lb/450g) loaf tin.
Put the flour into a large bowl. Cut in the coconut oil with a table knife or a fork, until the coconut oil is in very small pieces and well mixed in (if using butter, rub in as if making pastry).
Add the desiccated coconut, sugar and dried fruit.
Mix in the egg and enough milk to make a fairly stiff batter.
Transfer the batter to the loaf tin, level the surface and sprinkle with a tablespoon of demerara sugar,
Bake for about 60 minutes, until golden and firm, and a test probe comes out dry.

Cranberries and apricots is one of my favourite combinations of dried fruit, and the coconut flavour in the cake worked well with this pairing. It's sheer bad luck that the slice of cake I took for the photograph shows such a weird uneven distribution of the two fruits at that point; it wasn't like that right through the cake!

Sunday, 23 October 2016

Blackberry and Coconut Crumble Cake

This cake is based on this recipe, although I made a few minor changes along the way. For a start, I didn't have enough butter in the house, so I decided to use coconut oil instead. As I reduced the amount of fat used in the recipe, to compensate for coconut oil being 100% fat, I thought I would need more liquid in the cake batter, but I only needed about half the volume of milk suggested in the recipe (and a couple of tablespoons of rum), to give a good dropping consistency. If I'd used the amount of liquid originally suggested, I'm not sure the blackberries would have stayed on the surface.

These are the ingredients I used to make the sponge base, which was spread into a 22cm springform tin: 160g coconut oil, 170g caster sugar, 2 large eggs, 1 teaspoon vanilla paste, 2 tablespoons rum, 150g SR flour, 150g plain flour, enough milk to give a dropping consistency (about 100mls). On top of this I spread 230g blackberries in a single layer, then topped with a crumble mix made from 75g plain flour, 50g butter, 55g light muscovado sugar and 45g desiccated coconut. This was baked at 180C for 85 minutes, covered with foil after an hour.

I wasn't expecting a light sponge, as there was double the amount of flour to fat and sugar, and half of it was plain flour, but this really was a dense cake! It was very tasty though, as it wasn't over-sweet and the tang of the blackberries was still evident. The coconut in the crumble added a good flavour and texture, and it was nice to use blackberries with something other than apples.

Because of the denseness of the sponge, this would probably have been better as a warm dessert, with custard, as suggested. I think if I made it again as a cake, I would use all SR flour to try to make it a little lighter.

Saturday, 4 June 2016

Chocolate-topped Coconut Flapjack

When this recipe, for Bounty Flapjacks, popped up on my Facebook page, I was instantly smitten. As I have a reliable recipe of my own for flapjacks, I decided to adapt that, rather than follow She Who Bakes' recipe, but I want to acknowledge where the idea came from!

Ingredients
100g butter
60g coconut oil
100g light muscovado sugar
70g golden syrup
240g porridge oats
70g desiccated coconut

Topping - 150g plain chocolate and extra desiccated coconut (about 25g) for sprinkling

Method
Preheat the oven to 180C and line a shallow 20cm (8") square baking tin with baking parchment.

In a large bowl, in the microwave, melt the butter, coconut oil, sugar and syrup together and stir until the the mixture is smooth. It doesn't need to get to boiling point, just hot enough to dissolve the sugar. Alternatively use a saucepan on the hob.

Stir in the oats and coconut and mix well to coat everything in the butter mix. Spread evenly in the baking tin and press down firmly. Bake for 25 minutes, until just beginning to colour.

While the flapjack is cooking, finely chop the chocolate. Remove the cooked flapjack from the oven and turn off the heat. Sprinkle the chocolate fairly evenly over the oat base and pop back into the oven for 5 minutes. After this time, spread the melted chocolate right to the edges of the flapjack, with a spatula or the back of a spoon and sprinkle heavily with desiccated coconut.

I usually cut my flapjacks into squares while still warm, and did the same this time, but that meant the chocolate topping dribbled down the sides of the squares a little. I wasn't sure how well the flapjack would cut when cold, and was also worried that the chocolate would crack in the wrong place if I left it until set, but that meant I didn't get the clean looking squares that are shown with She Who Bakes recipe!

Once cut, the flapjack needs to be left until the chocolate has set before removing from the baking tin - this can take a surprisingly long time!

These were delicious! I wouldn't go so far as to call them Bounty Flapjacks as the chewy, oat-packed flapjack, with it's typical caramel-like flavour from the butter and brown sugar is more dominant than the Bounty Bar characteristics, but the combination of plain chocolate and coconut is always a winner with me, and adding it to flapjack is a brilliant idea.

Wednesday, 16 March 2016

Lemon, Coconut and Cherry Loaf Cake

 - dairy-free!

Butter was on my shopping list; it's not my fault I forgot to pick it up - my husband distracted me by asking if we needed any cheese. By the time I'd explained, as I do every week, that if I needed something, it would be on my list, we had moved away from the butter shelf!

So, I would need to bake a cake with oil. As I also needed a cake to enter into this month's AlphaBakes challenge, which is the letter C, I decided to make a coconut cake, using both desiccated coconut and coconut oil. For added flavour, I decided to use a lemon that was languishing in the fridge, and some dried cherries which were near the 'best-before' date.

Ingredients
100g dried cherries, roughly chopped
2 tablespoons Kirsch (optional)
150g SR flour
1/2 teaspoon baking powder
75g desiccated coconut
200g caster sugar
160g coconut oil
zest of 1 lemon
3 large eggs
lemon juice, as required

Method
Soak the cherries in the Kirsch, if using, for a few hours beforehand, if you are organised enough. If you haven't got much time, or don't want to use alcohol,  soak the cherries in boiling water for a few minutes, then drain well.
Line a 900g (2lb) loaf tin with baking parchment and pre-heat oven to 180C.
Mix the flour, baking powder and desiccated coconut.
Beat the coconut oil, caster sugar and lemon zest until well blended.
Add the eggs one at a time, with a spoonful of the flour mixture, and beat in slowly.
Fold in the rest of the flour mixture, the cherries, and enough lemon juice to give a soft dropping consistency - I only needed a tablespoon of extra liquid.
Transfer the batter to the loaf tin, level the top and bake for about 60 minutes, until a test probe comes out dry and clean. If necessary, cover the cake after 30 minutes to prevent over-browning.
Cool in the tin for 20 minutes, then transfer the cake to a wire rack to finish cooling.

As the cake rose with a fairly flat top, I decided to turn it upside down and top with a lemon glacé icing made with a icing sugar and some of the leftover lemon juice.

You can see from the photos that the cherries sank to the bottom of the cake. To try to prevent this, I should have tossed them with a little of the measured flour. As I had turned the cake upside down to serve, this didn't look as bad as it could have done, but it was a stupid mistake to make! Fortunately it didn't affect the flavour, which was a good balance between the lemon, coconut and cherries. The texture was moist but a little heavy - I think it might have been better to beat the eggs and sugar together, then warm the oil slightly, to add it as a liquid.

AlphaBakes is a monthly challenge co-hosted by Caroline Makes and The More Than Occasional Baker. The idea is to bake something with a randomly chosen letter of the alphabet as the initial letter of either a major ingredient, or the name of the recipe. This month the host is Ros at TMTOB, and the letter chosen is C - in this case there's a double dose of Coconut and Cherries.

PS - this is my 600th blog post. How typical that it should be about something that wasn't entirely successful!

Wednesday, 21 October 2015

Date and Walnut Sponge Pudding

Dairy-free and gluten-free

The recipe I adapted for this gluten- and dairy-free  dessert calls itself a healthier version of a sticky toffee pudding. It comes from the Hemsley sisters who are well known for healthy eating recipes and I found it on the Vogue website. That's not a website that I would think to look at for recipes but it came up in a Google search for recipes using coconut flour.

While I'm all for healthy eating, that wasn't the aspect of the recipe that really interested me. What I wanted was a gluten-free recipe that could be adapted to be dairy-free as well. In this recipe the flour is replaced by ground almonds and coconut flour. The recipe also cuts out added refined sugar, relying on just the dates for natural sweetness. I wasn't convinced this would be sweet enough for those more used to normal puddings, so I added 75g of light muscovado sugar. I replaced the butter with coconut oil and added 75g chopped walnuts for texture and flavour (and also so that this dessert could be my contribution to this month's AlphaBakes challenge).

Ingredients
250g dried dates, roughly chopped*
1 1/4 teaspoons bicarbonate of soda
200ml boiling water
100g coconut oil
75g light muscovado sugar
3 eggs (mine happened to be large)
200g ground almonds
pinch of ground cloves
20g coconut flour
75g walnut pieces

* I used a semi-dry date which was still quite moist and sticky. I cut each date crossways into three pieces with scissors - this ensures there are no pits left in any of them.

Method
(I don't have a large food processor, so adapted the method in the original recipe to use a hand (stick) blender.)
Soak the dates in the boiling water and bicarbonate of soda for 10 minutes. While still warm, use a hand blender to purée the dates, and their liquid, with the coconut oil. If you can leave a few pieces of dates in the mixture it gives more texture to the pudding, so don't blend too much.
Transfer the date mixture to a large bowl and stir in the sugar, then beat in the eggs, one at a time.
Stir in the ground almonds and cloves, then sift over the coconut flour and fold in quickly. Lastly, fold in the walnut pieces.
Transfer to a baking dish (I used one roughly 20cm square), greased with coconut oil, and bake at 170C for around 45 minutes, until firm. You might need to cover the pudding towards the end of the cooking time, if it's getting too dark.
Cut into portions to serve while still warm - it should serve 8-12 people depending on appetite.

The resulting dessert was delicious but not really dark and sticky enough to call itself a 'sticky toffee' pudding in my opinion, so I've just called it a sponge pudding. It was surprisingly light, considering it was just raised by the bicarbonate of soda. Adding 75g of sugar seemed to make the pudding just about right to me, in terms of sweetness, so I'm not sure how enjoyable the original version would have been. However, it's certainly worth a try if so-called 'sugar-free' baking appeals to you - but remember that dried fruit such as dates contain a lot of natural sugar, so you're not cutting out all sugar!

Adding the walnuts, and leaving some pieces of dates in the blended mixture made the texture of the pudding more interesting - the walnuts added crunch and the pieces of dates added bursts of sweet caramel flavour. If you don't like nuts, adding some plumped up raisins or sultanas would keep some textural variations - I would soak them in orange juice or something similar, so that they didn't absorb too much moisture from the cake batter, as coconut flour needs all the moisture it can get to avoid making things really dry and stodgy. I didn't make the suggested sauce to serve with the dessert, as I needed to stay dairy-free, but it was very good with a little maple syrup poured over it, and served with natural yogurt.


AlphaBakes is a monthly challenge hosted by Caroline, at Caroline Makes, and Ros, at The More Than Occasional Baker. The idea of the challenge is to use a randomly chosen letter of the alphabet as the first letter of a prominent ingredient, or a word in the name of the dish made. This month, Caroline is the host, the letter is W, and I used Walnuts.

Friday, 7 August 2015

Baking with Coconut Flour: 3 - More Brownies

Although I was pleased enough with the previous batch of brownies I made with coconut flour, they were a little on the cakey side, rather than dense and chewy. The brownies I usually make are dense and chewy - my definition of a perfect brownie - so I wanted to see if I could adapt that recipe to use coconut flour.

My usual recipe contains both melted chocolate and cocoa for great depth of flavour, and butter. I decided to make my trial recipe dairy-free, as well as using the gluten-free coconut flour. To achieve this I used coconut oil rather than a vegetable oil. Although it is a more saturated fat, I like the results of using coconut oil better than using vegetable oils - it's similar to the results when baking with butter.

I was working mainly on instinct, combined with my limited experience of cooking with coconut flour, as well as what I'd read about baking with coconut flour. This is how I changed the recipe:

Original:                                                                   Coconut flour recipe:
140g plain chocolate (around 70%)                            140g plain chocolate
140g butter                                                                100g coconut oil
300g light muscovado sugar                                       300g light muscovado sugar
2 teaspoons vanilla extract                                        2 teaspoons vanilla extract
3 large eggs                                                               4 large eggs
160g plain flour                                                         40g coconut flour
3 tablespoons cocoa                                                  3 tablespoons cocoa

(If it's important that the recipe is completely dairy-free, then remember to check the ingredients in the chocolate that you choose.)

In both cases the method was the same - melt the chocolate and fat together, stir in the sugar and vanilla extract, then beat the eggs in, one at a time. Sift in the flour and cocoa, and fold into the wet mixture. Spread into a 8 x 8" square tin, lined with baking parchment, and bake at 180C. The original recipe takes 30-35 minutes to bake, depending on how gooey you like your brownies, but the coconut flour brownies were cooked in 25 minutes.  Cut into bars or squares while still warm but cool completely before removing from tin.

I was really pleased with these  brownies. Using melted chocolate and more sugar made the brownies moister and more chewy (less cakey) than the first recipe, as I'd hoped, although they were still quite light. I think this lightness is a feature of any baking with coconut flour as you need so little compared with wheat flour. The use of coconut oil, as well as coconut flour, added a touch more coconut to the flavour, but nothing too overwhelming.

What made it more pleasing to adapt my own recipe successfully was that only a few days previously I'd tried an online recipe for chocolate chip bars with coconut flour and had produced something so disastrous that it had to be thrown away - and things have to be really awful before I bin them, as I'm reluctant to waste food if it's at all edible!

Wednesday, 1 July 2015

Baking with Coconut Flour: 1 - Blueberry Coconut Cake

Coconut flour seems to be a fashionable ingredient at the moment. It is popular with those eating a Paleo diet, as they avoid any type of grain, so have considerable difficulties when it comes to needing flour for baking. It is also gluten-free, but it's cost would probably rule it out as the sole alternative to grains containing gluten for most coeliacs. Those on a Paleo diet are usually doing so because they fear modern diets are harming our health. I'm sceptical about these sort of claims, and think the new breed of 'well-being' bloggers and cooks could do more harm than good if others follow their restrictive diets, but it's not a point I want to argue about here.

I was asked to try coconut flour by Nuts.com, and was interested in taking up their challenge to try it in my baking because I've already tried, and liked, coconut oil and sugar. It was the gluten-free aspect of the flour that most interested me, as I do need to bake gluten-free goodies occasionally.

When I looked into coconut flour more closely, it seemed a very interesting product - lower in carbohydrates, higher in fibre and protein than wheat flour, as well as being gluten-free, and containing several important vitamins and minerals. This appears to make it a more nourishing ingredient to use than wheat flour, although, because it is extremely absorbent, much less of it is needed when baking, compared to flours from grains and pulses.

This absorbency presents problems when baking, as coconut flour can't be substituted weight for weight for other flours - less than half is typically needed in most recipes. Additionally, recipes advise increasing the number of eggs used (doubling the usual number seems popular), although some use oils and syrups instead of solid fats and sugars, as well as extra liquid. The main advice is to initially use recipes specifically written for coconut flour, rather than trying to adapt your own favourite recipes, until you are more familiar with how it works. This is fine, if you can find a trusted source of recipes - they aren't exactly mainstream; Paleo recipes often use ingredients that I just wouldn't want to put in my baking! Coconut flour is also extremely expensive compared to wheat flour - I paid £6.99 for 500g of Tiana coconut flour in Holland and Barrett - so I didn't want too many failures when trying recipes, even if the recipe uses only 50g! It is, however cheaper than ground nuts, which I tend to use a lot, and in larger quantities, in gluten-free baking.

The first recipe which appealed to me was a blueberry and coconut cake from the Great British Chefs website, devised by Victoria Glass. I liked the look of this because it didn't seem too extreme - it used basic white sugar, a reasonable number of eggs (I found one chocolate cake recipe which used 12!) and made a product which looked comparable to 'normal' cakes, even though it was both gluten- and dairy-free. I tried not to deviate too far from the recipe, although I did add a little vanilla extract, and only had 150g of blueberries.

This cake worked out very well - it was  moist but surprisingly light, and tasted strongly of coconut, which wasn't surprising in a cake containing coconut three ways - flour, oil and desiccated. The texture of the cake wasn't any different to cakes made with grain flours, so I don't think anyone would notice that it was made with such an unusual ingredient. Despite the number of eggs used, I didn't find the flavour or texture 'over-eggy' which is a complaint about some coconut flour recipes.

The very fact that the cake was so coconutty made me want to try the flour  in a recipe where the coconut flavour isn't really needed, such as a chocolate cake or brownies. The search for a suitable recipe for one of those is ongoing - the recipes I've found so far are either too 'paleo' or add other coconut products to make sure there's a strong coconut flavour.

I don't think coconut flour is likely to become one of my 'everyday' baking ingredients, but I can see that it will be useful for gluten-free baking, and that it might appeal to those who feel guilty about eating cakes and other baked goods, and want to make them a little more nutritious.

If you are interested in trying coconut flour, here's a few links to nutritional and baking guides that I found useful. Note that I'm not endorsing any health claims written therein - I don't have the expertise to either agree with or challenge them - you'll have to make up your own mind!

Retailers:
Nuts.com
Tiana-coconut.com
Sukrin Coconut Flour

Blogs:
All Day I Dream About Food
Nourished Kitchen
Elana's Pantry

Disclaimer  - Although Nuts.com asked me to try coconut flour, I have received nothing from them as an inducement to either endorse their product, or give a favourable review of coconut flour in general. All opinions expressed are my own.

Monday, 9 February 2015

Chocolate Brownies with Coconut and Matcha Cream Cheese Swirl

When the theme of this month's We Should Cocoa challenge was set, by Katie at Recipe for Perfection, to be brownies, I thought I'd better rise to the occasion and do something out of the ordinary. I wanted something which would both look and taste different to a plain brownie. Don't get me wrong - there's not much that can beat the best dense, fudgy, rich, sweet, chocolate-laden brownie for flavour, but if you've made and photographed as many brown squares as I have over the years, you want to make something which will stand out in a baking challenge.

And nothing stands out as much as something green, when it comes to cake! Blue and green are supposed to be the worst food colours to use, to persuade people to eat something, particularly if the food is unfamiliar, or it's an unexpected colour to be used in that context.  Whereas green used to suggest only mint flavour, today it's just as likely to be green tea (matcha) providing the flavour, as with these brownies.

Once I'd decided to use green tea, which pairs very well with dark chocolate, it was difficult to decide on what other flavour to add, if any. I like citrus flavours with green tea, but not in brownies, and ginger might have worked well, but my last cake was a ginger cake. I think I must dream about food, even if I don't remember these dreams, because I woke up one morning thinking of coconut. I hadn't a clue whether the two flavours would work well together, but it seemed worth the risk! To make the green tea stand out against the dark chocolate, it became clear that adding both it and the coconut to a cream cheese swirl was the best way forward.

I used the coconut cream cheese swirl from this recipe, adding a tablespoon of matcha powder. The amount of add depends on the strength of the matcha used - mine doesn't seem especially strong, from previous experience. (I used a 200g pack of full-fat cream cheese and 40g desiccated coconut as a conversion of 1/2 cup.) I decided to adapt my favourite brownie recipe, an 'old-faithful' that I've been using for more than 10 years, although it's hardly recognisable in this form. I made 2/3 of a batch and decided the time was right to try reducing the amount of sugar in the recipe, from 400g to 300g. I used coconut oil instead of butter, and also decided that 2 eggs plus an egg white was a near enough equivalent of 2/3 of 4 eggs (to avoid waste)!

Ingredients - cream cheese layer
200g full fat cream cheese, at room temperature
50g caster sugar
1 large egg yolk
1 teaspoon vanilla extract
40g desiccated coconut
1 tablespoon matcha (green tea powder)

 - brownie layer
140g coconut oil
140g 70% plain chocolate
300g  light muscovado sugar
1 teaspoon vanilla extract
2 large eggs plus one egg white
160g plain flour
3 tablespoons cocoa

Method
Line a 20cm (8") square baking tray, with baking parchment and pre-heat oven to 180C.
In a medium bowl, beat together all the ingredients for the cream cheese swirl, until smooth.
Put the coconut oil and chocolate into a large bowl, and melt together over a pan of simmering water. Remove from the heat and add the sugar and vanilla, stirring until well mixed and smooth.
Beat in the whole eggs and the egg white, one at a time.
Sift in the flour and cocoa and fold in.

Spread 3/4 of the brownie batter into the prepared tin, then top with the cream cheese mixture, which should spread almost to the edges of the tin. Put blobs (7-9) of the remaining brownie batter over the surface, then use the end of a teaspoon, or something similar to swirl the batter into the cream cheese layer below.

Bake for 40-45 minutes until an inserted probe comes out with just a few damp crumbs sticking to it. Cool in the tin, then cut into 16 pieces.

I think these brownies were a great success; they looked attractive, without the green colour being too lurid and off-putting, and the sweet coconut and cream cheese balanced out the sometimes bitter edge of the matcha flavour well. The brownies were dense and fudgy, with a slight taste of coconut from the oil.

We Should Cocoa (rules here) is a chocolate baking challenge started by Choclette at Chocolate Log Blog. She shares her hosting duties with other chocolate-loving bloggers, and this month has handed over to Katie, at Recipe for Perfection, who has chose brownies as the theme, and will post a round-up of entries at the end of the month.


Sunday, 7 December 2014

Pineapple Mincemeat Tart

with coconut crumble topping.

I might have gone a step too far here, in a bid to make something different for Christmas, but at least I've tried it out on just the two of us, rather than jumping straight in and making it for guests.

It started with the idea that a crumble topping would speed up the process of making a large quantity of mince pies - half the rolling out, less fiddle with putting tops and bottoms together etc. Then I thought about the fact that I usually add extra apples, oranges or cranberries to bought mincemeat to make it less sweet and a more personal recipe. Adding  chopped nuts to the crumble topping would add an interesting texture too. While I was playing around with ideas, I remembered the fresh pineapple which needed eating - why not try a tropical variation of a mince pie, with pineapple in the mincemeat and coconut in the topping?

I decided to try out the concept in one big tart, rather than fiddle about with individual pies - mainly for speed of getting things done. The base was basic shortcrust pastry with no sweetening, used to line a shallow 22cm diameter flan tin. The filling was 250g mincemeat, 150g of finely chopped fresh pineapple and a teaspoon of ground rice (to absorb any excess fruit juice), spread straight onto the raw pastry. The topping was a crumble mix made by rubbing 50g coconut oil into a mix of 50g plain flour, 50g porridge oats and 35g caster sugar. I intended to add desiccated coconut to the topping, but only had flaked coconut available, so tried to break the flakes up a little as I added 25g to the crumble mix. This was sprinkled evenly over the tart filling. 

I baked the tart for 20 minutes at 200C, then lowered the temperature to 180C and baked for another 20 minutes, covering the tart loosely when I lowered the temperature, as the coconut flakes were browning too quickly.

Although I liked the coconut in the crumble topping, I didn't think the pineapple added enough flavour to be worth using - it was overwhelmed by the spices in the mincemeat. I could just have easily have added a chopped apple for the same result, which was to give the mincemeat a fresher, more tart flavour, but not a noticeably pineapple one. So, I'll  be sticking to more traditional ingredients when it's time for Christmas baking, but I will be using a crumble topping in some form this year.

I've just noticed that this is my 500th blog post - I suppose that's a good enough time as any to be a little experimental!

Sunday, 9 November 2014

Gooseberry Crumble

 I'm a great believer in seasonal eating, but it's getting ever more difficult to stick to  eating just what is traditionally in season. Growing crops in poly tunnels means that even British fruit such as raspberries are available for 9 months of the year, and that's before you even consider imports from abroad. Another factor is the use of the freezer to preserve fruit and vegetables. Rather than throw away excess from a glut, or eat it for weeks ad nauseam, it can often be frozen for out of season use.

This is what happens to my gooseberries and green beans, most years; I know our forbearers bottled fruit and salted beans, but some of the original freshness was missing when these were used. If you choose your fruit well, there is no loss of quality on thawing and cooking - blackberries, gooseberries and plums in particular freeze well, but rhubarb is less successful in my opinion, so that is still a truly seasonal fruit for me. Consequently, however much I might like to stick to seasonal fruit in Autumn and Winter desserts, there are always these fruits calling to me from the freezer .

You don't really want a recipe for fruit crumble - I'm sure you all have your favourite recipes - but I thought it was worth noting that I made a successful gluten- and dairy-free crumble using a proprietary brand of gluten-free flour and pure oats (labelled as wheat, dairy and gluten free), and coconut oil instead of butter.

I used my usual recipe of 100g each of flour, oats, fat and sugar (caster in this case) to make 4-6 portions. I rub the fat into all the other ingredients, which seems to give a better texture after baking. When I'm using coconut oil, I chill the crumble mixture for 30 minutes before putting it on the fruit and baking; I do this because I was worried about the coconut oil becoming too liquid while being rubbed in (even though I handled it a little as possible to get it more or less rubbed in), and wanted to keep the effect of using a solid fat.

If I'm using a fruit which I expect to make a lot of juice when it cooks, such as gooseberries or rhubarb, as well as sweetening it, I add just a level teaspoon of ground rice for every 300g fruit. This seems to thicken the juices perfectly, without adding any unwanted flavour, and with not much change in texture. Beware of using too much though - ground rice absorbs much more liquid than other thickeners such as flour or ground almonds.

I was really pleased that the texture and flavour of the gluten- and dairy-free crumble were comparable to my usual recipe, and I was really pleased with the 'free-from' oats, from Sainsbury's, which were a lot sturdier than the usual 'value' rolled oats I use. They gave a slightly crisper finish to the baked crumble, but of course, I did pay a price premium for them!

Thursday, 14 August 2014

Pineapple Upside-down Cake

with coconut and lime sponge.

I only wanted a small dessert, for the two of us, so the sponge layer was a two-egg all-in-one mixture. As the coconut oil was fairly liquid, this could easily be made with just a spoon and bowl - no need to get out any electric appliance:

100g coconut oil
100g caster sugar
90g SR flour
50g desiccated coconut
2 large eggs
zest of 1 lime.

I used a metal non-stick pie dish, as I thought the sloping sides might look quite attractive on the inverted cake. I creamed together 50g unsalted butter, 20g golden syrup and 30g light muscovado sugar and spread this in the base of the tin to make the traditional sticky topping. On top of this I then arranged slices of cored fresh pineapple  - about 1cm thick. I put a whole slice in the centre, but had to halve the other three slices to get them to fit into the dish. Into the spaces left in the arrangement of pineapple slices I put some glacé cherry halves.

I spread the cake batter gently over the fruit, so that it wasn't dislodged, and then the cake was baked for about 35 minutes at 180C until the sponge was firm and golden. After cooling for 10 minutes the cake was turned out onto a plate to finish cooling, revealing the neat pattern of pineapple slices.

The mix of pineapple with coconut and lime gave a nice tropical flavour to this dessert, and made a pleasant change from the traditional plain sponge base. Although I used fresh pineapple, once the fruit was cooked it didn't seem very different from using tinned pineapple in the same way, so don't think that fresh fruit is really essential.

I'm entering this cake into this month's AlphaBakes Challenge (rules here), a blog challenge co-hosted by Caroline Makes and The More Than Occasional BakerThis month the challenge is hosted by Caroline, at Caroline Makes, who has chosen the letter P. In this case, P is for pineapple, obviously!

Sunday, 6 July 2014

Rhubarb Shortbread Bars

With Coconut Flapjack Topping

After a slow start this year, my rhubarb has started producing stalks again - it's keeping us in occasional desserts while I wait impatiently for my gooseberries to ripen. The usual midweek dessert is just cooked fruit with natural yogurt, but the weekends are always a little more relaxed as far as calorific treats are concerned.

This recipe was devised with two of the regular baking challenges I enter in mind. This month's AlphaBakes challenge is the letter R (and I make no apologies for using rhubarb again, it's that time of year!) and the Tea Time Treats challenge is to make flapjacks and traybakes.

The base was made by rubbing 80g unsalted butter into 200g plain flour and 40g caster sugar, and pressing the crumbs into the base of an 8" square tin, lined with baking parchment. I made a small raised edge in case the fruit produced a lot of juice, and baked the base for 15 minutes at 190C. Although I've used this shortbread base before, in the same sized tin, it didn't work as well this time, and was a little fragile - I'm guessing the topping held it together better last time. I think I needed a thicker base with more butter to bind it - something with the more classic shortbread proportions of fat to flour.

When the shortbread was cooked I sprinkled two tablespoons of ground rice evenly over the surface - I find this excellent at absorbing excess juice when raw fruit is used in this sort of baking. I then topped this with 350g rhubarb, diced into cubes of  0.5-1.0cm in size. Practically speaking, this meant splitting two large rhubarb stalks in quarters, lengthways, then chopping each length into 0.5cm pieces.

The topping was made by heating together 60g coconut oil and 60g coconut flower nectar (a low GI alternative to beet and cane sugar) until the oil had melted, then stirring in 100g of porridge oats and 20g desiccated coconut. This was sprinkled carefully over the fruit to give an even layer and then the whole thing was returned to the oven for a further 30 minutes at 180C, until the fruit was soft and the topping a golden brown colour. The traybake was cooled in the tin before cutting into portions.

Apart from the fragile base, I really liked these bars. The sweet and sticky flapjack topping was balanced nicely by the tart fruit and the crisp shortbread. I had worried that the fruit might need sweetening, but the balance between the layers was just right. The addition of coconut to the topping added an extra flavour element that worked surprisingly well - I don't think I've ever tried rhubarb with coconut before!


AlphaBakes (see the rules here) is hosted alternately by Caroline Makes and The More Than Occasional Baker, who is running this month's challenge. Tea Time Treats (see the rules here) is hosted alternately by Lavender and Lovage and The Hedge Combers, who is running this month's challenge. Both hosts post a round-up of entries to each challenge at the end of the month.


Thursday, 26 June 2014

Coconut Cake with Apricots and Cherries...........

made using Cocofina coconut flower nectar.

I was determined to use some of the coconut flower nectar that I received from Cocofina in a cake, but I didn't have much luck finding a recipe for anything I liked the look of. Most people seem to use it for 'health' reasons, and the resulting recipes are correspondingly specialised, often containing seeds, odd grains and lots of raw ingredients that I just don't keep in stock.

OK - maybe coconut flower nectar does have a low GI, but it has a similar amount of calories to any other form of sugar, so it's not exactly the 'guilt-free' eating that some people like to portray. I just wanted to find out how it reacted to baking and what it tasted like in a cake. In the end, I had a brainwave and started looking for cake recipes made with honey. Even then I had difficulties; so many recipes - even those called honey cakes - used a tiny proportion of honey and the usual amount of refined sugar. Same thing when I looked at maple syrup recipes (maple syrup has a similar viscosity to coconut flower nectar). What I wanted was a recipe where the only form of sugar was honey.

Eventually I stumbled across this US site, the National Honey Board, which had a huge recipe section. I found this recipe for Apricot Honey Bread, which served as the starting point for my recipe, although I made quite a few changes. The biggest alteration was reducing the sweetener (honey) by 1/3, as 300g not only sounded a huge amount, it would use up almost all my supply of coconut flower nectar.

Ingredients
250g spelt flour
100g plain white flour
3 teaspoons baking powder
1/2 teaspoon bicarbonate of soda
1/2 teaspoon salt
zest of half an orange
300mls semi-skimmed milk
200g coconut flower nectar (or honey)
2 tablespoons coconut oil (or vegetable oil)
1 large egg, beaten
120g dried apricots, chopped
100g naturally coloured glacé cherries, halved, rinsed and tossed with a tablespoon of the measured flour
75g desiccated coconut.

Method
Prepare a suitable baking tin (I used a 2lb loaf tin which was almost too small - I think an 8"(20cm) square deep cake tin might have been a better size). Pre-heat the oven to 180C.

Mix the flours, baking powder, bicarbonate of soda, salt and orange zest in a large bowl.
In another bowl whisk together the milk, coconut flower nectar, egg and oil; add this to the flour mix and blend until just combined - don't over-mix. Finally fold in the dried apricots, glacé cherries and desiccated coconut.

Transfer to the baking tin and bake for 50-60 minutes, or until a test probe comes out clean. Cover the cake after 40 minutes if it seems to be browning too quickly. Cool in the tin for 20 minutes before turning out onto a wire rack.

I was really pleased with this cake - although quite sturdy, it had a lighter texture than I expected, and was much more moist too. With such a small amount of fat, and only one egg, as well as using a liquid sugar, I was expecting it to have a much heavier texture.

The flavours of coconut, apricots and cherries complimented each other well, with just a hint of citrus from the orange zest. Reducing the amount of sweetener didn't seem to have a detrimental effect, either. Unfortunately, I think the delicious flavour of the coconut flower nectar was masked by all the other flavours, although it's hard to tell without making the same cake with ordinary sugar and tasting them side by side.

It's good to know that coconut flower nectar can be successfully used in baking, but it's so difficult to find suitable recipes, and adapting recipes can be such a hit-or-miss experience that I doubt I will use it again unless a liquid sweetener is needed in the original recipe. If you are adapting your diet to use less refined sugar, then coconut nectar, with it's low GI, is definitely a good substitute, but for me, it's best used in simpler things such as sweetening cooked fruits or drizzling over natural yogurt (a truly delicious instant dessert!). It's also quite expensive, which is another reason for not using so much in one go - used sparingly in situations where it's flavour comes through means it will go a lot further and probably still do as much good in the long run.

Sunday, 8 June 2014

Cocofina coconut oil makes........

Chocolate Chip and Pistachio Brownies

Although I looked extensively online for recipes using coconut oil, many of them seemed to concentrate on the health aspects of using it instead of other fats, and some seemed very worthy indeed - full of seeds, strange grains and elusive raw ingredients. What I wanted to do was to use it to make something I was familiar with, for a good comparison, so in the end it seemed sensible to use a recipe that I already had

I adapted the recipe I usually use, for brownies made with oil, to make these brownies with coconut oil. Although coconut oil is solid at room temperature, I was trying to compare it's use against the oils I usually use in baking, so it seemed better to use an oil-based recipe rather than a butter-based one.

I decided to reduce the number of eggs in the recipe from 3 to 2, on the, perhaps spurious, basis that the more solid coconut oil would make the brownies firmer than when liquid oil was used, so a third egg was unnecessary.

Ingredients
150g plain (70%+) chocolate
100g coconut oil
2 large eggs
130g caster sugar
100g dark muscovado sugar
1 teaspoon vanilla extract
105g plain flour
75g milk chocolate, chopped coarsely
30g chopped pistachios

Method
Prepare an 8" square baking tin, and pre-heat the oven to 180C.
Melt the coconut oil and chocolate together, over a pan of simmering water.
In a large bowl, beat the eggs, sugar and vanilla together for about 5 minutes.
Fold in the chocolate mixture, followed by the flour and then the chopped chocolate and nuts.
Transfer to the baking tin and cook for 25 minutes until just firm but not too dry.
Cool in the tin before cutting into portions of the desired size.

I was really pleased with these brownies - they were as rich and fudgy as those made with butter and kept really well too. Baking with oil can seem OK when you know you have to do it for dietary needs, but you do lose some of the richness of both texture and flavour that you get from butter. Coconut oil gave back some of this to this particular recipe, hopefully it will work as well in other recipes too. However, coconut oil isn't tasteless, and it's flavour comes through more than the flavour of even a distinctive olive oil. This isn't a problem occasionally, but if every cake tastes of coconut, then I'm sure we'll soon be fed up with it and want a change.

One area where I do think coconut oil will be an advantage is on the few occasions I need to cook something dairy-free for a friend; she is a good cook herself and really loves her food and although she has adapted to a dairy-free diet well, she really misses rich cakes and desserts. With coconut oil I should be able to make some real treats for her, if it works as well as it has in this recipe.

If you haven't done so already, please read my review of other Cocofina products and enter the give-away at the end of the review.

Disclaimer: Although Cocofina provided the coconut oil free of charge, I was under no obligation to write a positive review. All opinions expressed are my own.

Friday, 6 June 2014

Cocofina Products Review and a Give-away

Cocofina has been around as a company producing coconut water since 2005, so they can hardly be accused of jumping on the latest bandwagon promoting coconut products, such as oil and sugar, as healthier alternatives to 'mass market' oils and sugars. In fact, their website only makes a few health claims for it's oil and flower nectar, buried deep within the site, and the main selling point for the coconut water is that it is isotonic, making it a refreshing drink, suitable for post exercise rehydration. Since the company's beginning, Cocofina's range of products has increased to include oil, flower nectar, snack bars and three varieties of fruit-flavoured water.

When I was contacted by Cocofina, to see if I would be interested in reviewing their products, I asked to try the things I could use when cooking, such as the oil and flower nectar, so that I could write a review that fitted in with the main theme of my blog - baking. Along with these two products I received a bottle of coconut water and some organic snack bars, which are made from only raisins, dates, coconut and oats (or cocoa and cocoa nibs, depending on the variety of bar). These bars contain around 145 calories and Cocofina suggests they are eaten as a pre-workout snack.

While I was waiting for my samples to arrive, I researched the health claims for coconut products. Both the oil and flower nectar are expensive, so I hoped there would be some real benefits from using them in place of  the wide range of fats and sugars already available for cooking.

Frankly, the information available on potential health benefits is very confusing. Most claims are made by producers or retailers, and don't seem to me to be backed up by large scale medical-standard trials. For every website proclaiming the benefits, there is one refuting those claims.  There are even contradicting statements about whether or not production of nectar is harmful in the long-term, rather than a sustainable source of coconut products, as it's argued that bleeding the flowers for sap prevents the palm tree from ever producing coconuts. I certainly don't feel confident about recommending any particular online reading to you - if you are interested in finding out more, any web-search will give you plenty of sites to choose from.

From my extensive reading I gleaned these main points, which seem to me to be quite relevant:

#Coconut flower nectar has a low GI, which means the energy it contains is released slowly and doesn't play havoc with blood sugar levels. This makes it better to use than cane or beet sugar, maple syrup or honey.

#Although there are claims that coconut oil can play a part in lowering cholesterol levels, it has to be remembered that it is one of the most saturated of all the cooking oils on the market - it is solid at room temperatures below 25C.

#Coconut oil may have natural antibiotic properties - many people use it, in addition to regular dental hygiene, to keep their mouth and gums healthy.

When it came to using the products, I obviously had to try the flavours of the oil and flower nectar first. The oil, despite being solid at room temperature, has a very light feel in the mouth, and disappears quickly with no greasy residue; it tastes only slightly of coconut. It is also absorbed quickly into the skin, if you were to use it for cosmetic or toiletry purposes. I've already made a batch of brownies using the coconut oil, which I will be writing about in a separate post. All I'll say here is that I was very impressed with the results, which were as good a brownies made with butter. My first impression is that coconut oil makes a much better substitute for butter than other oils, for dairy-free or vegan cooking. The background flavour of coconut might be considered a downside - however much you like coconut, you don't want everything you make to taste of it!

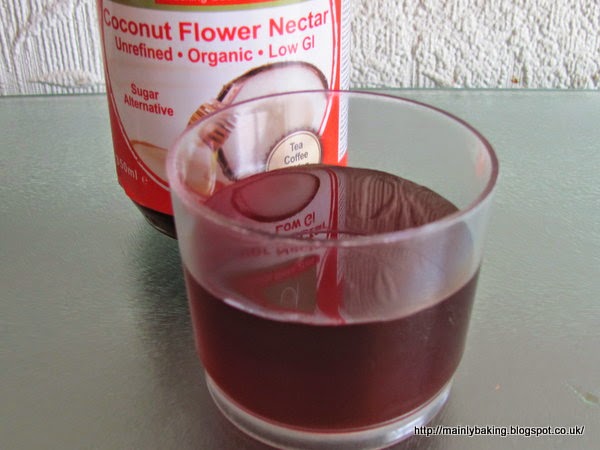
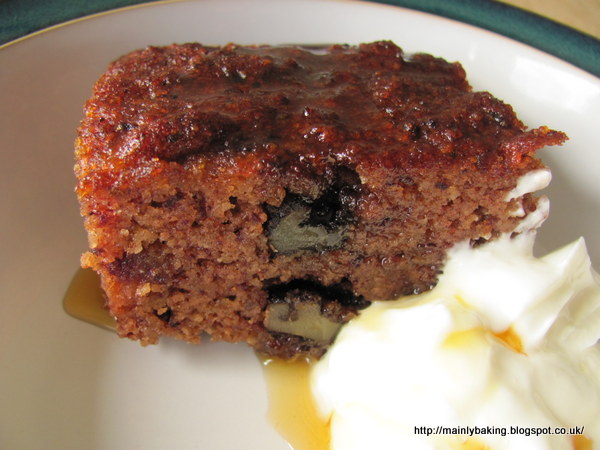
The coconut flower nectar has a dark caramel colour and a consistency similar to maple syrup. The flavour is hard to describe - I thought it tasted like a strong honey with a touch of molasses. The strong flavour may make it an acquired taste for some people, but I can see if being a good substitute for honey in baking recipes. I'll be looking for recipes to try soon. Cocofina recommends it for sweetening drinks, baking, cooking and even spreading (on hot toast, presumably!). I drizzled a teaspoon of nectar over a dish of natural yogurt, to sweeten it a little, and it was delicious.

I have to admit that I didn't like the coconut water on it's own; the 4.7% natural sugars present made it too sweet for my taste, but it did taste good when used to dilute pomegranate molasses or lime cordial to make a refreshing fruit flavoured drink.

The snack bars were delicious and made an almost guilt-free snack for someone perpetually worried about calorie intake. Around 145 calories of almost 100% fruit/coconut, with no added sugars, also made a good midday 'meal' on days when I was fasting on the 5:2 diet - a nice change from a bowl of salad!

This brings me to the 'give-away'. Cocofina have offered a case of 24 delicious Organic Coconut and Date Snack Bars to one of my UK-based readers. To be included in the draw for the prize, I'd like you to leave a comment telling me your favourite culinary use, or recipe, for any coconut product, including good old-fashioned desiccated coconut. Please leave an email address, or other means of contact, in your comment so that I can get in touch if you are the winner. The winner will be randomly picked on 20th July.

Disclaimer - although I was approached by Cocofina and asked to review their products, they have not exerted any influence over what I have written; all opinions expressed are my own.

THIS DRAW IS NOW CLOSED!

The winner is Debbie Costley aka Busybee - congratulations. Please get in touch via my email address here, or see my PM on Wildfood.