Every time I need a lemon I fall into the trap of buying a bag of them - partly because unwaxed lemons don't seem to be sold singly, and partly because each lemon works out cheaper.
However, if I don't use the lemons fairly quickly, it's a false economy, but that's not difficult to do as I love a lemon cake.
Dan Lepard calls this recipe a lemon drizzle cake, but whenever I make it the drizzle sets to a proper glacé icing. This doesn't bother me, as I don't like too much drizzle, but I don't feel happy calling it a drizzle cake, either.
This recipe really is delicious; there's the zest of 2 lemons and 75mls of juice to make it really lemony. Additionally, ground almonds keeps the cake moist and the addition of a little cornflour keeps the crumb really tender and delicate.
I don't deviate from the recipe in any way, but after adding up the weight of the ingredients, I bake it in a 2lb (900g) loaf tin, even though the recipe suggests a small tin should be used.
I'm still using the whole almonds, which were ground with the skins on (which explains the speckly appearance of the cake).
Monday, 18 November 2019
Saturday, 2 November 2019
Cherry Cheesecake Brownies
I've made these Cherry Cheesecake Brownies once before; an attempt which was delicious, but not altogether successful, because the cherry jam sank through the (reduced fat) brownie batter, and ended up in pools on the liner of the baking tin.
This time I went back to my favourite brownie recipe, made with butter. It's the one I've been using for more than 20 years, with a small reduction in sugar being the only modification I've made to the recipe in that time.
This time the recipe worked perfectly! The swirls of tart cherry jam balanced the sweetness of the cheesecake and both were a good contrast to the dense, chewy brownie.
Which makes it all the more annoying that I didn't get any photographs before some of the brownies were eaten, and the rest distributed between my children, for them to take home after dinner. I was left with this one portion for myself - a remarkable feat of restraint on my part!
Ingredients
Brownies: 140g butter
140g plain chocolate - about 70% cocoa solids
300g light muscovado sugar
1 teaspoon vanilla extract
3 large eggs
160g plain flour
3 tablespoons cocoa
Cheesecake: 180g full fat cream cheese
50g caster sugar
1 large egg
1/2 teaspoon vanilla extract
Plus: 125g cherry jam
Method
Line a 20cm(8") square baking tin with baking parchment. Pre-heat oven to 180C/160C fan.
To make the brownie batter: Melt together the butter and chocolate in a large bowl, over a pan of simmering water. Cool to around 40C if necessary (so that the eggs don't start to cook) then mix in the sugar and vanilla extract, followed by the eggs, one at a time. Finally sift in the flour and cocoa, and fold in until thoroughly mixed. Put 3/4 of this batter into the baking tin, reserving the rest for the swirls in the topping.
For the topping: Beat together the cream cheese, caster sugar, vanilla extract and egg until smooth. It will be quite runny. Pour this over the brownie layer in the baking tin. Dot the cherry jam over the surface, about a teaspoon at a time, then do the same with the reserved brownie batter, putting the blobs between the areas of jam. Use the handle of a teaspoon, or something like a chopstick, to swirl the jam and brownie batter blobs into the cheesecake mixture - you get a better pattern if you swirl deep enough to get into the lower brownie layer just a bit.
Bake for 40 minutes until just firm, then cool in the pan before cutting into the desired sizes. I cut into 16 squares, but less greedy people might prefer smaller bars.
This time I went back to my favourite brownie recipe, made with butter. It's the one I've been using for more than 20 years, with a small reduction in sugar being the only modification I've made to the recipe in that time.This time the recipe worked perfectly! The swirls of tart cherry jam balanced the sweetness of the cheesecake and both were a good contrast to the dense, chewy brownie.
Which makes it all the more annoying that I didn't get any photographs before some of the brownies were eaten, and the rest distributed between my children, for them to take home after dinner. I was left with this one portion for myself - a remarkable feat of restraint on my part!
Ingredients
Brownies: 140g butter
140g plain chocolate - about 70% cocoa solids
300g light muscovado sugar
1 teaspoon vanilla extract
3 large eggs
160g plain flour
3 tablespoons cocoa
Cheesecake: 180g full fat cream cheese
50g caster sugar
1 large egg
1/2 teaspoon vanilla extract
Plus: 125g cherry jam
Method
Line a 20cm(8") square baking tin with baking parchment. Pre-heat oven to 180C/160C fan.
To make the brownie batter: Melt together the butter and chocolate in a large bowl, over a pan of simmering water. Cool to around 40C if necessary (so that the eggs don't start to cook) then mix in the sugar and vanilla extract, followed by the eggs, one at a time. Finally sift in the flour and cocoa, and fold in until thoroughly mixed. Put 3/4 of this batter into the baking tin, reserving the rest for the swirls in the topping.
For the topping: Beat together the cream cheese, caster sugar, vanilla extract and egg until smooth. It will be quite runny. Pour this over the brownie layer in the baking tin. Dot the cherry jam over the surface, about a teaspoon at a time, then do the same with the reserved brownie batter, putting the blobs between the areas of jam. Use the handle of a teaspoon, or something like a chopstick, to swirl the jam and brownie batter blobs into the cheesecake mixture - you get a better pattern if you swirl deep enough to get into the lower brownie layer just a bit.
Bake for 40 minutes until just firm, then cool in the pan before cutting into the desired sizes. I cut into 16 squares, but less greedy people might prefer smaller bars.
Labels:
brownies/blondies,
cheesecake,
cherry jam,
chocolate,
cream cheese
Tuesday, 15 October 2019
'Pastry Scraps' Oat Biscuits
- with cranberries and hazelnuts.
I always err on the side of caution when making pastry, having been caught out several times trying to stretch the amount quoted in a recipe further than it wants to go. Perhaps I just can't roll it as thin as a professional pastry chef, but I'd rather have a bit more than I need, than dough which has to be stretched to fit the tin, then shrinks unevenly when baked, or even worse, tears as you try to move it.
And since I found this recipe for using leftover pastry I don't have to worry about waste either (although I usually rolled out any scraps, baked them and then crumbled for wild bird food).
I had 200g of leftover shortcrust pastry, so added 200g of rolled oats, 100g butter, 100g of light muscovado sugar and half a teaspoon cinnamon. I left everything in a large bowl to allow the pastry to warm up a bit from the fridge, then kneaded everything together until no trace of any lumps of pastry could be seen. Then I mixed in 35g chopped toasted hazelnuts and 35g of dried cranberries which had been chopped into smaller pieces.
After rolling out the dough, I used a 6cm cutter to cut out circles, then baked at 180C for about 15 minutes - a little longer than suggested in the recipe.
This recipe makes great biscuits which are not too sweet, but the sugar can be left out altogether to make savoury oat biscuits. I imagine that you could add dried herbs or seeds to flavour savoury biscuits but I haven't tried that yet.
I always err on the side of caution when making pastry, having been caught out several times trying to stretch the amount quoted in a recipe further than it wants to go. Perhaps I just can't roll it as thin as a professional pastry chef, but I'd rather have a bit more than I need, than dough which has to be stretched to fit the tin, then shrinks unevenly when baked, or even worse, tears as you try to move it.And since I found this recipe for using leftover pastry I don't have to worry about waste either (although I usually rolled out any scraps, baked them and then crumbled for wild bird food).
I had 200g of leftover shortcrust pastry, so added 200g of rolled oats, 100g butter, 100g of light muscovado sugar and half a teaspoon cinnamon. I left everything in a large bowl to allow the pastry to warm up a bit from the fridge, then kneaded everything together until no trace of any lumps of pastry could be seen. Then I mixed in 35g chopped toasted hazelnuts and 35g of dried cranberries which had been chopped into smaller pieces.
After rolling out the dough, I used a 6cm cutter to cut out circles, then baked at 180C for about 15 minutes - a little longer than suggested in the recipe.
This recipe makes great biscuits which are not too sweet, but the sugar can be left out altogether to make savoury oat biscuits. I imagine that you could add dried herbs or seeds to flavour savoury biscuits but I haven't tried that yet.
Tuesday, 1 October 2019
Autumn Fruit Frangipane Tarts
It's a measure of how little baking I do these days, that it's over three weeks since I last posted. When I do bake anything, however small, half of it usually ends up in the freezer, meaning there's always cake there if needed, but as a result I don't need to bake as often. My waistline doesn't need cake every day, either!
When making this tart I realised that I hadn't made any pastry since the festive baking at the end of 2018 - an indication that calorific desserts are also becoming something for special occasions; I usually just have fresh fruit and yogurt!
These Autumn Fruit Frangipane Tarts had plum jam in the base and fresh blackberries and pieces of eating apple embedded in the frangipane mixture. I made two small tarts instead of one big one, as I was taking one to my local Cake Club. The frangipane comes from this Jamie Oliver recipe, but I made half as much again, after seeing the amount the original ingredients gave.
I made sweet shortcrust pastry to this recipe, but this made enough for the two tart cases with quite a lot leftover: 300g plain flour, 1/2 teaspoon baking powder, 150g butter, 50g icing sugar, 1 medium egg, water as necessary to bind. If you reduce the quantities you could use just an egg yolk instead of a whole egg.
Once the pastry is mixed, rest in the fridge for 20 minutes, then roll out as thinly as possible to line 2 x 20cm (8") tart tins (or one 23cm tin if you're following the recipe). Refrigerate again while you make the filling - there's no need to blind bake with a frangipane.
Preheat the oven to 180C (160 fan) and put a baking sheet in to heat up too.
Put all the frangipane ingredients into a bowl and beat until well combined. I added just a few drops of almond extract, to give a better flavour, instead of the lemon zest in the recipe. Then prepare the fruit.
(I used one large eating apple, which I peeled and chopped into quite thin pieces, about 1cm square, and put into acidulated water so that the pieces didn't turn brown. I also used fresh blackberries, as I was worried that frozen would release too much juice and spoil the colour of the frangipane - I didn't weigh the amount I used but the quantity give in Jamie's recipe sounds about right.)
Spread a couple of tablespoons of plum jam (or whatever red jam you prefer) into the base of each pastry case. Divide the frangipane mixture between the two tarts, working from the edge inwards, and trying to get a good seal between the frangipane and the pastry, so that the jam doesn't boil out around the edge. Spread evenly and then dot the drained and dried apple pieces and blackberries over the surface, pressing down gently to embed them in the frangipane. Sprinkle over a handful of flaked almonds, then a little extra caster sugar.
Transfer to the heated baking sheet and bake for about 45 minutes until the frangipane is a good golden colour and feels firm. Cool on a wire rack.
I decorated the tart which I was taking to Cake Club with a drizzle of glacé icing, but it's not really necessary, and the icing soon dissolved where it was in contact with the pieces of fruit, so didn't really give the desired effect by the time it was eaten.
Adding fruit to a frangipane tart is a tasty bonus, although in this case the plum jam had a stronger flavour than the apples and blackberries - I should have looked for a blackberry jam, I think.
My tart looks darker than most frangipane because I was using almonds which had been ground with the skins still on; the jury is still out on whether this really gives a good look.
When making this tart I realised that I hadn't made any pastry since the festive baking at the end of 2018 - an indication that calorific desserts are also becoming something for special occasions; I usually just have fresh fruit and yogurt!
These Autumn Fruit Frangipane Tarts had plum jam in the base and fresh blackberries and pieces of eating apple embedded in the frangipane mixture. I made two small tarts instead of one big one, as I was taking one to my local Cake Club. The frangipane comes from this Jamie Oliver recipe, but I made half as much again, after seeing the amount the original ingredients gave.
I made sweet shortcrust pastry to this recipe, but this made enough for the two tart cases with quite a lot leftover: 300g plain flour, 1/2 teaspoon baking powder, 150g butter, 50g icing sugar, 1 medium egg, water as necessary to bind. If you reduce the quantities you could use just an egg yolk instead of a whole egg.
Once the pastry is mixed, rest in the fridge for 20 minutes, then roll out as thinly as possible to line 2 x 20cm (8") tart tins (or one 23cm tin if you're following the recipe). Refrigerate again while you make the filling - there's no need to blind bake with a frangipane.
Preheat the oven to 180C (160 fan) and put a baking sheet in to heat up too.
Put all the frangipane ingredients into a bowl and beat until well combined. I added just a few drops of almond extract, to give a better flavour, instead of the lemon zest in the recipe. Then prepare the fruit.
(I used one large eating apple, which I peeled and chopped into quite thin pieces, about 1cm square, and put into acidulated water so that the pieces didn't turn brown. I also used fresh blackberries, as I was worried that frozen would release too much juice and spoil the colour of the frangipane - I didn't weigh the amount I used but the quantity give in Jamie's recipe sounds about right.)Spread a couple of tablespoons of plum jam (or whatever red jam you prefer) into the base of each pastry case. Divide the frangipane mixture between the two tarts, working from the edge inwards, and trying to get a good seal between the frangipane and the pastry, so that the jam doesn't boil out around the edge. Spread evenly and then dot the drained and dried apple pieces and blackberries over the surface, pressing down gently to embed them in the frangipane. Sprinkle over a handful of flaked almonds, then a little extra caster sugar.
Transfer to the heated baking sheet and bake for about 45 minutes until the frangipane is a good golden colour and feels firm. Cool on a wire rack.
I decorated the tart which I was taking to Cake Club with a drizzle of glacé icing, but it's not really necessary, and the icing soon dissolved where it was in contact with the pieces of fruit, so didn't really give the desired effect by the time it was eaten.Adding fruit to a frangipane tart is a tasty bonus, although in this case the plum jam had a stronger flavour than the apples and blackberries - I should have looked for a blackberry jam, I think.
My tart looks darker than most frangipane because I was using almonds which had been ground with the skins still on; the jury is still out on whether this really gives a good look.
Monday, 9 September 2019
Date and Ginger Flapjacks
Another roll out of an old favourite - flapjacks are really quick to mix and bake so are ideal for occasions when you don't have much time, or just want to make something from store-cupboard ingredients. I think I overdid the ginger here, so the flavour of the dates didn't come through strongly, but their chewiness added to the texture. The recipe is really simple, and can be made in one bowl or saucepan, depending on how you want to melt the butter, syrup and sugar together.
As long as you don't exceed 150g, you can use any combination of dried fruit, nuts or seeds that you have in stock, or know you family likes, adding appropriate spices or other flavouring, such as citrus zest.
For a 20cm (8") square tin, melt together 160g butter, 70g of golden syrup and 100g of light muscovado sugar. I do this in a large bowl in the microwave, but it can also be done in a saucepan on the hob. When all the butter has melted add in 240g porridge oats, 2 teaspoons ground ginger, 1/2 teaspoon of ground cinnamon, 80g of chopped dates and 50g crystallised or glacé ginger, both chopped quite finely. Mix until well combined then transfer to the baking tin, which should be lined with baking parchment. Press down firmly to give an even layer, then bake at 180C for about 25 minutes, to give a chewy flapjack. If you like a slightly crisper finish, bake for a few minutes longer. Cool in the tin for 5 minutes, then mark into bars or squares, but leave in the tin until completely cold.
As long as you don't exceed 150g, you can use any combination of dried fruit, nuts or seeds that you have in stock, or know you family likes, adding appropriate spices or other flavouring, such as citrus zest.
For a 20cm (8") square tin, melt together 160g butter, 70g of golden syrup and 100g of light muscovado sugar. I do this in a large bowl in the microwave, but it can also be done in a saucepan on the hob. When all the butter has melted add in 240g porridge oats, 2 teaspoons ground ginger, 1/2 teaspoon of ground cinnamon, 80g of chopped dates and 50g crystallised or glacé ginger, both chopped quite finely. Mix until well combined then transfer to the baking tin, which should be lined with baking parchment. Press down firmly to give an even layer, then bake at 180C for about 25 minutes, to give a chewy flapjack. If you like a slightly crisper finish, bake for a few minutes longer. Cool in the tin for 5 minutes, then mark into bars or squares, but leave in the tin until completely cold.
Labels:
biscuits and bars,
crystallised ginger,
dates,
oats,
spices
Thursday, 22 August 2019
Marmalade Shortbread Squares
I was tempted by a jar of marmalade in one of our local independent delicatessens - blood orange, lime and chilli - but was quite disappointed when I tried it.
The fruit content wasn't very high (I know I should have checked before buying, but for what I paid I expected more) and the peel had been diced rather than shredded. On top of that the chilli flavour wasn't really noticeable either. However, it was too expensive to waste, so I decided to incorporate it into one of my favourite cookie bar recipes.
These shortbread squares are as near perfection as it's possible to get, I think. They are buttery, melt-in-the-mouth crumbly, yet still crisp (and they stay crisp, even after several days, which is quite a feat with a moist filling).
The original recipe is from Sue Lawrence's 'On Baking' , and used a filling of dates and currants cooked with ginger, honey and lemon juice to give a thick pulpy filling. I kept the shortbread layers exactly as they are in the recipe, and used 250g of marmalade for the filling.
Ingredients
170g SR flour
170g semolina
170g butter
85g caster sugar
250g marmalade of choice
Method
Pre-heat the oven to 190C (170C fan), and line a 20cm square baking tin with a piece of baking parchment.
Put the flour and semolina into a bowl. Warm the butter and sugar together in a small saucepan until the butter has melted and the sugar is dissolved. Pour onto the flour mixture and combine thoroughly to give a wet sticky dough.
Warm the marmalade slightly, so that it is spreadable (I put it in a small bowl in the microwave, for just a few seconds).
Put 2/3 of the dough into the baking tin and spread evenly over the base, pressing down firmly. Spread over the marmalade, leaving a 1cm margin around the edges.
Crumble the rest of the dough over the top, aiming for a fairly even distribution, and press down lightly just to make sure it sticks. There won't be enough to completely cover the surface but that doesn't matter - it will spread as it bakes, and a few gaps look attractive anyway.
Bake for 25 minutes, by which time it should be golden brown. Cut into squares immediately, but leave in the tin to get completely cold before removing - the shortbreads are too fragile to move while warm.
These were delicious! This shortbread recipe isn't over-sweet, so the biscuit layers were a nice contrast to the amount of sugar in the marmalade. The marmalade, although heavy in sugar, also had a pleasing sharpness to it's flavour so the whole thing was nicely balanced.
The possible variations on this recipe are as wide as your imagination - I've used jam, mincemeat, chocolate spread (with and without added caramel) other dried fruits (chopped and cooked with a little liquid until soft and pulpy) and have added chopped nuts and marzipan to the top layer of shortbread. I haven't tried fresh fruit yet - I think many fruits would be too wet for the shortbread to stay crisp, but pre-cooked and drained apples or pears might work.
Wednesday, 7 August 2019
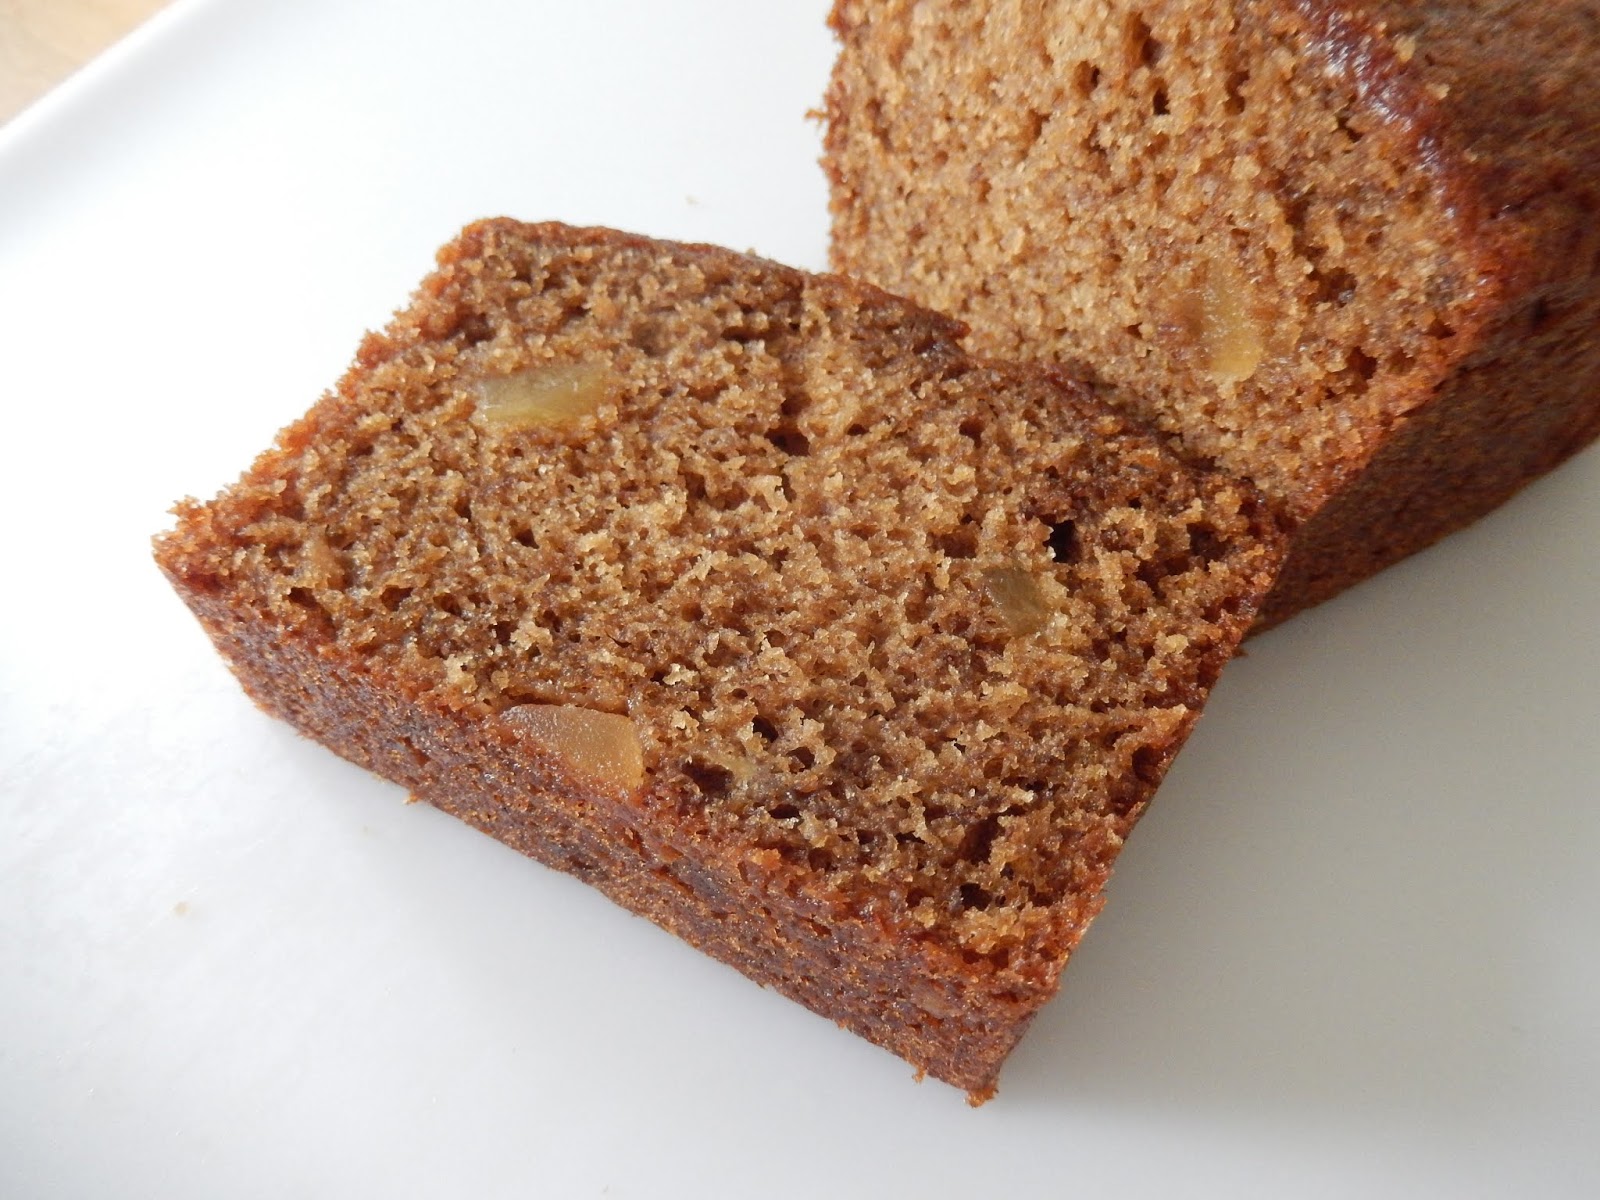
Dark Banana Ginger Cake
I feel as if I should apologise for three consecutive posts featuring loaves, but they are so practical now that I'm only baking for myself. Even with a small loaf cake, I often freeze part of it - mainly to save my waistline, not because I couldn't eat it all. Loaf shaped cakes are easy to portion and stack tidily in the freezer. In this case, I was able to bake this full-sized recipe (the second on the page) from the ever reliable Dan Lepard, but split it between two small loaf tins rather than bake it as one large 20cm (8") square cake. The cooking time for the smaller loaves was still 50 minutes.
I made a few changes to the recipe, some of which seemed inconsequential to how well the recipe worked - I used white bread flour, crystallised ginger instead of glacé, and added some ground spices to the recipe (1 teaspoon ginger and 1/2 teaspoon mixed spice). The final change was a bit more worrying - I only had two large bananas, which I was reasonably sure would weigh enough, but when the peel was off there was only 200g of flesh, not the 300g asked for in the recipe.
It was too late to back out at that stage so I went ahead, wondering if I needed to add anything to replace the missing 100g of banana. If the batter had been really thick, I might have added a tablespoon or two of natural yogurt, but it was very liquid, so I decided to go ahead with nothing else added. I noticed afterwards that Dan says in the introduction to the recipe that the bran in wholemeal flour soaks up the liquid from the mashed banana, so maybe losing the bran and using less banana cancelled each other out!
I really liked this cake, it was firm and close textured but not heavy, and it still smelled and tasted of banana. I think adding a little extra spice was a good idea as even though I was using fiery crystallised ginger pieces it was nice to have some spice flavour in the cake crumb too.
I made a few changes to the recipe, some of which seemed inconsequential to how well the recipe worked - I used white bread flour, crystallised ginger instead of glacé, and added some ground spices to the recipe (1 teaspoon ginger and 1/2 teaspoon mixed spice). The final change was a bit more worrying - I only had two large bananas, which I was reasonably sure would weigh enough, but when the peel was off there was only 200g of flesh, not the 300g asked for in the recipe.
It was too late to back out at that stage so I went ahead, wondering if I needed to add anything to replace the missing 100g of banana. If the batter had been really thick, I might have added a tablespoon or two of natural yogurt, but it was very liquid, so I decided to go ahead with nothing else added. I noticed afterwards that Dan says in the introduction to the recipe that the bran in wholemeal flour soaks up the liquid from the mashed banana, so maybe losing the bran and using less banana cancelled each other out!I really liked this cake, it was firm and close textured but not heavy, and it still smelled and tasted of banana. I think adding a little extra spice was a good idea as even though I was using fiery crystallised ginger pieces it was nice to have some spice flavour in the cake crumb too.
Labels:
banana,
cake,
crystallised ginger,
Dan Lepard,
spices,
strong bread flour
Subscribe to:
Posts (Atom)