Tuesday 30 July 2013

Rhubarb and Orange Oat Bars

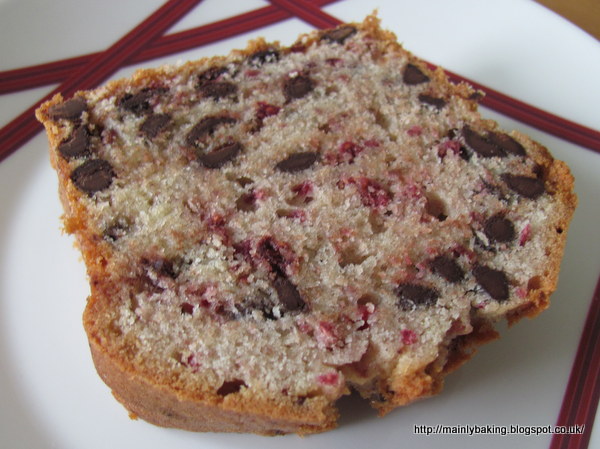
This oat bar is a great way to get fresh fruit into snacks, although the results weren't entirely satisfactory. I followed this recipe, adding orange zest to the oat mixture and leaving out the ginger in the fruit. I also added 30g chopped toasted hazelnuts to the portion of oat mixture set aside for the topping, and didn't add any icing. I cut the 8x8" bake into 8 portions - 16 small squares wasn't a realistic size for our appetites!

Although the bars were delicious, with the consistency of a chewy flapjack, the excess juice from the fruit made the bottom layer very sticky and slightly too soggy. The flavour from the orange zest came through well, and really complemented the rhubarb. The hazelnuts also added a welcome crunch to the topping, which helped overcome the general sogginess of the bars.

While looking for a recipe, I also saw some which cook the rhubarb to a purée and thicken the juices, before using it between the oaty layers, and I think this might be an improvement to what is basically a really good idea.

Monday 22 July 2013

Gooseberry Frangipane Tarts


The gooseberry bushes haven't performed well this year - the cold Spring meant the blossom was late, and the following dry period has produced much smaller fruits than usual. However, the time for harvesting one bush arrived this weekend - the red gooseberry bush was showing signs of over-ripe dropping fruit. This bush is very small - it never really recovered from some damage when we had a tree felled a few years ago, and it is overshadowed by a huge hazelnut thicket in my neighbour's garden, so doesn't get a lot of light. However, there was 450g of small berries this year.

I decided to pair the gooseberries with almonds to make Frangipane Tarts which could be entered into this month's AlphaBakes Challenge, which uses the letter F. I made basic shortcrust pastry with 200g flour, 100g butter and a little cold water. This was more than enough to line 6 tartlet tins which were about 9cm in diameter. I made the frangipane mixture by beating together 100g of softened butter, 100g ground almonds, 100g caster sugar, 25g plain flour, 2 large eggs and a few drops of almond extract. I half filled each pastry case with this almond mixture, then scattered a handful of gooseberries on top. These tarts were baked at 180C for about 25-30 minutes, until the frangipane was golden and set. After 5 minutes cooling the tarts were removed from the tart mould, to prevent any overflow of fruit juices setting and making the tarts stick.

 
Making the tarts only used about 2/3 of the frangipane and I still had some pastry leftover, so I decided to make a deeper tart too. For this I lined an individual pie dish with pastry and put a deep layer of gooseberries mixed with a teaspoon of flour and two tablespoons of caster sugar into the base. I spread the remaining frangipane on top and sprinkled a few flaked almonds on top. this deeper pie was baked at 180C for 20 minutes, then the temperature was reduced to 160C and the pie was baked until the topping was golden and set - about another 25 minutes, I think.


The shallow tarts were undoubtedly prettier, but the advantage of the deeper tart was that more gooseberries could be used. I think the deep version had a much better flavour because of this - the gooseberries were the star, not the frangipane mixture. With the small tarts the gooseberries didn't seem much more than decoration.

AlphaBakes is a baking challenge hosted jointly by Caroline from Caroline Makes and Ros from The More Than Occasional Baker. Each month a letter of the alphabet is randomly chosen and participants must feature that letter as part of the name of what they make, or as one of the main ingredients. Eg, this month the letter F is for Frangipane (name) or I could have chosen an ingredient such as Figs. The full rules are here, if my explanation is a little confused. Caroline is hosting this month and will post a round up of F-baking at the end of the month!


Sunday 21 July 2013

Apricot Ginger Yogurt Cake

There's an obvious dilemma (dilemna?) when baking during hotter than usual weather at this time of year. The abundance of wonderful fresh fruit cries out to be used, but we know things won't keep well unless refrigerated, which often spoils the texture of cakes and pastries, even if they are brought back to room temperature before serving.

I decided to take my chances with this fresh apricot cake, to my cost. It was baked on Thursday afternoon, but was mouldy by Saturday evening - I had hoped it would last long enough, without refrigeration, to be finished as Saturday's dessert, but the last three portions had to be thrown away.

The recipe I used was the delightfully versatile Stone Fruit Yogurt Cake from Dan Lepard. I used about 450g fresh apricots - 175g chopped into the cake batter and the rest arranged carefully in the base of the cake tin before putting in the cake batter. I also reduced the lemon zest to that from one lemon and added 50g of chopped glacé ginger and a teaspoon of ground ginger to the cake batter to add a little zing, as fresh apricots are often a bit of a gamble in the flavour stakes. As it turned out these apricots were wonderfully tart with a good depth of flavour when cooked, but the ginger still added an extra dimension to the overall balance of the cake.

The texture of this cake is quite dense and moist, thanks to the semolina in the batter, which makes it a great dessert as well as a tasty cake. It would be good as a picnic dessert if left in the tin until ready to eat.

This month's Tea Time Treats challenge, hosted by Karen at Lavender and Lovage, is to use fresh fruit when creating something suitable for the tea-table, so I am submitting this cake. Karen shares hosting duties for this Tea Time Treats (full rules here) with Kate at What Kate Baked. This month Karen is using a linky for submission of entries but will still write a round-up post at the end of the month.

Tuesday 16 July 2013

Chocolate Almond Olive Oil Torte - Gluten and Dairy Free

 I recently celebrated one of those big birthdays with a zero on the end, and the timing coincided with it being my turn to host a lunch for a group of friends who meet about 6 times a year. Two of my friends eat gluten-free, and one of those is dairy-free too, which doesn't present too many problems for starters and main courses, but always makes desserts that little bit more of a challenge. Fortunately she likes chocolate, and it didn't take long to find a version of one of my favourite types of chocolate torte made with oil instead of butter. I considered Nigella's recipe, but that only used cocoa, and I wanted something a bit more luxurious, and more like the torte I usually make.

This particular recipe uses mainly ground almonds plus two tablespoons of gluten-free flour for stabilising the structure, but I'm pretty sure you could increase the almonds a little if you didn't want to buy gluten-free flour just to use such a small amount (although most cooks have cornflour!), and I saw one version online which used cocoa instead of the gluten-free flour. I stuck with  extra-virgin olive oil, for added flavour, but any oil would work, and if you were using a flavoured chocolate you might prefer a more neutral oil.

Although the recipe suggests that a 9" springform tin would be OK, I made the torte in an 8" tin and think it would be too shallow in anything larger; if I only had a 9" tin, I think I would up the eggs to 5 and increase the other ingredients in proportion. Also be careful not to overcook - at 160C, my cake was cooked in 35 minutes.

One added bonus of this cake is that it kept really well. I made it on Tuesday and the last piece, eaten on Sunday, was as good as the first! It is a moist cake and although it's quite dense in texture, it doesn't feel dense or cloying in the mouth. Obviously the flavour depends on the chocolate chosen, and whether or not you use olive oil or something blander, but I didn't find EVOO to be overwhelming - it just added another depth to the flavour. However, I didn't add extra oil and salt to serve - I thought that might be a little too far out for my rather conservative friends! I offered a mixed fruit coulis (forest fruits, blackberries and redcurrants) along with cream, for those who could eat it, for the birthday lunch, and finished up the cake with the home-grown strawberries you can see in the photos.

I also made this delicious Rhubarb and Orange Cake from the Waitrose recipe bank. It's long been a favourite, although I don't make it often enough, as I'm always looking for new recipes to try, so that I have something new to write about. This is a really moist dessert cake; it's more like pieces of rhubarb held together by a small amount of almond and orange sponge batter, than a cake with rhubarb in it! Unfortunately in the rush of preparation and then my hosting duties, I didn't get a photograph - you'll just have to take my word that it looked like the picture with the recipe!

Sunday 7 July 2013

Oreo Brownies

I've seen Oreo brownies around on many other blogs I read, so it was only a matter of time before I tried them myself.

I wanted to use one of my brownie recipes with low saturated fat, as half the batch was being taken home by CT, who was having dinner with us. This time I chose the Good Food recipe for brownies made with mayonnaise, as I thought the thicker raw batter would hold up the Oreo pieces better than the batter from recipe I use for brownies made with oil. I added about 100g of chopped Oreo cookies.

The brownies were delicious, but I wasn't very impressed with the addition of the Oreos. Almost all the pieces seem to have dissolved into the brownie batter, leaving areas the were darker  in colour, like the biscuit part of the cookie. There were very few places where you could still see any of the white cream filling of the Oreos, although I did manage to capture a photo of one brownie showing a little patch of white. I may be wrong, but from the description of other Oreo brownies, I expected the cookie pieces to be stay separate and crunchy, and be recognisable as Oreo pieces.

As I say, the brownies were still delicious, but I could have achieved the extra-chocolatey patches with added chopped 85% chocolate, and saved the Oreos to enjoy as cookies!

Wednesday 3 July 2013

Chocolate Chip and Raspberry Loaf

This cake was an experiment to test the quality of the freeze dried fruit chips sold by Waitrose. Their description suggests they are for cake decoration, but I wanted to see how well they kept their flavour and colour when baked.

I used a 2 egg cake mixture, with Madeira cake proportions - ie a slightly higher proportion of flour than a Victoria Sandwich mixture. To this I added 100g of plain chocolate chips and the whole pack of freeze dried raspberry pieces (only 10g). This was baked for about an hour at 180C in a small loaf tin.

As you can see, the raspberry pieces kept their colour, and the flavour was pretty good too. This is a good way of adding raspberry flavour without the complication of how fresh fruit will react in a cake mixture. However, at £2 for a small 10g pack of fruit, it's quite an expensive addition, particularly as flavour extracts are becoming easier to find.