Showing posts with label eggs. Show all posts

Wednesday, 12 February 2020

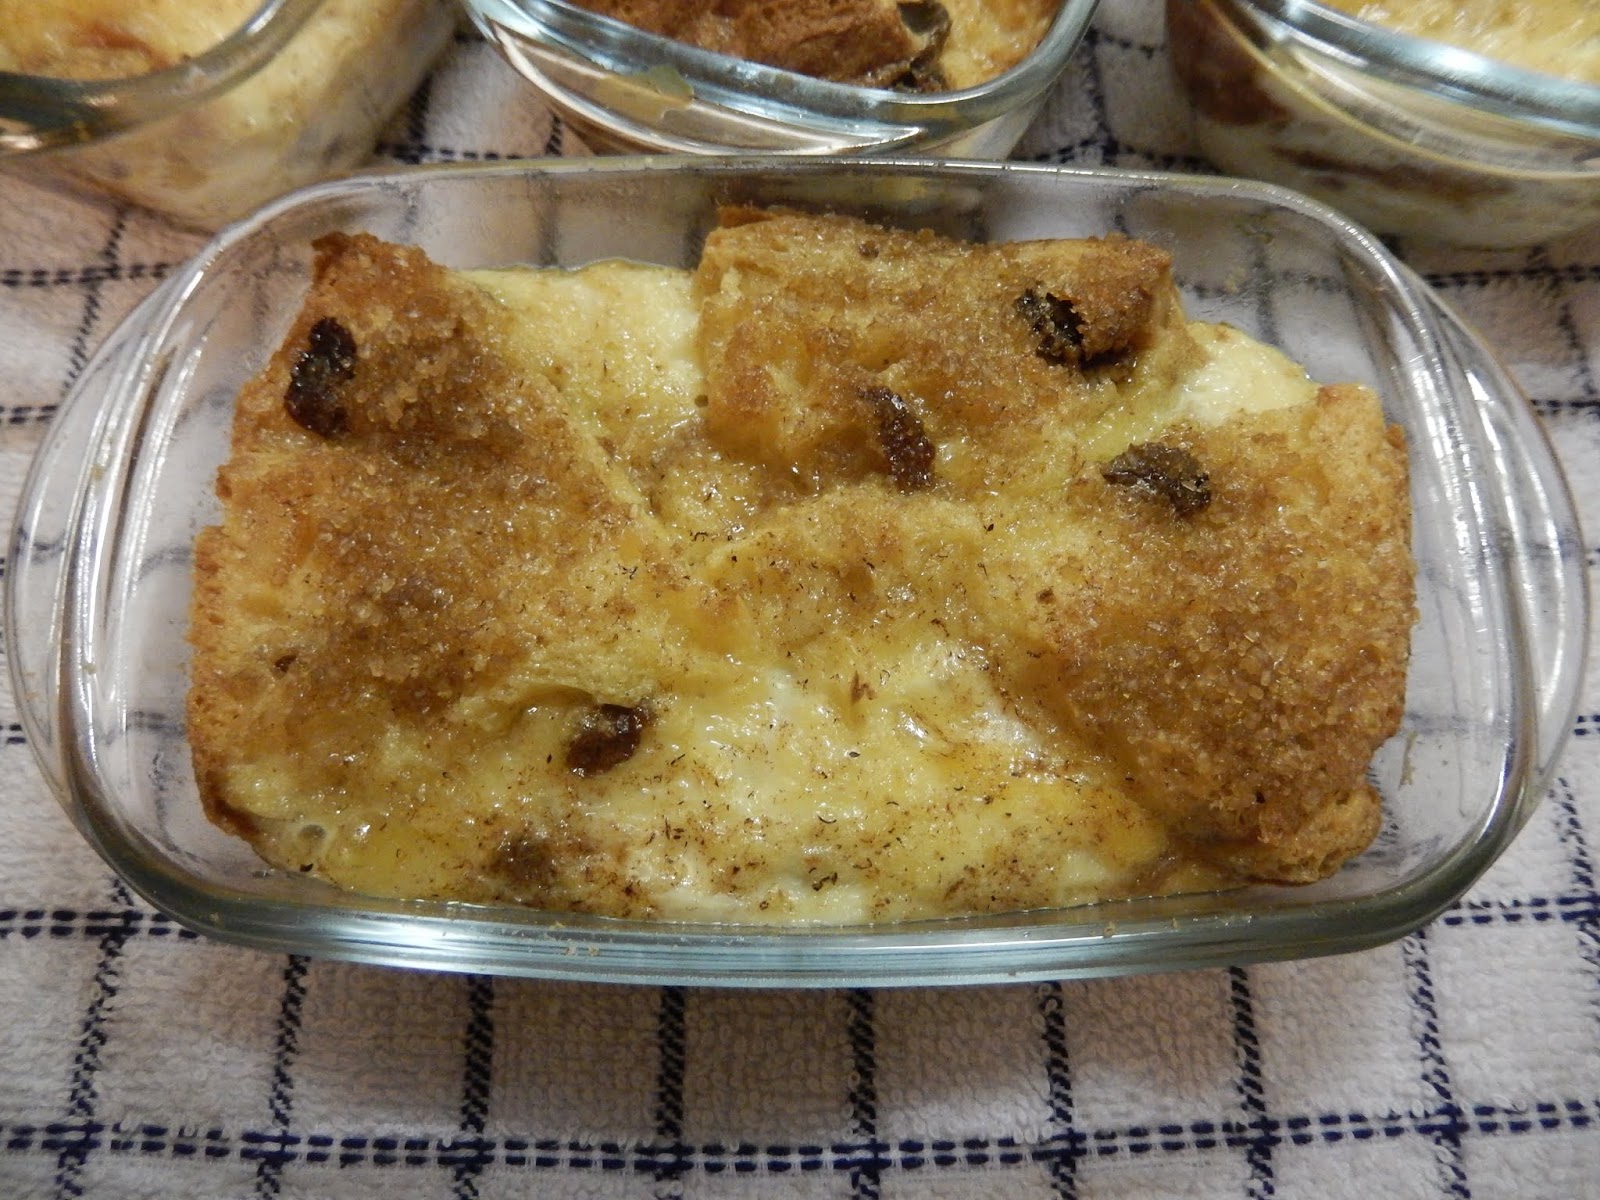
Lemon Bread and Butter Pudding

This dessert used up a panettone  bought for Christmas, in case of an unexpected need which didn't arise. I also had fresh lemons and an opened jar of lemon curd to use up, so as the panettone contained mixed peel, a lemon B & B pudding seemed the way to go.

I decided to make 4 individual puddings so that 2 could be frozen. I'm not sure how well they'll freeze, but I thought it was worth a try, rather than eating  a calorific dessert for 4 days running. I'd eaten one portion of the panettone, so I estimate there was about 425-450g left of the loaf.

I halved the loaf from top to bottom and sliced one portion into thin semicircular slices, which I sandwiched in pairs, spread with lemon curd. The rest of the panettone was cut into 4 slices to fit in the bottom of the dishes - I spread these with lemon curd too, and put into thickly buttered dishes curd side uppermost. Any trimmings and leftover pieces of panettone were crumbled and divided between the 4 dishes, then the semicircular sandwiches were cut and arranged neatly on top. I brushed the top of each pudding with more melted butter to help it crisp in the oven.

I hadn't realised until I started comparing recipes the wide range of egg:milk ratios used, as well as various baking times and temperatures, so the rest of the preparation went on a kind of average of the recipes I looked at.

I whisked together 3 large eggs, 50g caster sugar, the zest of 1 lemon and 500mls of semi-skimmed milk, and divided it between the 4 dishes. These were left standing for 30 minutes before baking, to allow the liquid to be absorbed into the bread - I pressed down with a fork occasionally to make sure the top pieces of panettone soaked up the custard mixture.

I added a little grated nutmeg and a sprinkling of demerara sugar to the top of each pudding, before baking at 160C (fan assisted) for 35 minutes. I intended to bake until the puddings were set, but still wobbling a little in the middle, but I think I baked for about 5 minutes too long.

These were lovely little puddings; adding lemon curd boosted the flavour nicely. I think adding some more dried fruit (such as a handful of sultanas) would have been an improvement and using a little more milk - another 100ml, perhaps - would have made the puddings softer and lighter, but I was pleased with them as they were.

As usual, with things that look their best straight from the oven, I didn't manage to get very good photographs of these. Not only were the light conditions far from perfect, they were visibly deflating as I watched them!

Sunday, 10 June 2018

Courgette Slice, with Bacon and Herbs

I make this recipe more often than I write about it, as it's become a staple warm weather dish; it makes an excellent meal when accompanied by salads. Depending on how filling the salad selection is, it will feed 4-6 people. The added flour also makes it sturdier than a frittata, so it's ideal for carrying to picnics, and of course, with no pastry, it's quicker and easier to make than a quiche.

This time, I was starting with bacon, so there was an extra step involved to fry the bacon until crisp and drain off the excess fat. If ready-cooked ham is used, it's just a matter of chopping and grating the vegetables and mixing everything together. The resulting mixture is then baked in a 23cm/9" parchment lined round baking dish at 195C (175C fan) for about 50 minutes, until firm and golden. I find that it's best eaten at room temperature, or even slightly chilled, rather than warm.

Ingredients:
300g coarsely grated/sliced vegetables (I used 200g grated courgettes, 70g grated carrots and half a red pepper, which I sliced very finely)
1 large onion, finely chopped
100g grated cheddar cheese
200g smoked bacon lardons, fried until crisp, then drained of fat (or 150g ham, cut into small strips)
A small bunch of fresh mixed herbs, finely chopped (I used sage, winter savory and lemon thyme)
5 large eggs
125mls sunflower oil
130g SR flour
Seasoning to taste - a little salt and plenty of pepper, plus a few chilli flakes, if liked


Wednesday, 22 November 2017

Apricot and Lemon Bread and Butter Pudding

I made this 2-portion pudding in individual dishes, but if it was made in one dish it could easily feed three people; I was a little too greedy! The ingredients list is a bit vague, because the only thing I measured accurately was the milk.

Ingredients
*4 thick slices of brioche, each about 10cm square
butter, softened
apricot jam
a handful of soft dried apricots, chopped
a small chunk of glacé lemon peel chopped finely (optional)
2 medium eggs
225mls semi-skimmed milk
zest of half a lemon
1 tablespoon caster sugar, plus a little more for sprinkling on top
freshly grated nutmeg

*or use plain white bread from a small loaf  - slightly stale bread can be used for this sort of pudding

Method
Thickly butter two individual baking dishes, which have roughly 350mls capacity each (or use one larger dish).
Mix the apricots and peel together, if using.
Use more butter and some apricot jam (fairly thinly spread), to make two sandwiches with the brioche.
Cut the sandwiches into suitably sized pieces to fit into your chosen dishes - I cut mine into 8 tiny triangles to get a tight fit.
Share half the pieces of sandwich between each dish and sprinkle with 2/3 of the fruit.
Arrange the rest of sandwiches on top, trying to keep the top fairly level and sprinkle over the rest of the fruit.
Mix the eggs, milk, lemon zest and caster sugar together in a jug and divide equally between the two dishes. Leave to stand for up to an hour to allow the custard mixture to soak into the bread.
When ready to cook, preheat the oven to 180C (160 fan). Sprinkle a little more sugar over each pudding and then grate over some nutmeg.
Cook for 25-30 minutes, until golden brown and crisp on top. One large pudding might take a few minutes longer.

This was a tasty version of the standard B & B pudding - the touch of lemon, and the tartness of the dried apricots, cut through the sweetness added by the jam.

I apologise for the awful photo - I wanted to get the puddings fresh from the oven, as they deflate as they cool and don't look so attractive, so had to use flash.


Saturday, 27 May 2017

Smoky Vegetable Slice


This is a dish based on the classic Australian recipe for Zucchini (Courgette) Slice, which I first saw on the blog Fig Jam and Lime Cordial. I've used Celia's version several times, so usually follow her guidelines for quantities of ingredients and cooking instructions, although a bit more or less of any of the vegetables doesn't make much difference. The Zucchini Slice is very similar to a frittata, but the addition of SR flour and oil makes it sturdier and more filling. It's excellent when eaten as a main meal with salads, or as a picnic food.

I made this version in an attempt to use up some vegetables which were lingering uneaten in the fridge. A sudden rise in temperature, after a spell of wet, cold weather meant that we couldn't face hot meals for a few days. Instead of courgettes (or a mix of courgettes and carrots, as Celia uses), I used equal quantities of grated sweet potato and broccoli.

Ingredients
150g sweet potato, peeled then coarsely grated
150g broccoli
1 small onion
100g smoked cheddar, grated
100g smoked bacon pieces
5 eggs
125ml sunflower oil
130g SR flour
plenty of black pepper to season, plus a little salt if desired (both the cheese and bacon will be salty)

Method
Preheat oven to 190C, 175C fan, and line a 23cm (9") round baking tin, or a 20cm (8") square one, with baking paper.
Fry the bacon pieces gently until just cooked through.
Blanch the broccoli florets in boiling salted water for about 3 minutes, then drain, rinse in cold water and allow to dry off. Slice the stems thinly and chop the florets into small pieces.
Finely chop the onion.
Put all the vegetables into a large bowl, add the cheese and bacon.
Sprinkle the flour over the vegetables, then make a well in the centre and break in the eggs and add the oil.
Mix everything together until no dry flour is visible, adding pepper and salt (if using) as you do so.
Transfer the mixture to the baking tin, level the surface and bake for about 40 minutes until golden and firm.
Best served at room temperature. You'll get 4-8 portions, depending on what else you are serving.

This was a really tasty version of a vegetable slice. The cheese and bacon added a subtle smoky flavour which we both really liked, and the sweet potato and broccoli made a good combination of vegetables.

Saturday, 1 April 2017

Goat's Cheese Soufflé Tart

This is the second time I've written about this recipe, for a Goat's Cheese Soufflé Tart, which is given extra flavour with a layer of onion chutney in the base, but the first was several years ago, so it was definitely time revisit the recipe!

I had a lot of cheese left after a meal with friends, including a large piece of soft goat's cheese, which wasn't going to keep for long. I was in two minds as to which kind of tart to make - this recipe or a more conventional leek and goat's cheese quiche with an egg and cream custard filling. In the end, I decided to make this soufflé-style tart again, as it was such a success the first time.

It's a little more fiddly to make than a traditional quiche, but from my previous experience, more likely to be successful, as the semi-solid, meringue-like, soufflé filling prevents any possibility of a soggy pastry bottom when the tart is cooked. I made my own pastry from 200g plain flour, 100g butter, 25g grated parmesan cheese plus water to mix, and used it to line a 22cm (9") deep fluted flan tin, which was then baked blind. I then followed the recipe closely for the soufflé filling, except for using finely chopped rosemary instead of thyme.

Once again, this was a resounding success! The onion chutney I had chosen was flavoured with a little chilli, nigella seeds and cumin, so added an extra piquancy to the layer between the pastry and goat's cheese filling. The souffléed filling was moist and creamy - completely different to the custard filling of a conventional quiche - and the pastry was light and crisp. The goat's cheese which was crumbled over the surface of the tart didn't brown much during cooking, so the tart looked pale and interesting rather than well-cooked, but this didn't affect the flavour. My goat's cheese was quite strongly flavoured and this came through well in the tart.

Sunday, 20 March 2016

Chocolate Hot Cross Bun and Butter Pudding

The We Should Cocoa cooking link-up, hosted this month by Linzi at Lancashire Food, (WSC is the brainchild of Choclette, at Tin and Thyme, who usually hosts the link-up on alternate months) has the seasonal theme of eggs. The challenge of putting eggs and chocolate together isn't difficult, but I wanted to bake something that relied on eggs for it's substance rather than just choosing a cake with the usual eggs in.

As it was a cold weekend I decided to treat us to a hot dessert rather than make a cake, and the proliferation of Hot Cross Buns in the shops in the run-up to Easter gave me the idea of making a bread and butter pudding with them. This fitted in well with the theme of eggs, as egg custard is an essential component, and adding chocolate to B & B pudding didn't seem a step too far!

The most challenging part of the dessert was slicing the buns thinly! I wanted to retain the crosses on the six buns for the top of the pudding, and still slice the remaining bun in half. Once that was done, I sandwiched the bun slices with butter and ginger jam, cut them in half crossways, and packed the little sandwiches into a buttered baking dish, as you would for a regular bread and butter pudding. I then scattered 50g of chopped dried apricots amongst the buns and placed the slices of bun with the crosses flatly on top. Finding the right sized baking dish is quite important here, so that the pudding looks right!

For the custard, I heated 350mls of semi-skimmed milk to about 60C, so that it would melt 50g plain chocolate when it was added. I then poured the chocolate milk onto 3 eggs and 2 tablespoons caster sugar and whisked together to mix evenly and dissolve the sugar. The custard mix was then poured over the buns in the baking dish and left to stand for an hour or so, to let the eggy mixture soak into the bread.

The pudding was baked for 45 minutes at 180C (160C, fan) and then cooled for about 20 minutes before serving.

This was a tasty dessert, with just enough chocolate to compliment the added ingredients and the fruit and spices already in the Hot Cross Buns without overwhelming them and becoming the dominant flavour. Using ginger jam was a good step, as it contained quite large pieces of preserved ginger to add to the bun spice. Unfortunately, it wasn't very pretty to look at, and I was also photographing it in bad light, so you'll just have to believe me that it tasted better than it looked!

Over a Belleau Kitchen, Dom's Simply Eggcellent link-up this month is a celebration of eggs with a focus on seasonal dishes, including those suitable for Easter. As Easter is early this year and it looks as if it might not be good weather, this hot pudding certainly fits the bill.

Saturday, 26 December 2015

Chocolate Orange Cheesecake

Although I love a traditional Christmas Pudding, the rest of the family are not so keen - especially the younger generation. For many years our tradition has been something with chocolate for dessert on Christmas Day. This dessert, from the 2015 Christmas (November) issue of Good Food magazine (the only issue I buy now), fit the bill, although the chocolate was very much in a minor role to the deliciously creamy baked orange cheesecake.

This recipe for Chocolate Orange Cheesecake was simple to make. I don't have a large food processor, so made the base by hand - crushing the biscuits with a rolling pin and mixing in the melted butter - and mixed the ingredients for the filling with a hand-held electric mixer, on slow speed. I chopped the chocolate for the topping in a mini-processor - much simpler and faster than grating. The only issue I had was leakage of the very sloppy cheesecake mixture out of my springform tin - I think it's time for a new one, hopefully with a tighter leak-proof fit between sides and base. Fortunately the wrapping of foil which was designed to stop the waterbath water seeping in also contained the mess, and the heat of the waterbath set the cheesecake quickly around the edges to prevent too much loss.

Although no-one wanted to eat much  dessert after Christmas Day dinner, CT and I both tried a small piece. I expected the topping to be difficult to cut, but the chocolate rubble had stayed as such, and hadn't set into a hard layer, as melted chocolate spread on top would have done. An excellent idea which I will remember for the future! In fact it was the base which was hard to get through - after serving two small slices, I realised I hadn't actually cut through the base at all, but had lifted the cheesecake off the biscuit layer! After that was sorted, subsequent slices were easier to serve!

As a baked cheesecake, this was deliciously soft and creamy - only just set, but just right! The orange flavour of the zest and liqueur in the cheesecake mixture shone through, highlighted by the orange flavoured milk chocolate in the topping. Adding a proportion of almondy milk chocolate to the topping added extra crunch and flavour, and the base was thin and crisp. All round, an excellent dessert, and one I will use again.

I promised to mention FB's mincepies in my post. It was her first attempt at making pastry, and an excellent attempt it was too! She used this Mary Berry recipe which added orange zest to the pastry, chopped dried apricots to the mincemeat and topped the pies with grated marzipan. They were really good - tasty adaptations to bought mincemeat to make the pies extra special. My thanks go to her for taking on some of the Christmas cooking.

The use of many eggs in this cheesecake means I can enter it into Belleau Kitchen's Simply Excellent link-up for December. Dom's theme this month is Anything Goes, so I'm expecting to see a lot of Christmas desserts!


Chocolate in the base and topping also makes this cheesecake eligible for this month's We Should Cocoa event, a blog cooking challenge originated by Choclette at Tin and Thyme and hosted this month by Munchies and Munchkins, who has chosen the theme of Christmas.

Saturday, 10 October 2015

A Russian-inspired Meal

Kartoshnik
This weekend's challenge for Formula 1 Foods, over at Caroline Makes, is to produce food inspired by the cuisine or culture of Russia, to coincide with the Russian leg of the Formula 1 Grand Prix. I wanted to cook something which would fit in with my meal plans and not be too fiddly, or involve the expense of buying special ingredients, and I was pretty sure that I could find something in Russian traditional cooking to fit the bill. In the end, after discounting cakes with 15 layers, recipes which used whole jars of honey, and anything based on yeast dough,  I found two suitable recipes, both of which used simple everyday ingredients and methods. One was a savoury potato and cheese dish called Kartoshnik and the other was Sharlotka, sliced apples cooked in a sweetened egg-rich batter to make a cake or pudding. I decided to cook them both and have a meal inspired by Russia.

Kartoshnik
To be honest, I have my doubts that Kartoshnik is a traditional Russian dish. It's mentioned frequently on recipe websites, but there only seems to be one recipe in circulation. Usually traditional dishes get tweaked by generations of cooks, or regional variations in ingredients, so just one recipe, with no variations, suggests an invention by one cook, which has just spread by online repetition. However, it was surprisingly tasty, so if it hasn't been eaten  by past generations of Russians, it deserves to be enjoyed by those in the future.

Kartoshnik is a dish meant to accompany a meat dish, but in view of the amount of eggs and cheese used, I decided to treat it as a vegetarian main meal. Cooked mashed potato is mixed with eggs, onion, cheese and a little cream, with some baking powder added to lighten the mixture. When baked it becomes something like a quiche filling, both in taste and texture, so it was quite good as a main course. According to the recipe it is traditionally served with sour cream and chopped green(spring) onions, but I served mine with cabbage cooked with onions, apples and caraway seeds, which felt quite Eastern European to me.

Following this online recipe, I mixed 4 eggs, 75g grated Cheddar cheese, 75g mature Gouda cheese (in place of swiss cheese), 80mls double cream, a grated small onion, 1 teaspoon salt, 3 teaspoons baking powder, then stirred in 450g cooked and mashed potatoes (weighed after peeling). This mixture was spread into a 9" square greased baking dish and baked at 200C(fan) for about 30 minutes until golden brown and set. As the dish was removed from the oven, I brushed the top with a knob of melted butter, rather than serve with the larger amount of butter suggested.

Sharlotka
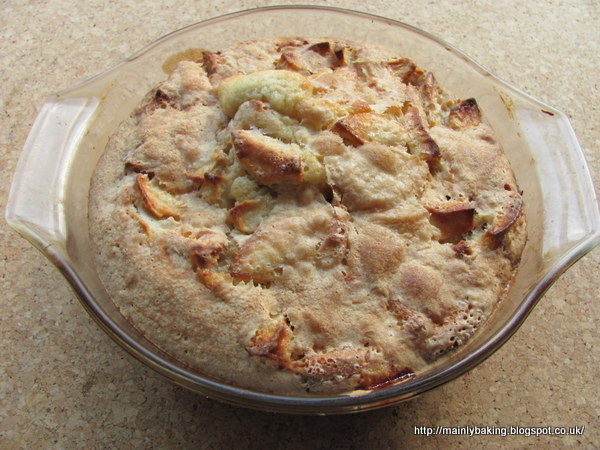
For dessert, I followed this recipe for Sharlotka, which baked the batter in a pudding dish. This wasn't entirely successful, as the depth of my baking dish meant that the dish took over an hour to cook properly. With the benefit of hindsight, it would have been better to use a larger, shallower cake tin, and serve the Sharlotka as a cake. Considering that the batter ingredients were just plain flour, sugar and eggs (with a 1/4 teaspoon baking powder, as suggested by some other recipes I looked at), I had no idea what the texture of the cake was going to be like. A sponge? a clafouti? a pancake? In fact, it was most like a dense sponge in texture, quite sweet but very plain and a good carrier for the sharp eating apples used in the recipe. When first baked, it had a crisp sugary crust, but this softened with time. I served the cooled cake with vanilla yogurt.

Although both these dishes are quite high in carbohydrates, neither of them seemed very heavy, so it didn't seem too much to serve them both as part of the same meal. The leftovers from the Kartoshnik were eaten with a chilli the following day, and suited that quite well too.


Sunday, 23 August 2015

Ham and Courgette Slice

This savoury bake is ideal for summer, especially when the forecast is for weather so hot that you wouldn't want the oven on, and you have enough warning and time to bake ahead. It's also good for when the courgettes are producing fruit faster than you can harvest them, or there's a glut on the market. We're not quite at the over-production stage, but I'm determined not to allow things to get out of hand this year - I don't want any marrows!

My inspiration comes from this recipe on Fig Jam and Lime Cordial, which I've written about before. This time I used two thick slices of smoked ham instead of the bacon, and added a sliced chilli and some shredded sage leaves for extra flavour.

This is what I used, but it seems a very versatile recipe, so a little more or less of any of the flavouring ingredients probably won't make a lot of difference, as long as you keep the batter the same (the eggs, flour and oil). I guess it would also be OK to add things like leftover cooked vegetables to the mixture too, as part of the total weight of vegetables.

300g coarsely grated vegetables (I used roughly 220g courgettes with 80g carrots for colour contrast)
1 large onion, finely chopped
1 red chilli, de-seeded and finely sliced
about a dozen sage leaves, finely shredded
100g grated cheese (I used 60g strong cheddar and 40g parmesan)
100-150g smoked ham, cut into small strips
5 large eggs
125mls light olive oil
130g SR flour
salt and pepper to taste

Just mix everything together, pour into a parchment-lined baking dish (I used a 23cm (9") cast iron pan) and bake in a pre-heated oven at 175C (fan) for around 50 minutes until firm and golden brown. The baking time depends on the depth of mixture which is determined by the size of the dish you use. A 20 x 20cm (8 x 8") square dish would be a similar size - anything smaller will give a deeper mixture which takes longer to cook.

This is best eaten warm or at room temperature. It's probably OK hot too, but I haven't tried that - I'd still let it rest for about 15 minutes after coming out of the oven.

Although this is very similar to a quiche filling, or a frittata, the SR flour makes it a little sturdier, whilst still keeping it light because of the raising agent, and the oil keeps the texture moist. The added bonus over a quiche (besides not making pastry, thus avoiding a soggy bottom) is that the onion doesn't need pre-cooking - any moisture given out during cooking is absorbed by the batter, which doesn't happen with a quiche filling.

I'm sending this to Belleau Kitchen's Simply Eggcellent bloggers' link-up. Dom is allowing us free reign this month saying that 'anything goes'! This dish makes a quick and easy main course, could easily be made vegetarian  and is robust enough to hold up in a lunch box or picnic basket, making it a useful recipe during the holiday season.

Thursday, 9 July 2015

Cauliflower, Blue Cheese and Walnut Cake

Last week, the weather suddenly changed from the usual non-descript British summer to a heatwave. A real heatwave too - the temperatures here in East Anglia got over 32C on the hottest day, and there were several days in succession when the temperature was in the high 20s. This played havoc with my eating plans, as we only wanted salad for most of the week, and left me with, amongst other things, a huge cauliflower which wasn't going to last much longer. I needed to make something which would be suitable for hot or cold meals, depending on how the weather changed.

This cauliflower cake was inspired by Yottam Ottolenghi's recipe from Plenty More, which I enjoyed a lot when I made it last year. This time, about the only thing I took from his recipe was the ratio of eggs to flour, and the cooking temperature, but I would never have thought of making this without trying his recipe first.

Ingredients
1 large cauliflower, cut into even sized florets, about 5cm across
120g plain flour
1 1/2 teaspoons baking powder
7 eggs, preferably free-range
3 tablespoons sunflower oil
150g blue cheese (I used Roquefort)
3 spring onions, including green parts - finely chopped
a handful of parsley - finely chopped
50g walnuts - coarsely chopped
1/2 teaspoon salt
black pepper to taste
25g parmesan cheese - finely grated

Method
Cook the cauliflower in boiling salted water, for about 8 minutes, until just tender. Drain well and cool.
Preheat the oven to 180C (160C fan), and line a 20cm diameter springform tin with baking parchment (to save heartache later, line the sides as well as the base, even if your tin is non-stick).
Sift the flour and baking powder into a large bowl, add three of the eggs and mix to a smooth paste, then mix in the other 4 eggs and the sunflower oil. Crumble in the blue cheese, then stir in the walnuts, spring onions, parsley, salt and pepper.
Gently fold in the cooked cauliflower, being careful not to break up the florets too much.
Tip the mixture into the prepared baking tin, trying to get the cauliflower evenly distributed and level in the tin.
Sprinkle the parmesan over the surface, then bake for about 55 minutes, until golden and firm. (If you use a larger tin, as in Ottolenghi's recipe, it takes about 45 minutes to cook, but I liked the idea of a deeper cake)
Best eaten at room temperature, or just a little warmer, but however you intend to eat it, leave it in the tin to cool.

This is more like a tortilla or frittata in texture, than a cake, but the addition of flour and baking powder makes it both lighter and more robust - ideal for food you might want to stand up to the rigours of transporting to a picnic, for example. The addition of blue cheese and walnuts added two strong flavours to the cauliflower, and the walnuts gave a welcome crunch to the texture, The finely chopped spring onions and parsley added attractive flecks of colour to an otherwise plain looking dish.

Over at Belleau Kitchen, this month's theme for Dom's Simply Eggcellent challenge is 'Eggs in the Morning'. While this cauliflower cake might not be most people's idea of a tasty breakfast, it would certainly be good on a brunch menu.

.

Monday, 15 June 2015

Gooseberry and Elderflower Cheesecake

While checking around the garden recently, I noticed how quickly the gooseberries were growing. That reminded me that there were still some of last year's gooseberries in the freezer, which ought to be used before this year's excess fruit went in. So when I needed a dessert to take to lunch with friends, something that could be made with frozen gooseberries seemed the best idea.

The biggest problem with taking desserts to other people is carrying them with no damage. It's also a good idea to take something ready to serve, so you're not doing last minute cooking in someone else's kitchen, or taking up oven space at an inconvenient time. A cold dessert, which was not likely to spill while travelling, seemed ideal and I eventually decided on cheesecake. After looking at several very different recipes, I chose a Mary Berry recipe (from her book 'Ultimate Cake Book') for a set gooseberry and elderflower cheesecake using gelatine. A gelatine based cheesecake could be transported still in the springform tin in which it was made, and the sides removed when ready to serve.

I never like to make an untried recipe for other people, so I had a trial run with the cheesecake the weekend before it was needed.

I adapted the recipe slightly so that I could use leaf gelatine, which I find much easier to use than powdered. I also made a few other changes, such as leaving the sugar out of the biscuit base, using the whole 250g tub of cream cheese, rather than having 25g left over, and leaving off the whipped cream decoration, as extra cream didn't seem necessary for the trial run. All I needed to do, to use leaf gelatine, was to soften nine leaves in cold water, then add them to the sieved gooseberries while the purée was still warm.

As with the rhubarb meringue pie I made recently, the addition of cream to the fruit seemed to mute the flavour. It was good, but decidedly 'delicate', and not as sharp as when using gooseberries in a pie or crumble. The crumb base was thin but this was good, as thick bases can be too hard to cut and eat easily. The set cheesecake mixture had bonded with the base well, so there wasn't any danger of things falling apart. The texture was very light and aerated - very mousse-like - so it didn't really seem like eating a cheesecake at all.

Because I was a little worried about the lack of flavour, I decided to make a tangy gooseberry sauce to eat with the cheesecake when I made it the second time, for those who liked the sharpness of gooseberries. I made this by simmering 550g of gooseberries with 80g of sugar until softened. I strained the juices back into the pan and reduced them by about half, until syrupy, while I sieved the cooked gooseberries to remove the pips. The concentrated juices were stirred back into the purée - more sugar could be added at this stage, to taste, but I decided to leave the sauce quite sharp.

By the time I made the second cheesecake, the elderflowers were almost out, so I decorated the cheesecake with small sprigs of flower buds and gooseberry leaves, rather than whipped cream, and served it with creme fraiche. Unfortunately, as I had to leave it in the springform tin for transportation, I couldn't get a good photo of the second cheesecake.

As the mousse-like texture of this cheesecake relies on beaten egg whites, I'm entering this into Belleau Kitchen's Simply Eggcellent bloggers link-up for June, which is for recipes where free-range eggs feature heavily. Dom hasn't set a theme for this month - anything goes - but a light cheesecake with seasonal fruit is perfect for this time of year.

Wednesday, 3 June 2015

Rhubarb Meringue Pie

It was only after making this dessert that I realised it was somewhat similar to Delia Smith's recipe. I hadn't knowingly read Delia's recipe beforehand - perhaps it just a case of great minds thinking alike (ha ha!). It was an idea that had been  in the back of my mind for a while but it wasn't until I had some double cream leftover from something else that I finally got round to trying it.

The filling was 500g chopped rhubarb cooked to a pulp with 80g sugar. Once it was cool, I mixed in 2 egg yolks and 100mls double cream. This was poured into a pre-cooked shortcrust pie case and cooked for 20 minutes at 170C.

I made half a batch of this meringue mixture from the two egg whites, spread it over the pie filling and baked for a further 15 minutes, until the meringue was beginning to colour.

The pie filling was quite soft at room temperature, although it firmed up more after chilling. I think, for this quantity of fruit and cream, 3 egg yolks would have been better. Three egg whites would have made a better quantity of meringue too.

Using cream in the filling muted the flavour of the rhubarb quite a bit. I think if I made this again I would try Delia's method of thickening the filling with cornflour, and leaving the rhubarb in pieces rather than cooking it to a purée. Despite my criticism of the taste, this made a nice change from the crumble I usually make when we want a weekend dessert.

Saturday, 16 May 2015

Cheddar and Jalapeno Cornbread,

made with Quark.

I love the AlphaBakes challenge, where we are asked to cook something using a randomly chosen letter of the alphabet, as either the starting letter of a principle ingredient (eg B for bacon), or as part of the name of the dish (eg B for Battenburg Cake). Admittedly, some letters of the alphabet prove more difficult than others, but that's all part of the fun.

Last time the letter Q came around I made a cake using quinoa, which had a fairly unpleasant texture and didn't go on my list of things worth making again; this time I intended to play it safer with a quiche. Except every time I suggested quiche for dinner, my husband vetoed the idea, so I had to think again. Quark seemed the next best idea, and while searching for recipes I came across this cornbread recipe from The Fabulous Baker Brothers.

This is a luxury version of cornbread, compared to recipes I've tried before. It contains lots of cheese, sweetcorn kernels, onion and jalapeno peppers for flavour, and uses quark instead of the sour cream or buttermilk more usually found in cornbread recipes.

This was a straightforward recipe to follow, but my batter was very dry and I needed to add a few tablespoons of milk to give a stiff dropping consistency. The cooked cornbread was quite dry and crumbly, so it wouldn't have hurt to make the batter a little sloppier. The cornbread also took a lot longer to cook than the 40 minutes the recipe suggested - I think mine was in the oven for a touch over an hour!

We both really liked this - it was very cheesey, and well spiced with the jalapenos, which I had chopped quite finely. Most cornbread recipes contain a proportion of wheat flour, which I think lightens the sponge texture; this one was all cornmeal, and also contained coarsely puréed sweetcorn kernels, so it was quite dense. It definitely needed more liquid in the batter though, to reduce the crumbliness a little.

We ate the cornbread, still warm, with a spicy ratatouille. The following night we ate it with a pork and bean chilli, but after two meals I'd only used half the cornbread, so I had to freeze the rest. I hope it doesn't become even more crumbly in the freezer.

This cornbread also fits the brief for Dom's Simply Eggcellent challenge over at Belleau Kitchen. This month he wanted our savoury recipes using eggs. While eggs are not the principle ingredient of a cornbread, it's almost impossible to make any sort of cake without eggs, so I think it's OK to submit this recipe.


AlphaBakes is co-hosted by Ros, at The More Than Occasional Baker and Caroline, at Caroline Makes. This month's challenge, using the letter Q, is hosted by Ros, who will be posting a round-up of entries at the end of the month.

Sunday, 5 April 2015

Chocolate Cheesecake

An Easter Eggstravaganza!

Easter wouldn't be Easter, in this household, without chocolate. Not Easter Eggs though - our children quickly caught on that you didn't get much chocolate for your money in an Easter Egg, so our tradition became a Terry's chocolate orange (or something similar) and a chocolate dessert for the weekend. Now that they are adults we've stopped buying chocolate presents, but the tradition of a chocolate dessert lingers on.

I decided on a baked cheesecake because it's fairly light on added sugar, compared to some of the desserts I could have chosen. I picked this recipe from Good Food, because it sounded quite light (despite some of the reviews claiming it was too rich!). The recipe uses cocoa and relatively small amount of plain chocolate to get a good flavour, rather than a lot of chocolate.

As usual, I only used the recipe as a guide to the correct quantities for the cheesecake mixture. I introduced a hint of nuts by adding finely chopped toasted hazelnuts to the biscuit base, and Amaretto liqueur to the cheesecake mix instead of a coffee liqueur. I also used plain chocolate instead of one with coffee flavour.

The base was made from 170g of chocolate and oat biscuits from IKEA, 50g toasted hazelnuts and 60g butter. I reduced the butter a little from the usual 50% of the weight of biscuit because I wasn't sure how absorbent the biscuits would be, and I didn't want the base to be too heavy - I prefer a slightly crumbly base rather than one which is dense and crisp. I followed the recipe for the cheesecake mixture as far as quantities of ingredients were concerned, just making the changes I've already mentioned.

I was rather concerned about how liquid my cheesecake mixture was - the recipe said to smooth the top after pouring it onto the base, but my mixture flowed like custard and certainly didn't need any help from me to become smooth and level. Perhaps because of this, the cheesecake took a little longer to cook than stated in the recipe. It also cracked badly, with one deep crack going right down to the base (which explains why there's no photograph of the whole cheesecake!). When cold, I decorated the top with a drizzle of plain chocolate, rather than the cream and chocolate sauce suggested in the recipe. I thought it better to serve cream as an optional extra, rather than force everyone to eat some.

Although I'd expected this cheesecake to be light, it was very different in texture to what I had hoped for. It was more like a set cheesecake or a mousse than other baked cheesecakes I've made. It still tasted good though, which is the main consideration. The hint of nuttiness was just right, and the chocolate flavour was strong enough without being too rich at the end of a meal.

I didn't really manage to get any good photographs after the cheesecake was cut. By the following morning the remnants were a bit worse for wear  - the chocolate topping was a bit weepy, and the cheesecake was crumbly to cut straight from the fridge. I think this bottom photo shows the texture quite well, despite all that.

I'm entering this cheesecake into the April 'Simply Eggcellent' link-up set by Dom (of Belleau Kitchen); with due consideration for our priorities at Easter, his theme for this month is chocolate.


Monday, 2 March 2015

Jammy Bread and Butter Pudding

As a cake and dessert maker, a lot of what I make contains eggs - cakes, tray bakes, brownies, cookies, mousses and cheesecakes. They are indispensable for perfect results, and often the most nutritious part of many recipes. So I'm happy to join in with Belleau Kitchen's new blogger link-up - Simply Eggcellent - which celebrates the versatility of eggs.

Bread and Butter Pudding is made from bread soaked in a simple egg custard - usually just eggs and milk or cream, and maybe some sugar. The fun comes with the extras that can be added - dried and fresh fruit, chocolate, alcohol, preserves, nuts and spices.

This Jammy Bread and Butter Pudding was a spur of the moment dessert, to use up the end of a stonebaked sourdough baguette and the last of a carton of sour cream. I decided to keep things simple and use gooseberry jam to provide the main flavour, some sultanas for juicy fruit chewiness and a little nutmeg to spice it up a little.

I sliced the bread thinly and made jam sandwiches, which I fitted into a small ovenproof dish, interspersed with a handful of sultanas. The baguette was quite thin, making it impossible to remove the crusts, so I arranged the bread with the crusts uppermost, so that they would make a crisp topping after cooking.

I was only making two portions, with about 100g of bread, so a custard made from one large free-range egg, 50ml sour cream and 150g milk was sufficient. I didn't add any extra sugar to the custard as the jam was going to provide a lot of sweetness.

I poured the egg mixture over the bread and left the dish to stand for about an hour before baking, to allow the custard to soak into the bread. Before baking I sprinkled the top of the pudding with Demerara sugar and a grating of nutmeg. I baked the pudding in a bain marie, at 180C for 45 minutes.

Using jam to flavour this bread and butter pudding worked very well; together with the sultanas and sugar topping it was plenty sweet enough. The custard soaked bread was light and moist, with a lovely crisp crunchy topping made from the crusts on the slices of bread and the sugar.

As usual, it isn't good for food photography to take something out of the oven at 6pm, and need to get it photographed before it's eaten a few minutes later, so I apologise for the strange colour!

You can read all about Simply Eggcellent on the link above. I look forward to seeing how Dom, at Belleau Kitchen, develops the core theme of eggs over the coming months.