Thursday 27 April 2017

Chocolate Marmalade Brownies

When I first made this recipe, for Chocolate Marmalade Brownies, almost seven years ago, I thought the recipe was a keeper. Making them again, only recently, I'm not quite sure what I saw in them in the first place. They were pleasant enough, but more like cake than a brownie, and the one word in their name that is meant to describe the added flavour is the thing I couldn't taste at all! The walnuts, cayenne and ginger (an extra addition, part of the chocolate used) were all much more prominent flavours than the marmalade.

The only changes I made to the recipe were to bake in a slightly smaller tin (20 x 30cm), which added five minutes to the baking time, and to use chopped dark chocolate containing crystallised ginger instead of plain chocolate chips.

Really, the only thing to recommend this recipe is that the brownie batter is made with cocoa rather than chocolate, which could be useful if you were short of chocolate. However, if you're the sort of person who regularly bakes brownies, I can't see you being the sort of person who runs short of chocolate - I get twitchy if there's ever less than 500g in the house!

Friday 21 April 2017

Mincemeat and Apple Cake

Another outing for the cake I often make when I want a dessert with fresh fruit, but can't be bothered to fuss around with pastry. Because I hadn't checked supplies and found myself short of flour, I used a proportion of spelt flour in the recipe this time - it seemed to make the cake a little more crumbly.

Anything with mincemeat in it smells wonderful when it is baking; in this case the flavour was pretty good too. Adding the apples and orange zest cut back on the sweetness of the filling a little without changing the flavour much, as the mincemeat had it's own citrus notes. The dough has a texture somewhere between pastry and scone - what I imagine the old-fashioned American shortbread cakes to be like.

I'm pleased to say that this cake used the last of my winter mincemeat stocks!

Ingredients
150g butter
150g caster sugar
1 large egg
*100g SR flour
*200g white spelt flour
*1 teaspoon baking powder
250g mincemeat
2 eating apples, peeled, cored and chopped into small pieces
grated zest of 1 orange

* you can use 300g SR flour, in which case you won't need the baking powder

Method
Preheat oven to 180C. Grease and base-line a 20cm (8") springform cake tin.
Melt the butter in a large bowl in the microwave - it doesn't need to be very hot, just liquid. Stir in the sugar, then beat in the egg.
Add both flours and the baking powder and mix to a soft dough. Put 2/3 of the dough into the baking tin and spread out into an even layer with your fingers, building up a little wall around the sides of the tin.
Mix together the mincemeat, chopped apples and orange zest and spread onto the cake base.
Crumble the remaining dough evenly over the filling and press down lightly, spreading the dough as you do - it should more or less cover the top, but any small gaps will fill as the dough rises and spreads during baking.
Bake for 50-60 minutes until the top is firm and golden. Cool for about 15 minutes, then run a knife between the cake and the tin, in case any fruit juices have leaked from the cake and are sticking to the sides of the tin - this can sometimes happen with mincemeat.
Dust with icing sugar before serving, either warm or at room temperature. This cake can be quite fragile, so I always leave it on the springform base.

Monday 17 April 2017

Golden Simnel Cake

My family's festive celebrations have never included traditional fruit cakes - we're more of a mini chocolate appreciation society -  so I was surprised when my daughter asked me to make a Simnel Cake for Easter this year. I'm not averse to traditional recipes but I still wanted to put a spin on this cake to make it more personal, so I decided to make a golden fruit cake.

After looking at several recipes, I thought that Felicity Cloake's recipe from her 'How to Cook the Perfect.....' series in The Guardian would be the best one to adapt to what I wanted. I particularly liked the idea of adding saffron to help the golden colour of the cake I was planning.

I used the same quantities of all ingredients, although I used caster sugar instead of light brown sugar, to keep the crumb colour as pale as possible. Instead of using 400g of the fruit Felicity suggested (sultanas, currants and glacé cherries) I used 115g of each of sultanas, golden raisins and chopped apricots and 55g chopped dried peaches. I left the mixed peel in the recipe but took out the chopped almonds, as my daughter doesn't always like chewing on pieces of nuts, even though she loves the flavour of almonds. I used shop-bought white marzipan instead of yellow - just a personal preference!

It's a pity I didn't cross reference Felicity's decision making processes with the sources she used, or I would have discovered that her oven temperature was for a fan setting, not a conventional oven - after 2 hours at the quoted temperature the cake batter was still raw. It took another hour with the oven turned up another 20C for the cake to cook. Anyone with any experience of fruit cakes would have noticed the error straight away, but I've hardly ever made a rich fruit cake, even in 40 + years of cooking!

I was quite impressed with the look of the finished cake, although if I ever make another I will use more marzipan so that I can put thicker layers inside and on the top. The size of the 11 decorative balls, at 15g each, was about right, however. When cut, the colour of the crumb was just right for a golden cake.

I liked the flavour of the cake - a delicious subtle balance between spice and citrus, with all the fruits working in harmony, so that none stood out more than others. The soft inner layer of melted marzipan added a note of bitter almonds to the cake, although it hadn't stayed level in the cake, possibly a result of the error in cooking temperature.

There were other faults too, which might have been caused by the same error - the fruit wasn't evenly distributed in each layer, and although the cake was really moist, it was also crumbly and didn't cut cleanly. However, these faults were outweighed by the lovely flavour; all it really meant was that it was difficult to get a good photograph. I will have to try the recipe again, and cook it properly next time!


Thursday 13 April 2017

Rhubarb, Marzipan and Citrus Cake

I've been harvesting our homegrown rhubarb since the middle of March, and this traybake recipe is perfect for the beginning of the season when there are some thin stalks to pick. If you can only get thick sticks, then I suggest you cut them into fairly thin slices, both to distribute the rhubarb evenly through the cake, and make sure it cooks properly.

I picked this Rhubarb, Marzipan and Citrus Cake recipe because I wanted something portable to take to my daughter, who was cooking a Mother's Day dinner, and also because I know she loves marzipan.

I followed the recipe exactly, although I used the zest from the whole lemon and orange, as I didn't see the point of leaving half grated fruit - this turned out to be a good move, as the citrus flavour wasn't very pronounced, even with the extra zest. I also used fine cornmeal rather than polenta, as I can only get the quick-cook sort which is relatively coarse.

What the recipe doesn't mention is that initially the cake batter seems too stiff, and although it does slacken a little when the fruit is added, it never gets to the 'dropping' stage. Resist the temptation to add more liquid -  more juices will be released from the fruit during baking.

We all loved this dessert - there were subtle citrus notes amongst the tang of the rhubarb, and the marzipan gave concentrated pockets of the sort of almond flavour you don't get from ground almonds alone. My husband reckoned it would come a close second to rhubarb crumble in his 'favourites' list!

Friday 7 April 2017

Salted Caramel and Chocolate Fudge Squares

I found myself with half a tin of caramelised condensed milk, and no idea what to make with it. One thing that kept coming up, however inventively I worded my internet searches, was Millionaires' Shortbread, and similar bakes. The problem with many ready-made caramel products is that they often aren't thick enough to work really well in things like Millionaires Shortbread - I hate cutting into something only to see the caramel squidge out all over the plate.

However, the recipes made me wonder if mixing the caramel with melted chocolate would mean that it set more solidly after baking, and decided that it couldn't hurt to try. I then decided to pair the chocolate-caramel mixture with my favourite, really easy, shortbread recipe - from Sue Lawrence's 'On Baking' - and ended up with the components of a Millionaires' Shortbread with much less work. I also added some salt flakes and some hazelnuts for extra flavour.

Ingredients
170g unsalted butter
85g caster sugar
170g SR flour
170g semolina
60g coarsely chopped hazelnuts
pinch salt flakes

filling - 200g caramelised condensed milk, at room temperature
100g of plain chocolate (the darker the better - I used Willie's Chef's Drops; although they are just 70% cocoa solids they are quite bitter when eaten on their own, so ideal for adding to caramel)
1/2 teaspoon salt flakes

Method
Pre-heat the oven to 190C and line a 20cm (8") square baking tin with baking parchment, using one piece of paper to come up the sides of the tin too.
Melt the chocolate in a bowl over a pan of simmering water and allow  to cool a little, if necessary, to around 40C (blood heat). Mix in the caramelised condensed milk and the salt.
Melt the butter and sugar together, either in a large bowl in the microwave, or a large pan on the hob. Add the flour and the semolina and mix everything together to give a crumbly rubble.
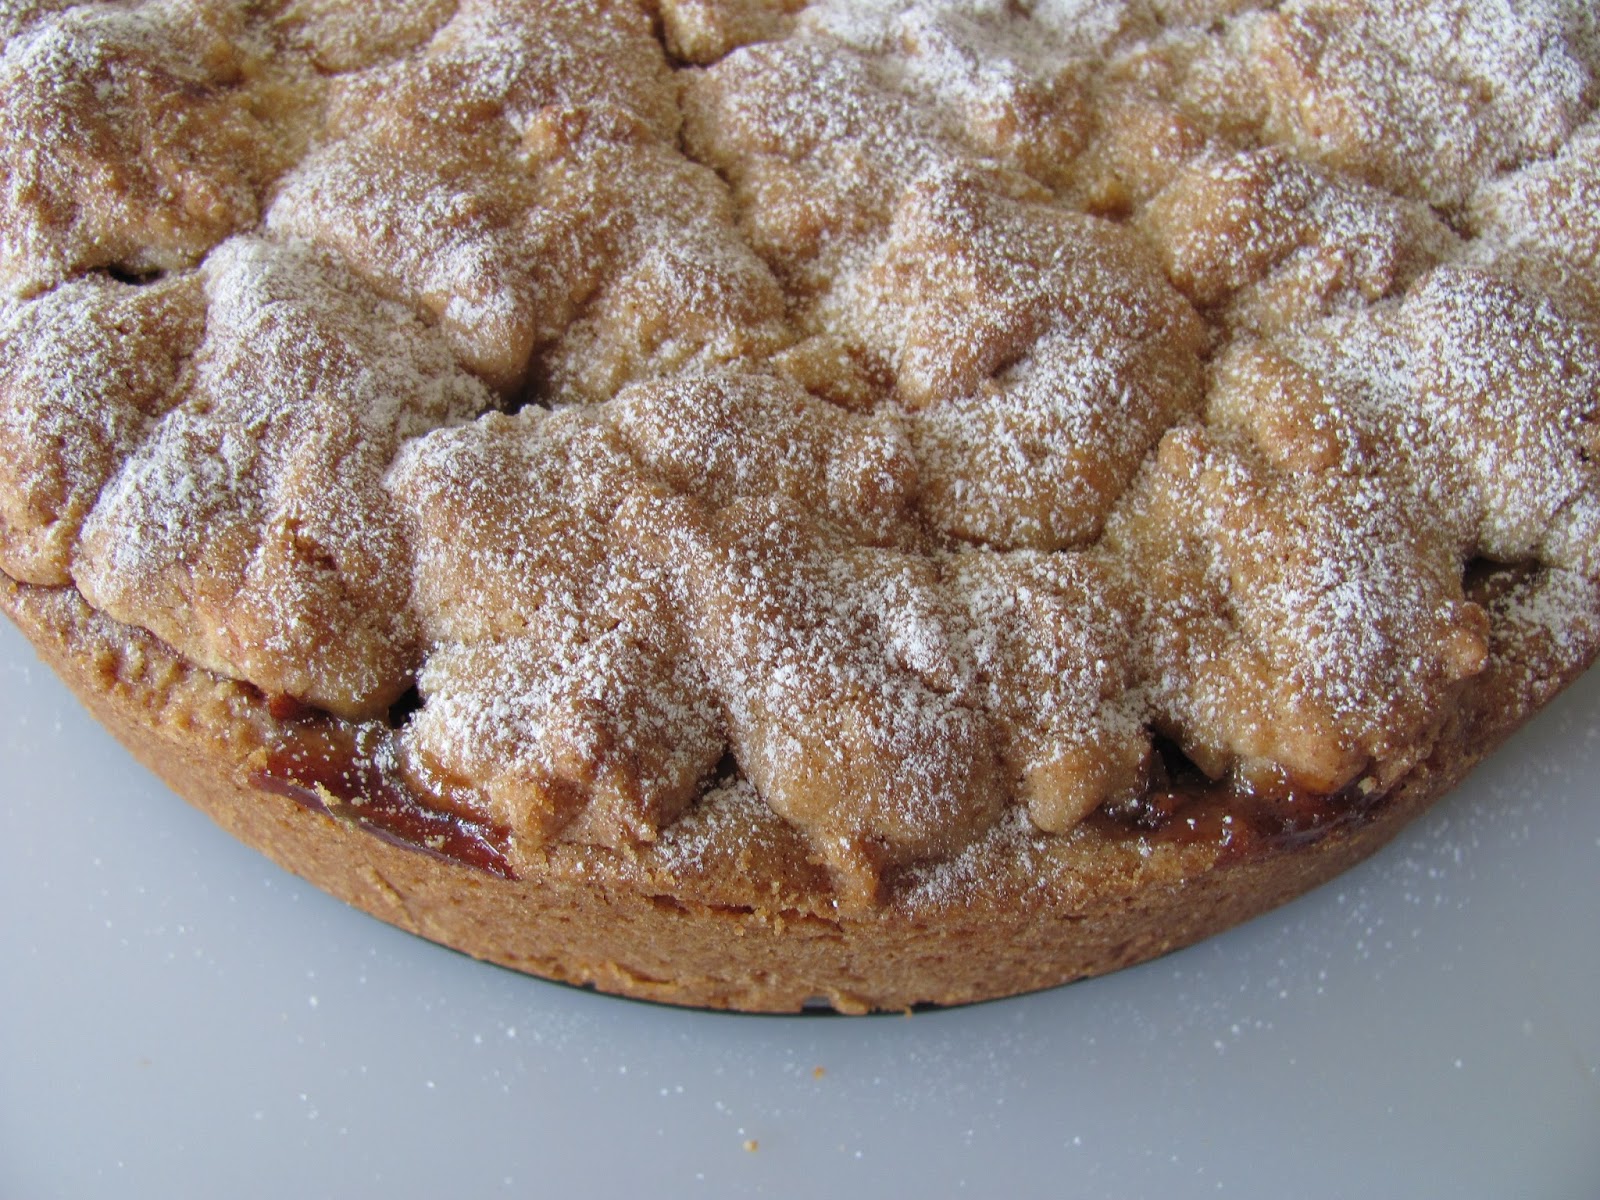
Put 2/3 of the mixture into the baking tin and spread evenly, pressing down firmly so that it looks like a sheet of dough rather than rubble.
Spread on the chocolate mixture, stopping just short of the edges.
Mix the hazelnuts into the remaining dough, and sprinkle this over the contents of the baking tin, this time only pressing down lightly.
Sprinkle over a pinch more salt, then bake for 30 minutes until the topping is firm and golden.
Leave for 30 minutes to give the chocolate layer time to set a bit, then mark into squares. Leave in the baking tin until completely cold, as the squares are too fragile to move while hot.

These were really tasty! The centre was rich and fudgy, but because it was a thin layer it didn't seem over-sweet. The shortbread layers were, as usual, crisp, but with a 'melt-in the mouth' delicacy. The added salt was just the right amount and the hazelnuts added to both the texture and flavour. 

These weren't quite successful as replacement for Millionaires' Shortbread, with it's separate layer of caramel, as the caramel flavour wasn't really strong when mixed with the chocolate, but what this means is that these could probably be made with basic condensed milk to give the same fudgy filling, without much loss of flavour.

I'm adding these to April's We Should Cocoa link-up, over at Tin and Thyme. Choclette doesn't set a theme for this link-up - any recipe, using any form of chocolate is welcome.

Saturday 1 April 2017

Goat's Cheese Soufflé Tart

This is the second time I've written about this recipe, for a Goat's Cheese Soufflé Tart, which is given extra flavour with a layer of onion chutney in the base, but the first was several years ago, so it was definitely time revisit the recipe!

I had a lot of cheese left after a meal with friends, including a large piece of soft goat's cheese, which wasn't going to keep for long. I was in two minds as to which kind of tart to make - this recipe or a more conventional leek and goat's cheese quiche with an egg and cream custard filling. In the end, I decided to make this soufflé-style tart again, as it was such a success the first time.

It's a little more fiddly to make than a traditional quiche, but from my previous experience, more likely to be successful, as the semi-solid, meringue-like, soufflé filling prevents any possibility of a soggy pastry bottom when the tart is cooked. I made my own pastry from 200g plain flour, 100g butter, 25g grated parmesan cheese plus water to mix, and used it to line a 22cm (9") deep fluted flan tin, which was then baked blind. I then followed the recipe closely for the soufflé filling, except for using finely chopped rosemary instead of thyme.

Once again, this was a resounding success! The onion chutney I had chosen was flavoured with a little chilli, nigella seeds and cumin, so added an extra piquancy to the layer between the pastry and goat's cheese filling. The souffléed filling was moist and creamy - completely different to the custard filling of a conventional quiche - and the pastry was light and crisp. The goat's cheese which was crumbled over the surface of the tart didn't brown much during cooking, so the tart looked pale and interesting rather than well-cooked, but this didn't affect the flavour. My goat's cheese was quite strongly flavoured and this came through well in the tart.