Showing posts with label dessert. Show all posts

Saturday, 16 January 2021

Cranberry and Hazelnut Frangipane Tart

Just before Christmas, I bought a jar of Christmas Cranberry Curd; just after Christmas I bought another - 'reduced to clear' so that the supermarket could get rid of unsold Christmas stock. I didn't have a clear idea of what to do with them at the time, but the idea of using some in a Bakewell tart type of thing slowly took shape. So, in my first baking session since Christmas, that's what I made.

I didn't have enough ground almonds, but I did have ground hazelnuts which needed using. I thought the hazelnut flavour might be better with cranberry, as it's much stronger than the flavour of almonds (in fact, you really need to add almond extract if you want a strong almond flavour in anything).

I also had some Trex cooking fat in the fridge, which needed using up too. I've never used Trex in baking (it was bought to make a lining paste for bundt tins) but it was past it's BBE date, so needed to be used. I did taste it to make sure it wasn't rancid, and it was fine. I substituted 1/4 of the butter in the pastry with Trex and just that amount was enough to make the pastry shorter than usual. The pastry dough seemed a little more difficult to work with, but it was worth it for the result, and didn't seem to affect the flavour greatly.

Ingredients

  • Shallow 24cm tart/flan tin lined with chilled raw shortcrust pastry - no need to bake blind.*
  • 200g of cranberry curd (lemon curd or a jam of your choice can be used instead)
  • Frangipane - 100g softened butter, 100g caster sugar, 2 large eggs, 50g ground roasted hazelnuts, 25g ground almonds, 25g flour (I used SR flour, but think plain flour, or more nuts would be better **).
  • 2 tablespoon of chopped roasted hazelnuts.

Method

Spread the cranberry curd over the base of the pastry case and return to the fridge while the frangipane is made.
Pre-heat oven to 200C/180C fan-assisted. Put a baking sheet in to heat up.
Make the frangipane by putting all the ingredients, except the chopped hazelnuts, into a bowl and beating until the mixture is light and fluffy and no specks of butter can be seen. Spread carefully over into the pastry case - I spoon small amounts of batter around the edge of the case then spread it inwards, so as not to move the curd or jam towards the edges of the pastry case, where it might erupt out of  any gaps between the frangipane and pastry. 
Use a teaspoon or a damp finger to try and seal the frangipane batter against the pastry sides, level the surface, then sprinkle over the chopped hazelnuts.
Transfer the tart to the heated baking sheet and bake at 200C for 10 minutes. Reduce the heat to 170C and bake for roughly another 25 minutes, until the frangipane isn't wobbling, and is golden brown in colour.

* I made shortcrust pastry using 300g flour, 150g butter and Trex and water to mix to a dough. I wanted some pastry for something else, so made more than necessary for one tart case. I'm guessing starting with 200g flour would be enough for just the tart case, and you could make a sweet shortcrust (adding sugar and egg) if preferred.

** The tart puffed up while baking, which I expected, as I'd added some SR flour, but it didn't sink evenly when it cooled, leaving a puffy rim around the edge of the tart and a fragile crust on the frangipane. This hasn't happened to me before, but I'm now rethinking the use of SR flour in frangipane. I'll try plain flour next time, but all ground nuts can be used too; I like a little flour as it makes the frangipane lighter and more cakey than when just nuts are used, but that's a personal preference.

This tart was absolutely delicious. The tartness of the cranberry curd stood up well to the flavour of the hazelnuts. My only disappointment was that the curd seemed to be absorbed into the bottom of the frangipane mixture, so that there wasn't a well defined layer of curd left after baking, as there usually is with jam. When I checked the curd ingredients, I noticed that it contained agar as a gelling agent, which gave it a strange gloopy consistency, but may also explain the way it behaved in the tart, when heated. Fortunately, this didn't affect the flavour, only the looks.

Wednesday, 23 December 2020

The Triennial Chocolate, Fig and Ginger Panforte

For some reason, I have made this Panforte, for Christmas, at three year intervals - 2014, 2017 and again this year. Perhaps it's going to be a tradition!


Panforte is a particularly suitable Christmas treat this year, when, if we are meeting friends and family at all, it's on a very restricted schedule with regards to both numbers and time. It keeps for weeks after making, so however few of you there are to eat it, you'll get through it without any waste. 

This year, this panforte will almost be all mine! Apart from a brief visit from both my children on Christmas Day for an exchange of presents and a meal together, the Covid restrictions mean, like many others, I'll be alone most of the time. That doesn't bother me - all I need is a good book to keep me happy, and it will only be a few days before we're all back into the routines of our lives. For me that can be quite hectic, as I volunteer at the local Food Bank, which has been very busy since the start of the pandemic.

I followed my original recipe from 2014, which was a compilation of several other recipes, in a quest for perfection. I could vary the flavours by changing the fruit, or leaving out the ginger, but this particular combination of chocolate, figs and ginger, together with the spices and hint of orange, works so well that I'm reluctant to make changes.

Here's wishing you the best 

for this Festive Season, 

with hopes that 2021 

will be better for all of us!

Thursday, 26 November 2020

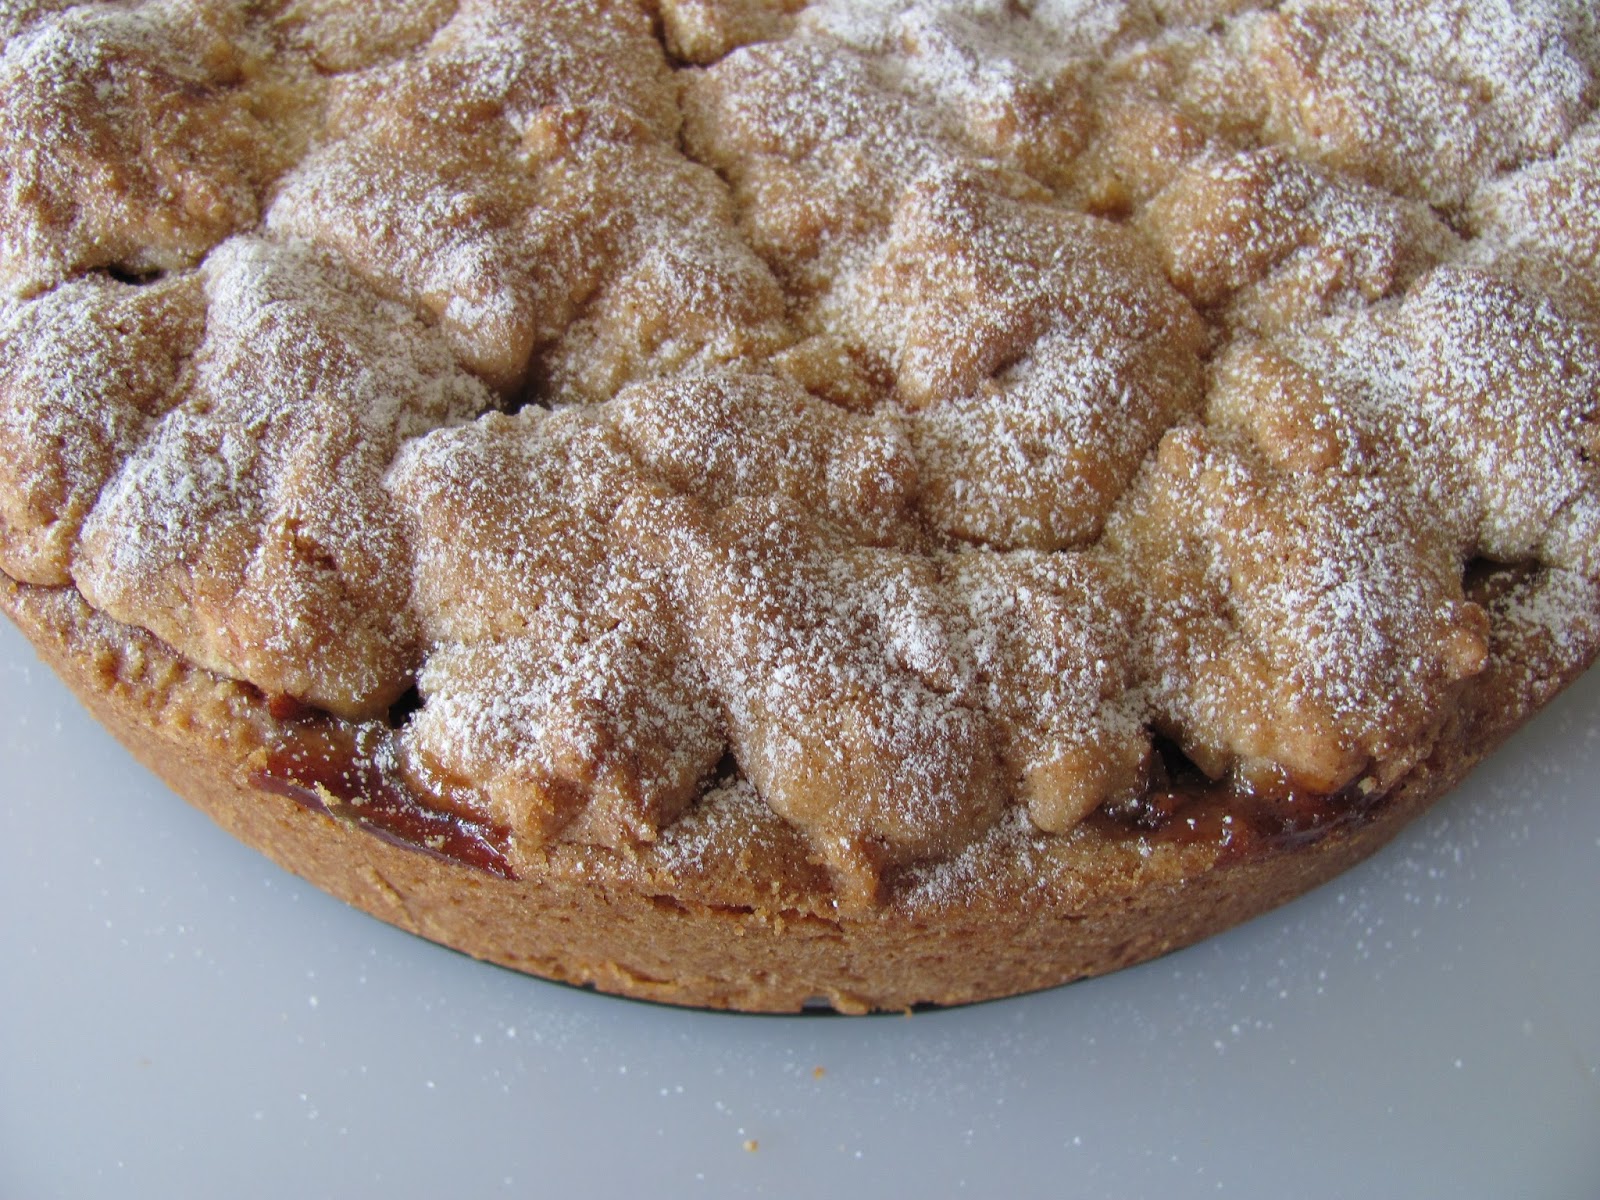
Apple and Cranberry Cake

I usually make this cake, which is two layers of a scone-like dough sandwiching a layer of fresh and/or dried fruit, as a dessert. I often make it when I haven't got time to fuss around with pastry, as the result is very similar to a pie, but much easier to make. 
This time, I wanted to capture some of the essential flavours of Autumn, which is one of my favourite times of the year for seasonal baking. So I used eating apples, dried cranberries and cinnamon in the filling, and some flaked almonds in the topping.

Ingredients

150g butter
150g caster sugar
1 large egg
300g SR flour
3 eating apples, peeled, cored and sliced* 
80g dried cranberries
1 teaspoon cinnamon
30g flaked almonds
icing sugar to dust
* I usually slice the apples into water to which I've added a little lemon juice or vinegar, to stop the fruit discolouring. When I'm ready to use the slices, I drain them well and pat dry on a clean tea towel. 

Method
Preheat the oven to 180C, and line the base of a 20cm (8") springform tin with baking parchment; grease the sides with a little butter if your tin needs it.
Melt the butter in a large mixing bowl, in the microwave, or in a saucepan on the hob - if you do this in a large pan you can mix the dough in it too. The butter doesn't need to be really hot - just completely melted.
Stir in the sugar, then beat in the egg.
Add the flour and mix in thoroughly - it should give a soft crumbly dough.

Put 2/3 of the dough into the cake tin, and spread evenly with your fingers, building up a little wall of dough around the edge of the tin, to contain any excess fruit juices.**
Mix the flaked almonds into the remaining dough.
Mix the prepared apples, dried cranberries and cinnamon together and spread over the dough base.
Crumble the rest of the dough over the top, then press down lightly, spreading the dough a little to give good coverage over the top. The dough will spread more during baking, so don't try to fill all the gaps.
Bake for 50-60 minutes until the top is firm and golden. Cool for about 10 minutes, then run a knife between the cake and the edge of the tin, to stop and leakages of fruit juice sticking to the sides.
Dust with icing sugar before serving; I like this at room temperature, and I usually leave it on the springform base as it's quite fragile, but  it can be moved to a serving plate if you have a large cake lifter.
** There's a photograph here which shows how the cake is assembled.

Wednesday, 12 February 2020

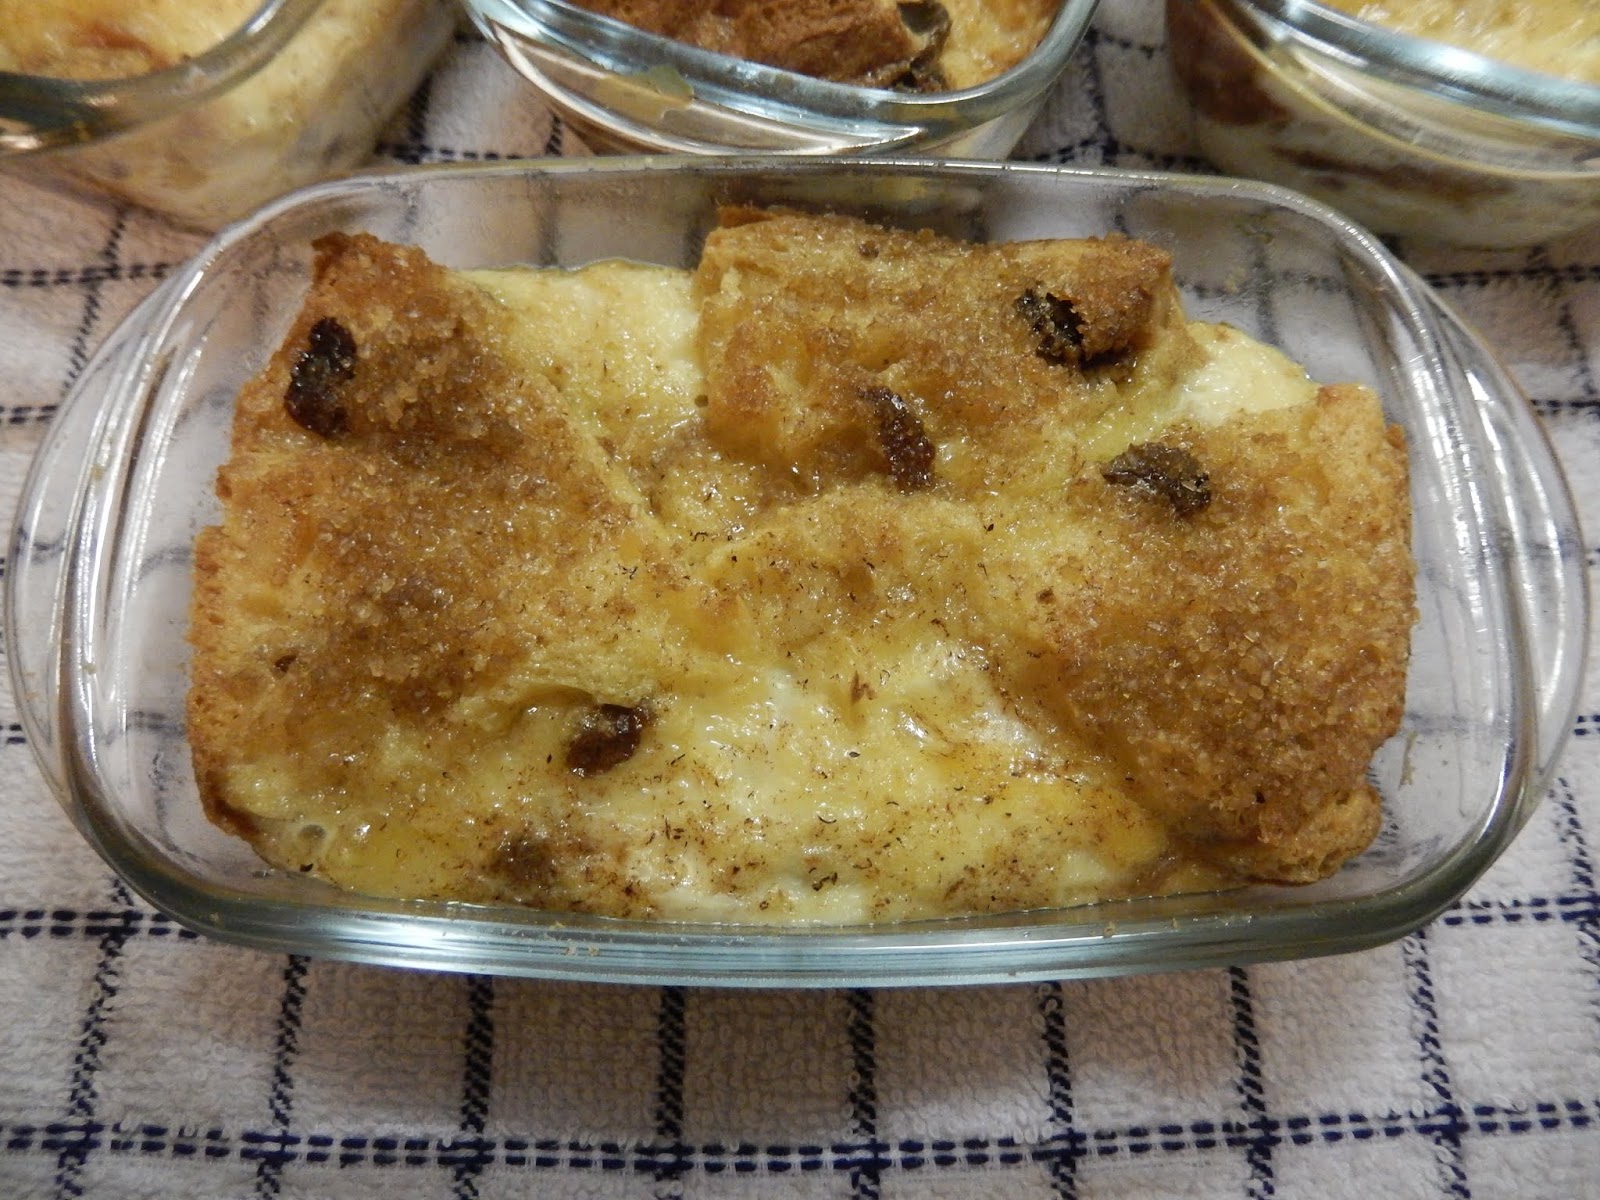
Lemon Bread and Butter Pudding

This dessert used up a panettone  bought for Christmas, in case of an unexpected need which didn't arise. I also had fresh lemons and an opened jar of lemon curd to use up, so as the panettone contained mixed peel, a lemon B & B pudding seemed the way to go.

I decided to make 4 individual puddings so that 2 could be frozen. I'm not sure how well they'll freeze, but I thought it was worth a try, rather than eating  a calorific dessert for 4 days running. I'd eaten one portion of the panettone, so I estimate there was about 425-450g left of the loaf.

I halved the loaf from top to bottom and sliced one portion into thin semicircular slices, which I sandwiched in pairs, spread with lemon curd. The rest of the panettone was cut into 4 slices to fit in the bottom of the dishes - I spread these with lemon curd too, and put into thickly buttered dishes curd side uppermost. Any trimmings and leftover pieces of panettone were crumbled and divided between the 4 dishes, then the semicircular sandwiches were cut and arranged neatly on top. I brushed the top of each pudding with more melted butter to help it crisp in the oven.

I hadn't realised until I started comparing recipes the wide range of egg:milk ratios used, as well as various baking times and temperatures, so the rest of the preparation went on a kind of average of the recipes I looked at.

I whisked together 3 large eggs, 50g caster sugar, the zest of 1 lemon and 500mls of semi-skimmed milk, and divided it between the 4 dishes. These were left standing for 30 minutes before baking, to allow the liquid to be absorbed into the bread - I pressed down with a fork occasionally to make sure the top pieces of panettone soaked up the custard mixture.

I added a little grated nutmeg and a sprinkling of demerara sugar to the top of each pudding, before baking at 160C (fan assisted) for 35 minutes. I intended to bake until the puddings were set, but still wobbling a little in the middle, but I think I baked for about 5 minutes too long.

These were lovely little puddings; adding lemon curd boosted the flavour nicely. I think adding some more dried fruit (such as a handful of sultanas) would have been an improvement and using a little more milk - another 100ml, perhaps - would have made the puddings softer and lighter, but I was pleased with them as they were.

As usual, with things that look their best straight from the oven, I didn't manage to get very good photographs of these. Not only were the light conditions far from perfect, they were visibly deflating as I watched them!

Saturday, 28 December 2019

Festive Desserts

I made two desserts for the Christmas period, as something chocolate is obligatory, but my daughter had also asked for a repeat of Dan Lepard's Mont Blanc Layer Cake.

The Mont Blanc Layer Cake recipe, based on meringue, is far too big for just three of us, particularly as it doesn't keep well, so I made a meringue roulade with only 3 egg whites, filled it with a half quantity of the chestnut and ricotta cream and drizzled melted chocolate over the top.

We decided, on trying the dessert, that although it was delicious, we all preferred the crisper meringue of the original recipe, which gives a better textural contrast with the chestnut cream than the soft meringue of the roulade.

For  the chocolate dessert, I made a half-sized quantity of Delia Smith's Chocolate Truffle Torte, which fitted nicely into a 7" (18cm) shallow cake tin. The only departure from the recipe was to use Amaretto liqueur instead of rum.

My daughter also contributed a batch of mince pies, which has become a tradition now. She uses this Mary Berry recipe, which adds dried apricots to the mincemeat and tops the tarts with grated marzipan.

Tuesday, 1 October 2019

Autumn Fruit Frangipane Tarts

It's a measure of how little baking I do these days, that it's over three weeks since I last posted. When I do bake anything, however small, half of it usually ends up in the freezer, meaning there's always cake there if needed, but as a result I don't need to bake as often. My waistline doesn't need cake every day, either!

When making this tart I realised that I hadn't made any pastry since the festive baking at the end of 2018 - an indication that calorific desserts are also becoming something for special occasions; I usually just have fresh fruit and yogurt!

These Autumn Fruit Frangipane Tarts had plum jam in the base and fresh blackberries and pieces of eating apple embedded in the frangipane mixture. I made two small tarts instead of one big one, as I was taking one to my local Cake Club. The frangipane comes from this Jamie Oliver recipe, but I made half as much again, after seeing the amount the original ingredients gave.

I made sweet shortcrust pastry to this recipe, but this made enough for the two tart cases with quite a lot leftover: 300g plain flour, 1/2 teaspoon baking powder, 150g butter, 50g icing sugar, 1 medium egg, water as necessary to bind. If you reduce the quantities you could use just an egg yolk instead of a whole egg.

Once the pastry is mixed, rest in the fridge for 20 minutes, then roll out as thinly as possible to line 2 x  20cm (8") tart tins (or one 23cm tin if you're following the recipe). Refrigerate again while you make the filling - there's no need to blind bake with a frangipane.

Preheat the oven to 180C (160 fan) and put a baking sheet in to heat up too.

Put all the frangipane ingredients into a bowl and beat until well combined. I added just a few drops of almond extract, to give a better flavour, instead of the lemon zest in the recipe. Then prepare the fruit.

(I used one large eating apple, which I peeled and chopped into quite thin pieces, about 1cm square, and put into acidulated water so that the pieces didn't turn brown. I also used fresh blackberries, as I was worried that frozen would release too much juice and spoil the colour of the frangipane - I didn't weigh the amount I used but the quantity give in Jamie's recipe sounds about right.)

Spread a couple of tablespoons of plum jam (or whatever red jam you prefer) into the base of each pastry case. Divide the frangipane mixture between the two tarts, working from the edge inwards, and trying to get a good seal between the frangipane and the pastry, so that the jam doesn't boil out around the edge. Spread evenly and then dot the drained and dried apple pieces and blackberries over the surface, pressing down gently to embed them in the frangipane. Sprinkle over a handful of flaked almonds, then a little extra caster sugar.

Transfer to the heated baking sheet and bake for about 45 minutes until the frangipane is a good golden colour and feels firm. Cool on a wire rack.

I decorated the tart which I was taking to Cake Club with a drizzle of glacé icing, but it's not really necessary, and the icing soon dissolved where it was in contact with the pieces of fruit, so didn't really give the desired effect by the time it was eaten.

Adding fruit to a frangipane tart is a tasty bonus, although in this case the plum jam had a stronger flavour than the apples and blackberries - I should have looked for a blackberry jam, I think.

My tart looks darker than most frangipane because I was using almonds which had been ground with the skins still on; the jury is still out on whether this really gives a good look.

Friday, 3 May 2019

Chocolate Orange Cheesecake

This is a really good cheesecake recipe, in so many respects, that it's a pity the topping lets it down a little. The base has just the right proportions of plain chocolate digestive biscuits and butter, so that it isn't too crumbly nor does it set too hard to cut. The cheesecake mixture is light and delicate in texture and flavour, and doesn't crack while cooling (although I did run a knife around the edge as soon as it came out of the oven to help prevent that).

The idea of the topping, which is a mixture of orange flavoured chocolate, and chocolate with almonds in it, is lovely, and it tasted delicious, but the chopped (or grated) chocolate melted on the hot cheesecake, then set to a crisp brittle layer, which made it difficult to cut and serve neatly. What is even more annoying, is that this didn't happen the first time I made the cheesecake - then the tiny pieces of chopped chocolate stayed as a 'rubble' across the top and didn't hamper cutting it at all. I suppose I must have used a different brand of chocolate this time.

I didn't experience any problems with the recipe for this Chocolate and Orange Cheesecake, apart from the issue with the topping. I don't have a large food processor, so mixed with a hand-held electric beater, on a slow setting, after the eggs has been whisked thoroughly. As usual, even a double layer of foil failed to prevent a little water getting between the foil and the springform tin - perhaps it was condensation, as I was using extra-strong foil, which shouldn't have got holes in it with my careful handling.

I've been trying to think of a different way to top the cheesecake. Piped and set chocolate shapes or a thin layer of ganache, left to drip down the sides, are two options to keep the chocolate flavour. Another possibility is orange curd swirled into lightly whipped double cream or mascarpone. Overall, though, this is a recipe worth repeating.

Saturday, 29 December 2018

Lemon Curd and Hazelnut Tart

This was one of my Christmas desserts - not very festive, but I'd just made 2 large jars of lemon curd with some excess lemons, and needed to find ways of using it. I used this recipe for my curd, but this time added the zest of all 5 lemons. Lemon curd makes a tasty dessert, swirled into natural yogurt and topped with a sprinkle of plain granola, but it takes a long time to get through a whole jar that way, let alone two. This recipe used around 200g - I didn't weigh it, just spooned out about half a jar.

I made a sweet shortcrust pastry, using 200g plain flour, 1/4 teaspoon baking powder, a pinch of salt, 100g of butter, 50g of icing sugar, an egg and enough water to make a soft dough. After resting in the fridge I lined a shallow fluted flan tin with the pastry (the recipe won't use all the pastry, if you can roll it out really thinly - I made mince pies with the leftovers). I spooned 200g lemon curd onto the raw pastry, spread it evenly and refrigerated again while I made the hazelnut frangipane. I did this by putting 100g softened butter,
100g caster sugar, 50g SR flour, 50g ground roasted hazelnuts, half a teaspoon of vanilla extract and two eggs into a bowl and beating until well combined. The frangipane was spread gently over the lemon curd, working from the edges inwards, and being careful to get the batter to seal against the pastry edges, to minimise the chance of any lemon curd bubbling out. I sprinkled a handful of finely chopped roasted hazelnuts over the frangipane, then decorated the top with a few pastry shapes cut out from the excess pastry - they're supposed to be snowflakes but look more like stars. The tart was baked, on a pre-heated baking sheet, at 200C for 15 minutes, then the heat was lowered to 170C and baking continued until the frangipane was golden and firm - about another 20 minutes. The frangipane rose quite a lot while cooking, but thankfully sank back to give a level surface as it cooled - I think perhaps SR flour was unnecessary, but it does give a lighter texture to the tart.

The combination of lemon and hazelnuts was delicious, and the frangipane had the lightness of a sponge rather than being stodgy, as is sometimes the case when no raising agent, or all nuts, rather than a mixture of nuts and flour is used. I chose to use hazelnuts as they have a much stronger flavour than almonds, and because I thought they would work better with the tanginess of the lemon curd. I think the lemon curd would have overwhelmed the nut flavour if almonds were used, but this way the hazelnut flavour won.

Tuesday, 21 August 2018

Chocolate Hazelnut Tart

- for the final We Should Cocoa

We Should Cocoa, a monthly link-up for chocolate recipes started 8 years ago, when Tin & Thyme was still Chocolate Log Blog, and Choclette shared her hosting duties with Chele at Chocolate Teapot. Amazingly, I have been participating since the first link-up, although not very regularly recently. According to my records, I've contributed to 65 out of a possible 95 events. This month will be the 96th We Should Cocoa - and Choclette has decided to call a halt.

For many years the link-up had a theme, so I decided to check on the first, in August 2010. It turned out to be raspberries. I made Chocolate Frangipane Tartlettes with chocolate pastry and raspberry jam in the base - a kind of chocolate bakewell tart. At the same time, I made some similar tartlettes, with Nutella in the base, which we preferred. I thought it would be a fitting end to these events to base my entry on the first thing I made, so decided to go with a tart with Nutella in the base and a hazelnut frangipane on top. I also added more chocolate to the filling, so that the final tart had both the chocolate and hazelnut flavours of the Nutella ramped up.

Ingredients
Pastry
150g plain flour
100g butter
25g icing sugar
25g cocoa
1 egg yolk
cold water to mix

Filling
110g softened butter
110g caster sugar
1 egg + 1 egg white
1 tablespoon plain flour
110g ground hazelnuts
150g chocolate hazelnut spread
25g plain chocolate (I used 100% cacao) grated*

to finish - 40g plain chocolate (about 70%)

* 100% cacao is very hard, and when grated on a fine microplane grater, 25g goes a long way. If you are using  70% plain chocolate, or a coarse grater, you might need as much as 50g to get enough grated chocolate to cover the base.


Method
Make the pastry by sifting the icing sugar and cocoa into the flour, then rub in the butter until the mixture resembles breadcrumbs. Add the egg yolk and enough cold water to make a soft but not sticky dough, kneading briefly. Shape the dough into a disc, wrap in clingfilm and refrigerate for 15 minutes. Roll out the dough thinly and  line a 20cm (8") tart tin. Refrigerate again while you make the filling.
Pre-heat the oven to 200C. Put a baking sheet into the oven while it is heating.
Cream the butter and caster sugar until light and fluffy, then slowly beat in the egg, egg white and flour. Fold in the ground hazelnuts.
Warm the chocolate spread slightly (just a few seconds in the microwave, or in a bowl over hot water) and spread over the base of the pastry case, then sprinkle over the grated chocolate. Spoon the hazelnut frangipane filling into the pastry case and spread evenly.
Put the tart onto the preheated baking sheet and bake for 10 minutes, then lower the heat to 180C and bake for a further 25 minutes until the frangipane is set and golden in colour. Cool in the tin.
Finish the tart by melting the 40g of plain chocolate and drizzling it over the cool tart - I put the chocolate into a small plastic bag, then put that into a mug of hot water (seal the bag first, of course). When the chocolate has melted, snip off one corner of the bag to allow the chocolate to dribble out.

This tart was delicious! The extra dark chocolate in the base cut through the sweetness of the chocolate hazelnut spread, and the hazelnut flavour of the frangipane came through strongly. The only thing wrong was that the frangipane appeared to have separated a little as it cooked, leaving a pale set custard-y layer at the bottom. Although this didn't affect the flavour, it did affect the appearance; I have no idea what went wrong.

So, it's the end of an era! I'm sending this recipe to the very last We Should Cocoa link-up. Although I don't bake as much now as I did 8 years ago, I can thank WSC for stretching both my skills and my imagination. Over the years I've used ingredients that I would never have thought to pair with chocolate (some more successfully than others, I must admit) and tackled more complex recipes than I would usually handle. I believe Chocolette intends to keep the WSC archive, and has a Pinterest board, so we can still look there for inspiration.

Thank you for 8 years of fun, Choclette!


Monday, 30 July 2018

Lemon Meringue Ice Cream Cake

To be honest, this Lemon Meringue Ice Cream Cake is nothing more than an assembly job, consisting of just creme fraiche, bought meringues and lemon curd on a sponge cake base.  However, it's been a useful dessert to have in the freezer, especially during the sort of summer we're having at the moment. It slices easily from frozen, and only needs a few minutes to soften enough to eat. I found that the meringue pieces become less noticeable with time, but it still tastes good.


If you want to make it more complicated, you can make your own cake layer for the base - and I have done this in the past - but a good bought madeira (or even ginger) cake is perfectly acceptable. Another good addition, if you're only feeding adults, is a little limoncello sprinkled on the base, and stirred into the lemon curd. Homemade lemon curd would, of course, vastly improve the dessert too!


Saturday, 23 December 2017

Fig, Chocolate and Ginger Panforte

This is a repeat of the recipe for Fig, Chocolate and Ginger Panforte that I made three years ago. This year I used gluten free flour and divided the mixture between two 6" (15cm) foil pie cases for baking, as I wanted to take one as a gift to friends, where I knew that some of the other guests required gluten free food. I also left out the orange zest, although, after tasting, my memory of the first one tells me that that it's better left in! I kept the baking time the same, as the smaller panforte were similar in depth to one large one.

Panforte is ideal for this time of year, as it is more like a confection than a cake, and seems to keep for ever once it is baked. I cut the cake that I kept for myself today, over three weeks after making it and it tasted just as good as the when first made. It's very rich, so best cut into small slivers for serving.


HAPPY CHRISTMAS 
TO YOU ALL!


Wednesday, 22 November 2017

Apricot and Lemon Bread and Butter Pudding

I made this 2-portion pudding in individual dishes, but if it was made in one dish it could easily feed three people; I was a little too greedy! The ingredients list is a bit vague, because the only thing I measured accurately was the milk.

Ingredients
*4 thick slices of brioche, each about 10cm square
butter, softened
apricot jam
a handful of soft dried apricots, chopped
a small chunk of glacé lemon peel chopped finely (optional)
2 medium eggs
225mls semi-skimmed milk
zest of half a lemon
1 tablespoon caster sugar, plus a little more for sprinkling on top
freshly grated nutmeg

*or use plain white bread from a small loaf  - slightly stale bread can be used for this sort of pudding

Method
Thickly butter two individual baking dishes, which have roughly 350mls capacity each (or use one larger dish).
Mix the apricots and peel together, if using.
Use more butter and some apricot jam (fairly thinly spread), to make two sandwiches with the brioche.
Cut the sandwiches into suitably sized pieces to fit into your chosen dishes - I cut mine into 8 tiny triangles to get a tight fit.
Share half the pieces of sandwich between each dish and sprinkle with 2/3 of the fruit.
Arrange the rest of sandwiches on top, trying to keep the top fairly level and sprinkle over the rest of the fruit.
Mix the eggs, milk, lemon zest and caster sugar together in a jug and divide equally between the two dishes. Leave to stand for up to an hour to allow the custard mixture to soak into the bread.
When ready to cook, preheat the oven to 180C (160 fan). Sprinkle a little more sugar over each pudding and then grate over some nutmeg.
Cook for 25-30 minutes, until golden brown and crisp on top. One large pudding might take a few minutes longer.

This was a tasty version of the standard B & B pudding - the touch of lemon, and the tartness of the dried apricots, cut through the sweetness added by the jam.

I apologise for the awful photo - I wanted to get the puddings fresh from the oven, as they deflate as they cool and don't look so attractive, so had to use flash.


Sunday, 9 July 2017

Red Gooseberry and Orange Crumble

I wouldn't normally add a post about what is essentially my usual crumble recipe, but I haven't baked anything for over two months now, so need to keep the blog alive! 'Not-baking' started with a need for both of us to lose a little weight before going away to France, so that the inevitable excesses of holiday eating didn't have too great an impact. Unfortunately, we then returned from holiday to face a family health crisis, which hasn't left me with any time to bake.

But, however little time you have, the garden continues to demand attention - this weekend it was the red gooseberries which needed harvesting. There was only 300g of fruit on  the bush, not quite the amount I usually use, so I added a chopped up orange segments to the gooseberries, and the zest of the orange to the crumble mix. It added an interesting dimension to the flavour.

Ingredients
80g plain flour
80g porridge oats
80g light muscovado sugar
80g butter, in small cubes
1 orange
300g prepared gooseberries
50g caster sugar
2 teaspoons ground rice (to thicken the fruit juices)

Method
Put the flour, oats, muscovado sugar and butter into a large bowl, and add the finely grated zest of the orange. Rub in the butter to make the crumble mix.
Cut the peel and pith from the orange, over the dish in which you are going to bake the crumble to save any juice. Cut the orange into small pieces, then mix with the gooseberries, caster sugar and ground rice, in the baking dish.
Scatter over the crumble mix and press down lightly.
Bake at 200C (180C fan), for about 45 minutes, until the crumble is golden brown and the fruit juices are bubbling.

Thursday, 11 May 2017

Rhubarb Vanilla Yogurt Cake

I happened upon this recipe, on the Riverford Organic Farmers website, by chance, while looking for new recipe for a rhubarb cake. I wanted one which didn't use a lot of fruit, as my crowns aren't doing well this year (I think it was the lack of a prolonged cold spell during last winter).

All I can say is that I'm thrilled to have found this recipe; it made a perfect cake! As an added bonus, it couldn't be simpler to make - dry ingredients in one bowl, wet in another then combine the two and mix briefly. The rhubarb was even mixed with the dry ingredients, reducing the steps needed to mix the batter even more, as fruit is often folded in separately at the end. I think it's probably quite important to keep the rhubarb pieces small, so that they don't sink through the cake during baking, but the raw cake batter was thicker than normal, which also helps.

I did make one change to the recipe - I only had vanilla yogurt available, rather than plain, but as I wasn't adding an additional flavour, only a little more sugar, I decided to go ahead anyway. The resulting cake was light but moist, with a really tender crumb, and it wasn't too sweet either (even when using a sweetened yogurt), allowing the tart flavours of the rhubarb and orange zest to show through. It was fantastic while still warm, as a dessert, and almost as good when it was completely cold, eaten as a cake. This is definitely a cake to make again!

Wednesday, 3 May 2017

Zebra Cheesecake

I decided on cheesecake for an Easter dessert; more specifically, chocolate cheesecake, as I think the family would feel cheated if chocolate didn't make an appearance at Easter! A few weeks ago I saw a link to a recipe for a Zebra Cheesecake in an excerpt from Lorraine Pascale's latest book "Bake: 125 Showstopping Recipes, Made Simple" which looked ideal.

The recipe was simple to follow, and involved layering measured quantities of vanilla and chocolate cheesecake mixture onto a biscuit base. As the layers build, the cheesecake mixture gradually spreads to the edges of the baking tin, and this forms an attractive pattern in the baked cheesecake.

That's the theory! In practice it didn't work quite that way.

Firstly, the cheesecake mixture was very reluctant to spread, even with quite vigorous tin tapping. Although I did manage to get the mixture to the edges of the tin eventually, it was still domed in the centre when it went into the oven. Fortunately it levelled out before it set (with a little extra shaking).

Secondly, after 35 minutes baking - the time suggested in the recipe - the cheesecake still looked as raw and wobbly as when it went into the oven. It took well over an hour until I was satisfied that the cheesecake was cooked - set at the edges but still wobbly in the middle.

Thirdly, my cut cheesecake didn't look much like the photo accompanying the recipe. I followed the instructions, making each layer with about 2 tablespoons of mixture; this gave me, as far as I can make out from my photos, 14 or 15 alternating layers of vanilla and chocolate. I'm not sure why the layers in my cheesecake look so much thinner than those in the published photo, if that cheesecake was made following the same recipe exactly. Fewer layers - perhaps 8, using a quarter of each mixture in each layer - would give a more attractive result, I think.

After all that, this cheesecake wouldn't feature amongst the best I've ever made in terms of eating quality either! It tasted pleasant enough but it was very solid and quite dry in texture.

On the positive side - the pattern does look zebra-ish, and the cheesecake didn't crack during cooking or cooling. You can see from the photos that I made one slight departure from the recipe - I made the base using 200g plain chocolate digestive biscuits and only 80g butter. I've found that using half the quantity of butter to the weight of biscuits can make the base too solid and difficult to cut - I prefer the biscuit layer to be a little looser and crumblier.

I was disappointed that the cheesecake didn't look as attractive inside as the recipe suggested it would but even more disappointed that the baking time was so inaccurate and that the recipe didn't make a better cheesecake. This is the first recipe from Lorraine Pascale that I've tried, and it doesn't give me much confidence to try others!

Friday, 21 April 2017

Mincemeat and Apple Cake

Another outing for the cake I often make when I want a dessert with fresh fruit, but can't be bothered to fuss around with pastry. Because I hadn't checked supplies and found myself short of flour, I used a proportion of spelt flour in the recipe this time - it seemed to make the cake a little more crumbly.

Anything with mincemeat in it smells wonderful when it is baking; in this case the flavour was pretty good too. Adding the apples and orange zest cut back on the sweetness of the filling a little without changing the flavour much, as the mincemeat had it's own citrus notes. The dough has a texture somewhere between pastry and scone - what I imagine the old-fashioned American shortbread cakes to be like.

I'm pleased to say that this cake used the last of my winter mincemeat stocks!

Ingredients
150g butter
150g caster sugar
1 large egg
*100g SR flour
*200g white spelt flour
*1 teaspoon baking powder
250g mincemeat
2 eating apples, peeled, cored and chopped into small pieces
grated zest of 1 orange

* you can use 300g SR flour, in which case you won't need the baking powder

Method
Preheat oven to 180C. Grease and base-line a 20cm (8") springform cake tin.
Melt the butter in a large bowl in the microwave - it doesn't need to be very hot, just liquid. Stir in the sugar, then beat in the egg.
Add both flours and the baking powder and mix to a soft dough. Put 2/3 of the dough into the baking tin and spread out into an even layer with your fingers, building up a little wall around the sides of the tin.
Mix together the mincemeat, chopped apples and orange zest and spread onto the cake base.
Crumble the remaining dough evenly over the filling and press down lightly, spreading the dough as you do - it should more or less cover the top, but any small gaps will fill as the dough rises and spreads during baking.
Bake for 50-60 minutes until the top is firm and golden. Cool for about 15 minutes, then run a knife between the cake and the tin, in case any fruit juices have leaked from the cake and are sticking to the sides of the tin - this can sometimes happen with mincemeat.
Dust with icing sugar before serving, either warm or at room temperature. This cake can be quite fragile, so I always leave it on the springform base.

Thursday, 13 April 2017

Rhubarb, Marzipan and Citrus Cake

I've been harvesting our homegrown rhubarb since the middle of March, and this traybake recipe is perfect for the beginning of the season when there are some thin stalks to pick. If you can only get thick sticks, then I suggest you cut them into fairly thin slices, both to distribute the rhubarb evenly through the cake, and make sure it cooks properly.

I picked this Rhubarb, Marzipan and Citrus Cake recipe because I wanted something portable to take to my daughter, who was cooking a Mother's Day dinner, and also because I know she loves marzipan.

I followed the recipe exactly, although I used the zest from the whole lemon and orange, as I didn't see the point of leaving half grated fruit - this turned out to be a good move, as the citrus flavour wasn't very pronounced, even with the extra zest. I also used fine cornmeal rather than polenta, as I can only get the quick-cook sort which is relatively coarse.

What the recipe doesn't mention is that initially the cake batter seems too stiff, and although it does slacken a little when the fruit is added, it never gets to the 'dropping' stage. Resist the temptation to add more liquid -  more juices will be released from the fruit during baking.

We all loved this dessert - there were subtle citrus notes amongst the tang of the rhubarb, and the marzipan gave concentrated pockets of the sort of almond flavour you don't get from ground almonds alone. My husband reckoned it would come a close second to rhubarb crumble in his 'favourites' list!

Monday, 20 March 2017

Chocolate Tart

gluten- and lactose-free

I have a favourite recipe for a baked filling for a chocolate tart, which is naturally gluten-free, but unfortunately it didn't work well when I tried to make it lactose-free too. Using a vegetable fat instead of butter and lactose-free cream instead of creme fraiche lead to the filling separating during baking to give a thin layer of egg custard on the base with a thicker chocolate layer on top. It was still edible and quite tasty but not really good enough to serve to guests.

Searching through my file of recipes cut from magazines, I eventually found a recipe for a filling for a chocolate tart which looked suitable. It contained a much smaller amount of butter than the previously tried recipe and cream rather than creme fraiche, so I hoped it would adapt better to lactose-free alternatives.

Ingredients
23cm (9") pre-baked shortcrust pastry case (gluten and dairy-free, if necessary)
50g hard vegetable fat (eg Stork)
250g 70% dark chocolate, dairy-free
3 large eggs, separated
50g caster sugar
6 tablespoons lactose-free double cream
1 tablespoon finely ground fresh coffee

Method
Pre-heat oven to 200C.
Melt the butter and chocolate together in a bowl, over a pan of simmering water. Cool slightly.
Whisk egg whites to very soft peak stage.
Whisk yolks and sugar in a large bowl, until just combined and slightly frothy. Stir in the coffee and cream.
Pour in the cooled chocolate mixture, and fold in gently, along with the egg whites.
Spoon the chocolate mixture into the pastry case, and level using a hot, wet palette knife to give a smooth surface.
Bake for 12-15 minutes, until the edges are firm and the centre is just set.
Cool to room temperature before serving.

This recipe worked perfectly. The chocolate filling was dense and fudgy, but not too sweet. Although I don't need either gluten-, dairy- or lactose-free baking for family cooking it is nice to have 'free-from' alternatives when needed for guests. Now that I'm happy with the gluten-and dairy-free pastry recipe I use, a chocolate tart is a useful addition to my repertoire.


Friday, 3 March 2017

Coconut Tart

gluten- and dairy-free

The main aim of this baking session was to see how well my recipe for gluten-and dairy-free pastry behaved during blind-baking (see this post for details of the pastry). It shrank rather more than I'd expect from using my usual pastry techniques, and browned slightly too much during the drying out period. My main fear was that, as the pastry is so soft and pliable, the edges would collapse during baking, but I pressed the baking parchment quite firmly against the pastry wall and made sure the baking beans went well up the sides. The over-browning can be easily rectified by lowering the oven temperature during the drying out phase, so overall I was pleased with the result.

When it came to a filling, I wanted something different to the tarts I've baked recently, so that ruled out chocolate, lemon and frangipane. I've got a recipe book called The Book of Old Tarts, and came across a recipe for Cumbrian Tart in there - a coconut macaroon-type mixture on top of raspberry jam. I don't know how authentically Cumbrian this recipe is, as I couldn't find any online references, but  it sounded tasty, and was simple to make.

I didn't have raspberry jam, and although I was briefly tempted by the leftovers of a jar of mincemeat, I decided that marmalade would probably give a good sharp contrast to the sweet coconut topping - and it did!

Ingredients
1 shallow pre-baked 23cm(9") pastry case (gluten and dairy-free if necessary)
200g marmalade (I used fine shred orange and tangarine)
2 tablespoons golden syrup
25g caster sugar
55g butter (or hard baking fat, eg Stork, if dairy-free)
140g desiccated coconut
1 egg

Method
Pre-heat oven to 190C.
Spread the marmalade in the base of the pastry case.
Warm the golden syrup, sugar and butter together, in a small pan, until the sugar has dissolved.
Remove from the heat and mix in the coconut and egg.
Spread the coconut mixture over the marmalade, making sure to seal the edges where the filling joins the pastry.
Bake for 30 minutes until golden brown (mine was cooked to dark brown in 23 minutes).

If you search for coconut tart recipes, there are several similar recipes, but they often use a lot more sugar and fat in the filling, and more complicated methods of preparation. The simplicity of this recipe, together with quite low levels of sugar, meant that the flavour of the coconut dominated, and the filling, while nice and chewy, wasn't too sweet and contrasted nicely with the crisp pastry.

The second time I made the recipe I used a seedless raspberry jam in the base, and also reduced the oven temperature, from 200C to 180C, while drying out the pastry case for 10 minutes after blind baking.

I preferred the marmalade version which I thought gave the coconut filling a tropical twist as well as a certain tartness, but my husband preferred the more traditional raspberry. I found the raspberry version too sweet, although the contrasting colour does  make the tart look more interesting.

Tuesday, 31 January 2017

Lemon Tart

I've not been having much luck with lemon recipes recently; after the Spelt, Lemon and Maple Drizzle Cake, which failed twice, I had another technical failure with a Lemon Tart.

I chose this particular Lemon Tart recipe, from Good Food, to see if reducing the fat levels still made an acceptably tasty dessert - this recipe claims to be half the fat of a classic tart.

I liked the reduced fat pastry, which was unexpected, and really loved both the flavour and texture of the filling, which was light and silky smooth and just about sharp enough for my tastes. However, my tart cracked like crazy paving as it cooled. I don't think it was overcooked, as it was still wobbly in the centre, but I did leave it in the oven, with the door slightly open, to cool, so that might have been the problem, although slow cooling is usually advised to avoid cracks. The cracks didn't really spoil the tart from the point of view of eating it, but I usually only make desserts like this on special occasions, and wouldn't want to serve this to guests.