Showing posts with label gluten-free. Show all posts

Tuesday, 17 July 2018

Chocolate Tart - free from gluten and lactose

I've used this recipe before, when I needed a gluten- and lactose-free chocolate tart. I really liked it the first time I made it, and didn't want to play around finding a different recipe, as we were are in the middle of a heat-wave and having too much cake/dessert around isn't good for me at all, especially with no-one to help me eat it!

I find gluten- and dairy-free pastry shrinks more than usual when baked blind, but the recipe I use makes a sweet shortcrust pastry case which doesn't stick to the baking tin, doesn't seem to suffer from soggy bottoms and has a good 'short' texture which doesn't become too hard, which seems a good trade-off to me. The dough starts out stickier, and needs careful handling - you can find the details here. Instead of adding the tart filling to a raw pastry case, as in that particular recipe, the pastry case is baked blind once the clingfilm is removed.

When baking blind, the only thing I do differently, compared to regular shortcrust pastry, is to dry out the pastry case for a little longer than usual, at a lower temperature. I initially bake the case, lined with baking parchment and filled with baking beans, at 200C for about 12-15 minutes, then turn the oven down to 160C, remove the parchment and beans and return the empty pastry case to the oven for about 20 minutes.

The filling for this tart is dense and fudgy, but as you don't add much extra sugar, it allows the flavour of the chocolate to dominate, so you need to choose a chocolate that you are happy  to eat on its own. The addition of the coffee is to further bring out the chocolate flavour, but I can't see any reason why other flavours couldn't be used too, such as orange zest. And, of course, if you don't need dairy/lactose-free, make it with butter and regular double cream.

As you can see, I served this tart with raspberries and there was also raspberry coulis and cream available.

Saturday, 9 December 2017

Date Shortbread Squares

 - gluten-free, plus dairy-free option

This is an adaptation of my favourite 'shortbread squares' recipe, which comes from 'On Baking' by Sue Lawrence, to make it gluten-free. Instead of wheat flour and semolina, I used a gluten-free flour, ground rice and added a little xanthan gum. It's the shortbread part of the recipe which is so good - quick to make, as it uses melted butter, and very crisp and light after it's baked. Any type of filling can be used, such as mincemeat or re-hydrated and cooked dried apricots - just make sure it's not too wet; for this version I made the filling from dates flavoured with pomegranate molasses, cinnamon and a little rosewater.

Ingredients
Filling:
225g dates - chopped
3 tablespoons pomegranate molasses
3 tablespoons water
1/2 teaspoon cinnamon
1/2 teaspoon rosewater

Shortbread:
255g gluten-free plain flour
85g ground rice
1/2 teaspoon xanthan gum
170g butter (or hard vegetable fat such as Stork*)
85g caster sugar

*see note at end of post

Method
Preheat the oven to 190C (170C fan)

Start by making the filling. Put all the ingredients into a small saucepan and bring to the boil. Cover the pan, turn the heat to low, and simmer for a few minutes until the dates are soft. At this stage you can blend the filling until smooth, but I prefer to just mash the dates with a fork, to make a rough purée. You may also need to add a splash more water to make the purée easy to spread, if all the added liquid has been absorbed during cooking.

For the shortbread, mix the gluten-free flour, ground rice and xanthan gum in a bowl.
Warm the butter and sugar together in a small pan, until the sugar has dissolved, then pour onto the flour mixture. Stir well to combine thoroughly - the mixture will form a crumbly dough.
Put 2/3 of the dough into a 20cm (8") square shallow tin, lined with baking parchment, spread evenly and press down firmly.
Spoon over the date filling, spread evenly, leaving a small margin around the edges.
Use your hands to crumble the remaining shortbread mixture evenly over the dates to cover as much as possible, and press down lightly with the palm of your hand.
Bake for 30 minutes until pale golden in colour. Cut into squares (16) while still hot, but leave the squares to cool completely before trying to remove them from the tin, as they are fragile when warm.

My only criticism of these is that the added flavourings were a little too subtle - both the cinnamon and the rosewater could have been increased.

* Dairy-free: I made a second batch of these date shortbread squares which were dairy-free as well as gluten-free, using Stork vegetable fat instead of butter. The shortbread was a little more crumbly than when using butter, for some reason, and they didn't taste as rich, but the recipe was largely successful.

Saturday, 5 August 2017

Blueberry and Lemon Polenta Cake

gluten-free

We planted two blueberry bushes earlier this year, but we weren't sure whether or not they would bear fruit straight away. Fortunately they did, although the fruit doesn't all ripen at once, so I'm picking 100-150g every five days or so. I've also found out that I really prefer cooked blueberries to raw, so I've made blueberry sauce for some cheesecake pots, and added some to baked rhubarb.

I decided to put the latest pickings into a cake, but had to find a recipe using a small amount. I also had some lemons that needed using, so a blueberry and lemon cake seemed in order. I soon found this Sainsbury's recipe for a lemon and blueberry polenta cake, which only used 100g of fruit. I had to adapt the recipe a little, using vanilla yogurt instead of natural. As I was using a yogurt with a separate topping of toasted oat flakes (about a tablespoonful), I sprinkled them on top of the cake too.

This was a deliciously light cake, although I think it could have taken another 50g of fruit, as the blueberries were very thinly spread. The zest of another lemon would have improved the flavour from my point of view but I do like a tart lemon cake - others might appreciate the subtlety of a milder flavour.

It's also nice to add another gluten-free cake to my repertoire.

Monday, 20 March 2017

Chocolate Tart

gluten- and lactose-free

I have a favourite recipe for a baked filling for a chocolate tart, which is naturally gluten-free, but unfortunately it didn't work well when I tried to make it lactose-free too. Using a vegetable fat instead of butter and lactose-free cream instead of creme fraiche lead to the filling separating during baking to give a thin layer of egg custard on the base with a thicker chocolate layer on top. It was still edible and quite tasty but not really good enough to serve to guests.

Searching through my file of recipes cut from magazines, I eventually found a recipe for a filling for a chocolate tart which looked suitable. It contained a much smaller amount of butter than the previously tried recipe and cream rather than creme fraiche, so I hoped it would adapt better to lactose-free alternatives.

Ingredients
23cm (9") pre-baked shortcrust pastry case (gluten and dairy-free, if necessary)
50g hard vegetable fat (eg Stork)
250g 70% dark chocolate, dairy-free
3 large eggs, separated
50g caster sugar
6 tablespoons lactose-free double cream
1 tablespoon finely ground fresh coffee

Method
Pre-heat oven to 200C.
Melt the butter and chocolate together in a bowl, over a pan of simmering water. Cool slightly.
Whisk egg whites to very soft peak stage.
Whisk yolks and sugar in a large bowl, until just combined and slightly frothy. Stir in the coffee and cream.
Pour in the cooled chocolate mixture, and fold in gently, along with the egg whites.
Spoon the chocolate mixture into the pastry case, and level using a hot, wet palette knife to give a smooth surface.
Bake for 12-15 minutes, until the edges are firm and the centre is just set.
Cool to room temperature before serving.

This recipe worked perfectly. The chocolate filling was dense and fudgy, but not too sweet. Although I don't need either gluten-, dairy- or lactose-free baking for family cooking it is nice to have 'free-from' alternatives when needed for guests. Now that I'm happy with the gluten-and dairy-free pastry recipe I use, a chocolate tart is a useful addition to my repertoire.


Friday, 3 March 2017

Coconut Tart

gluten- and dairy-free

The main aim of this baking session was to see how well my recipe for gluten-and dairy-free pastry behaved during blind-baking (see this post for details of the pastry). It shrank rather more than I'd expect from using my usual pastry techniques, and browned slightly too much during the drying out period. My main fear was that, as the pastry is so soft and pliable, the edges would collapse during baking, but I pressed the baking parchment quite firmly against the pastry wall and made sure the baking beans went well up the sides. The over-browning can be easily rectified by lowering the oven temperature during the drying out phase, so overall I was pleased with the result.

When it came to a filling, I wanted something different to the tarts I've baked recently, so that ruled out chocolate, lemon and frangipane. I've got a recipe book called The Book of Old Tarts, and came across a recipe for Cumbrian Tart in there - a coconut macaroon-type mixture on top of raspberry jam. I don't know how authentically Cumbrian this recipe is, as I couldn't find any online references, but  it sounded tasty, and was simple to make.

I didn't have raspberry jam, and although I was briefly tempted by the leftovers of a jar of mincemeat, I decided that marmalade would probably give a good sharp contrast to the sweet coconut topping - and it did!

Ingredients
1 shallow pre-baked 23cm(9") pastry case (gluten and dairy-free if necessary)
200g marmalade (I used fine shred orange and tangarine)
2 tablespoons golden syrup
25g caster sugar
55g butter (or hard baking fat, eg Stork, if dairy-free)
140g desiccated coconut
1 egg

Method
Pre-heat oven to 190C.
Spread the marmalade in the base of the pastry case.
Warm the golden syrup, sugar and butter together, in a small pan, until the sugar has dissolved.
Remove from the heat and mix in the coconut and egg.
Spread the coconut mixture over the marmalade, making sure to seal the edges where the filling joins the pastry.
Bake for 30 minutes until golden brown (mine was cooked to dark brown in 23 minutes).

If you search for coconut tart recipes, there are several similar recipes, but they often use a lot more sugar and fat in the filling, and more complicated methods of preparation. The simplicity of this recipe, together with quite low levels of sugar, meant that the flavour of the coconut dominated, and the filling, while nice and chewy, wasn't too sweet and contrasted nicely with the crisp pastry.

The second time I made the recipe I used a seedless raspberry jam in the base, and also reduced the oven temperature, from 200C to 180C, while drying out the pastry case for 10 minutes after blind baking.

I preferred the marmalade version which I thought gave the coconut filling a tropical twist as well as a certain tartness, but my husband preferred the more traditional raspberry. I found the raspberry version too sweet, although the contrasting colour does  make the tart look more interesting.

Friday, 23 December 2016

Mincemeat Frangipane Tart

gluten- and dairy-free

The highlight of this recipe, for me, was making a really good gluten- and dairy-free pastry. I'd read that it wasn't easy, so it felt quite an achievement  to come up with a recipe which worked well first time (and was repeatable - I made this dessert twice!). After looking at many recipes and reading about gluten-free pastry, I based this recipe on my usual wheatflour sweet shortcrust pastry recipe, but added both a little xanthan gum for strength and baking powder for lightness. I'd read that gluten-free pastry needs more liquid than wheatflour pastry, so I made the dough wetter than usual.

There are reservations about this apparent success though - the pastry dough was very sticky and hard to handle, and I'm not sure I would have had as much success in other situations, for instance if the pastry needed baking blind, or if I was trying to make a pastry top crust too. This may have only worked because the filling was put straight onto raw chilled pastry, and the mincemeat and frangipane layers completely filled the pastry case, holding the sides in place until the pastry had set during baking and leaving no chance of any collapse. Obviously I need to try out the pastry in other situations before declaring it a total success.

Ingredients:
Sweet shortcrust pastry:
200g Dove's gluten-free plain flour
1/8 teaspoon xanthan gum
1/4 teaspoon baking powder
100g hard dairy-free baking fat (eg Stork)
50g icing sugar
1 large egg
2 tablespoons water

250g mincemeat (check it's gluten- and dairy-free, if this is important)

Frangipane:
100g caster sugar
100g ground almonds
100g dairy-free baking spread
1 tablespoon ground rice
2 large eggs
a few drops almond extract
flaked almonds for topping

Method
Sift the flour and icing sugar into a bowl and add the xanthan gum and baking powder.
Cut the baking fat into small cubes and add to the bowl. I find that Stork is not as hard as cold butter, so can usually be used straight from the fridge.
Rub or cut the fat into the flour mixture until the mixture resembles breadcrumbs, then mix in the egg and water to make a smooth sticky dough. Only knead enough to incorporate everything into an even dough. Put the ball of dough onto a large piece of clingfilm, wrap loosely and flatten the dough into a 3cm thick disc. Chill for 20 minutes.
Unwrap the dough, but leave it in the centre of the clingfilm, then cover with another large piece of film. Roll out the dough evenly, between the pieces of film, until it is about 30cm (12") in diameter and will fit into a shallow fluted flan tin, about 23cm (9") in diameter.
Remove the top piece of clingfilm carefully - the dough will still be sticky - and invert the circle of dough into the flan tin, so that the bottom piece of film is now on top. While this piece of clingfilm is still in place, ease the dough into place in the corners and flutes of the tin. Chill the pastry case again.
Remove the pastry case from the fridge, gently ease off the clingfilm and trim the dough around the top of the tin to give a neat edge. Any small holes can now be patched with small pieces of the dough trimmings, if necessary - just smooth a small piece into place with your finger.
Pre-heat the oven to 180C, and put a baking tray onto a middle shelf to heat.
Spread the mincemeat into the base of the pastry case.
Put all the ingredients for the frangipane, except the flaked almonds, into a bowl and beat until the mixture is smooth. This is easily done with a spoon, but you can use a hand-held mixer too, if you prefer.
Pour the frangipane over the mincemeat to fill the pastry case, and sprinkle with flaked almonds. Put onto the baking tray and cook for 40-45 minutes until frangipane is firm and golden brown.
Cool in the tin.

I was really pleased with this. I've made frangipane mincemeat tarts before, but never a gluten-and dairy-free version. I doubt anyone would be able to tell the difference as the strong flavours of mincemeat (I used a gluten-free variety with added cranberries) and almonds covers any deficiencies through not using butter in the pastry. The pastry was light and crisp too, and kept well over the three days it took to eat the tart.

I think this will be my last post before Christmas, so I'm fortunate it's a festive one. I'm not planning to cook anything new over the Christmas period, just old favourites. It's also hard to get photographs in the chaos of cooking and the bad light at this time of year, so I'll be back soon with something new.

Season's Greetings to you all!

Tuesday, 20 December 2016

Chestnut Flour Brownies - 2

gluten- and dairy-free.

After my earlier, not entirely successful, experimentation with chestnut flour (see previous post), I looked back over all my brownie recipes to see which one might be best adapted to use chestnut flour in place of flour containing gluten. I soon found this Diana Henry recipe for brownies made with rye flour, which is lower in gluten than wheat flour. This made me think the recipe might work as well with a gluten-free flour, so I tried a straight swap of flours, using chestnut flour instead of rye, and also added 3 chopped marrons glacé instead of the nuts suggested (you could add more, but they are very expensive!). I also used a hard dairy-free baking fat (eg Stork) instead of butter, as I was still trying to make the brownies both gluten- and dairy-free

The batter was a lot stiffer than I remembered it being in the original recipe, and really difficult to spread, so I was worried that the brownies might be too solid. However, the baked brownies were fine - quite delicious, in fact. They were dense, chewy and fudgy - everything a good brownie should be. They also tasted as if they had a lot more chocolate in them than they actually did, but without being too rich, as in my last recipe. The little pieces of candied chestnuts added an extra dimension to both the flavour and the texture.

I suspected that the stiff batter was down to the chestnut flour absorbing more moisture than rye flour, although none of the baking recipes using chestnut flour that I've looked at suggest that any adjustment is necessary. So I tried the recipe for a second time, adding 2 tablespoons of water to the batter, which made it easier to spread in the tin, but also made the brownies a little less fudgy and added a few minutes to the baking time.

My only slight disappointment with both batches of chestnut brownies was that I didn't really pick up any flavour components that I could attribute to the chestnut flour. Yes, the brownies were delicious, but would they have been any less delicious if made with spelt or rye flour? As chestnut flour is so expensive, I don't think it's something that I'll bother to keep in stock, unless I find a recipe which showcases it's flavour.

I'm sending these brownies to Choclette's 'We Should Cocoa' link-up for December, over at Tin and Thyme. Chocolate is always associated with Christmas, but adding chestnuts to these brownies makes them even more seasonal.

Monday, 19 December 2016

Chestnut Flour Brownies - 1

gluten- and dairy-free

Chestnut flour is something that I've been meaning to try for a long time, but I've only ever seen it for sale online, where minimum order charges or postage charges haven't made it economical. So when we were on holiday in Italy in September, and found ourselves passing a wholefood supermarket I had to see if they had any. I think I probably paid as much per kg as I would have in this country, but I got organic flour, and didn't have to buy anything extra to make up an order.

Once I'd got the flour, I decided to keep it for Christmas baking, but couldn't resist trying these brownies from Fig Jam and Lime Cordial, which only needed 40g of flour, when I wanted to try something different in the way of gluten- and dairy- free baking. I had to adapt the recipe to make it dairy-free, and to allow for the fact that I only had 70% plain chocolate available, but Celia's recipe was certainly the inspiration. In this post Celia warns of the pitfalls of trying to use chocolate with too high a percentage of cocoa solids in this recipe, so although I didn't have any problems, you might want to stick to the original recipe.

Ingredients
100g hard dairy-free baking fat - I used Stork
200g 70% plain chocolate
175g light muscovado sugar
1 teaspoon vanilla extract
2 large eggs
40g chestnut flour
130g 70% plain chocolate, chopped coarsely

NB - check that the chocolate is dairy-free if this factor is important.

Method
Preheat the oven to 170C and line a 20cm (8") square brownie tin.
Melt the chocolate and baking fat together in a bowl, over a pan of simmering water, then remove from the heat and stir in the vanilla extract and sugar.
Cool, if necessary, until the mixture is only lukewarm, then beat in the eggs, one at a time.
Sift in the flour and stir vigourously until  the flour is incorporated and the mixture 'snaps' (as Celia describes it). This is the point at which the texture of the batter stiffens and comes cleanly away from the sides of the mixing bowl.
Fold in the chopped chocolate, transfer the batter to the baking tin, spread evenly and bake for 25 minutes until just form.
Cool completely in the tin before cutting into pieces. I recommend small pieces, as these brownies are very, very rich. The pieces in the photographs were only about 2.5cm square!

I'm usually reluctant to use non-dairy fats in place of butter, but in this recipe the chocolate hit was so powerful that any adverse flavour from the Stork baking fat was completely masked. I very rarely say things like this, but I think this recipe made something that was too rich to be thought of as a brownie. Even after cutting into tiny squares, it was difficult to eat more than one - it was like eating semi-solid chocolate, not any sort of cake. We had to eat the brownies as an after-dinner chocolate treat rather than a dessert. They were absolutely delicious, but not what I was looking for in terms of a gluten- and dairy-free dessert.

Thursday, 12 May 2016

Chocolate Cake

Gluten-free and Dairy-free

This was a test cake, in my quest to find a 'tea-time' chocolate cake which was both gluten and dairy free. I've got several dessert recipes for rich, dense chocolate tortes which are both, but wanted something lighter and 'cakey-er'. 

Because I was just testing the recipe, I decided not to make a filling or frosting for the cake, adding just a dusting of icing sugar to make it slightly more photogenic. 

The recipe, another from the Waitrose website, worked out very well. I had expected the 200g of chocolate in the cake to make it quite dense but it rose well and was as light as a sponge-cake - just what I wanted. The cake wasn't too rich, either, considering the amount of chocolate it contained, but I think it really needed a fudgy frosting (or the ganache from the recipe) to elevate it from a 'plain' cake to something a bit more special.

We both really liked this cake, so I don't think I need to look any further for a good chocolate cake recipe that is both gluten- and dairy-free.

Sunday, 1 May 2016

Date, Banana and Rum Loaf

Gluten-free and dairy-free.

This Date, Banana and Rum Loaf, found on the BBC Good Food website, could be considered a healthy cake, as it has no added fat or sugar. The natural sweetness comes from almost 800g of fresh and dried fruit packed into the loaf, and the only significant fat is that which is contained in the nuts - 100g of pecans.

I was a little worried about making the cake, as some of the comments on the Good Food website said the cake was quite crumbly, but I needn't have worried. I followed the basic cake recipe closely and made a dense, very moist fruit cake, which even survived being dropped (in it's cake box); quite frankly I was amazed that just the puréed fruit, 100g of fine cornmeal and 2 egg whites made a batter that actually held everything together! In a slight departure from the recipe, I added 1/2 teaspoon of xanthan gum, as it's easy to get hold of now, although it wasn't when this recipe first appeared in 2008; I don't know if it made any difference but it couldn't have done any harm!

One other thing I did, not mentioned in the recipe, was to cut each date in half, cross-ways, before cooking them. I found two stones while doing this, so it's well worth the extra time spent, as unnoticed stones could damage food processor blades.  When I drained the cooked dates I didn't get enough liquid, so I added water to get to the 100mls needed for the recipe. I varied the topping, as I don't really like banana chips - I used the remaining pecans, chopped coarsely, and 4 crushed brown sugar cubes (optional if you don't want to add sugar).

I really enjoyed this cake, but I would leave the sugar off the topping next time. It only added a crunch when the cake was fresh, and quickly dissolved in the moisture from the cake. Unlike a lot of other recipes that rely on the natural sweetness of the ingredients, rather than adding any additional sugar, this cake did taste sweet enough. This is definitely a recipe I'll be using again!

One small criticism - sultanas and raisins are very similar in looks and taste; the cake might have been more attractive and even tastier if a different mix of dried fruit was used. Cranberries, cherries, chopped apricots and/or golden raisins could be used to replace some of the 400g of raisins and sultanas used in the loaf.

Thursday, 21 April 2016

Rhubarb and Ginger Polenta Cake

Gluten-free & Dairy-free

This is a recipe I've been using for years - two layers of shortcake-style dough enclosing some fresh fruit. I usually make it with butter and SR flour, but wanted to see whether the recipe worked if it was made both gluten- and dairy-free. I decided to use polenta in place of 1/3 of the flour, as in this Nigel Slater recipe, a commercial brand of gluten-free flour and a non-dairy spread instead of butter.

This recipe works well with any type of fresh fruit filling, but something like rhubarb, which releases a lot of liquid during cooking, needs to be cooked first, then drained. I roasted 500g of rhubarb (the first of the season, incidently), cut into 4cm lengths, with about 50g of sugar; you might need more sugar if you don't like really sharp fruit.

Ingredients
150g caster sugar
150g non-dairy spread, suitable for baking
100g polenta (I only had the instant kind)
200g gluten-free plain flour
1 teaspoon baking powder
1/2 teaspoon xanthan gum
1/2 teaspoon ground ginger
1 large egg
500g sweetened cooked rhubarb, drained of cooking juices
3 balls of stem ginger, finely chopped

Method
My usual method is to melt the butter, then stir in the sugar and egg, then lastly add the flour, but I didn't think this would work as well with the non-dairy spread. Instead I followed the method in Nigel's recipe, which is to put all the dry ingredients into a bowl, rub in the fat, then mix to a sticky dough with the egg. The gluten-free flour and polenta made a much stickier dough than usual, which was almost too soft to work with - next time I think I'll add another 25g of flour.

Pre-heat the oven to 180C.
Once mixed, 2/3 of the dough is spread over the base of a 20cm springform tin, which has been greased and base-lined with baking parchment. The dough needs to be worked up the sides of the tin to make a wall about 2cm high.
Spread the fruit onto the base, packing it closely together but leaving the 'wall' uncovered.
Sprinkle the chopped stem ginger over the rhubarb, then drop the remaining dough on top of the the fruit in small teaspoonsful, starting at the edges and working inwards. Use the spoon to flatten and spread the dough as much as possible, but it isn't necessary to completely cover the fruit.
(The method of assembling the cake is covered in more detail, and with photographs, in this post.)
Bake for about 55 minutes until the cake is golden and feels solid. Cool in the tin.
The cake can be served warm but this gluten-free version is quite fragile, so I'd recommend serving at room temperature.

If liked, the top can be sprinkled with flaked almonds or demerara sugar before baking, or the cooled cake can be dusted with icing sugar before serving. As I mentioned earlier, almost any fruit can be used as a filling - sliced apples and a handful of sultanas, for instance, or sliced plums - and complimentary spices can be used in the dough, rather than ginger.

Rhubarb and ginger is a classic combination which worked well in this cake. There was just a hint of ginger in the cake dough, but the stem ginger in the filling was more pronounced and added an extra texture too, along with the graininess of the polenta. This cake was softer and more fragile than the same cake made with the usual ingredients, but I was pleased with how well the 'conversion' to a gluten- and dairy-free version turned out.

Wednesday, 21 October 2015

Date and Walnut Sponge Pudding

Dairy-free and gluten-free

The recipe I adapted for this gluten- and dairy-free  dessert calls itself a healthier version of a sticky toffee pudding. It comes from the Hemsley sisters who are well known for healthy eating recipes and I found it on the Vogue website. That's not a website that I would think to look at for recipes but it came up in a Google search for recipes using coconut flour.

While I'm all for healthy eating, that wasn't the aspect of the recipe that really interested me. What I wanted was a gluten-free recipe that could be adapted to be dairy-free as well. In this recipe the flour is replaced by ground almonds and coconut flour. The recipe also cuts out added refined sugar, relying on just the dates for natural sweetness. I wasn't convinced this would be sweet enough for those more used to normal puddings, so I added 75g of light muscovado sugar. I replaced the butter with coconut oil and added 75g chopped walnuts for texture and flavour (and also so that this dessert could be my contribution to this month's AlphaBakes challenge).

Ingredients
250g dried dates, roughly chopped*
1 1/4 teaspoons bicarbonate of soda
200ml boiling water
100g coconut oil
75g light muscovado sugar
3 eggs (mine happened to be large)
200g ground almonds
pinch of ground cloves
20g coconut flour
75g walnut pieces

* I used a semi-dry date which was still quite moist and sticky. I cut each date crossways into three pieces with scissors - this ensures there are no pits left in any of them.

Method
(I don't have a large food processor, so adapted the method in the original recipe to use a hand (stick) blender.)
Soak the dates in the boiling water and bicarbonate of soda for 10 minutes. While still warm, use a hand blender to purée the dates, and their liquid, with the coconut oil. If you can leave a few pieces of dates in the mixture it gives more texture to the pudding, so don't blend too much.
Transfer the date mixture to a large bowl and stir in the sugar, then beat in the eggs, one at a time.
Stir in the ground almonds and cloves, then sift over the coconut flour and fold in quickly. Lastly, fold in the walnut pieces.
Transfer to a baking dish (I used one roughly 20cm square), greased with coconut oil, and bake at 170C for around 45 minutes, until firm. You might need to cover the pudding towards the end of the cooking time, if it's getting too dark.
Cut into portions to serve while still warm - it should serve 8-12 people depending on appetite.

The resulting dessert was delicious but not really dark and sticky enough to call itself a 'sticky toffee' pudding in my opinion, so I've just called it a sponge pudding. It was surprisingly light, considering it was just raised by the bicarbonate of soda. Adding 75g of sugar seemed to make the pudding just about right to me, in terms of sweetness, so I'm not sure how enjoyable the original version would have been. However, it's certainly worth a try if so-called 'sugar-free' baking appeals to you - but remember that dried fruit such as dates contain a lot of natural sugar, so you're not cutting out all sugar!

Adding the walnuts, and leaving some pieces of dates in the blended mixture made the texture of the pudding more interesting - the walnuts added crunch and the pieces of dates added bursts of sweet caramel flavour. If you don't like nuts, adding some plumped up raisins or sultanas would keep some textural variations - I would soak them in orange juice or something similar, so that they didn't absorb too much moisture from the cake batter, as coconut flour needs all the moisture it can get to avoid making things really dry and stodgy. I didn't make the suggested sauce to serve with the dessert, as I needed to stay dairy-free, but it was very good with a little maple syrup poured over it, and served with natural yogurt.


AlphaBakes is a monthly challenge hosted by Caroline, at Caroline Makes, and Ros, at The More Than Occasional Baker. The idea of the challenge is to use a randomly chosen letter of the alphabet as the first letter of a prominent ingredient, or a word in the name of the dish made. This month, Caroline is the host, the letter is W, and I used Walnuts.

Sunday, 27 September 2015

Gluten-free Cornbread

We both really like cornbread, as an occasional alternative to rice, with a chilli, but I've yet to find the perfect recipe. The biggest problem is the bread being too crumbly, then there are recipes that are too sweet and recipes that are too bland. Flavours can easily be worked on, but it's getting the right balance of dry to wet ingredients which is proving elusive (although I have to admit that this recipe, from Ben Mims seemed pretty good the first time I tried it - I just forgot about it until now!). Add into the mix, the desire for a gluten-free cornbread and things get complicated.


It's fairly widely recognised that adding some wheat flour is better than 100% cornmeal, if a light cornbread is required, but this can't be used in gluten-free baking. This recipe, found on Jamie Oliver's website, uses equal volumes of a gluten-free flour mix and cornmeal, and allows for the use of non-dairy milk, if required. The only thing I didn't like, at first glance, was the amount of sugar added, so I cut this down from  80g to 50g. I added half a teaspoon of xanthan gum, just because I had it to hand, and it's meant to replicate the effects of gluten in wheat flour ie  cuts down on the crumbliness of baked products. I also used a mix of 50% polenta and 50% fine cornmeal instead of all cornmeal.

Converted to metric weights, I used: 200g gluten-free flour, 220g cormeal/polenta mix; 50g sugar, 2 tablespoons honey, 2 teaspoons baking powder, 1 teaspoon bicarbonate of soda, 1 teaspoon salt, 1/2 teaspoon xanthan gum, 2 large eggs, 360mls milk, 75g melted butter + another 10g to grease the skillet.

The method is fairly standard - mix dry ingredients in one bowl, wet in another, melt butter. Add wet ingredients and melted butter to dry ingredients and mix until just combined (don't overmix!). Pour into a pre-heated and well-greased skillet and bake in a hot oven. I used a fan oven at 160C and found that the cornbread was cooked in 25 minutes, rather than the 30-35 minutes suggested in the recipe.

The texture of this cornbread was good, but still a little crumbly. The Ben Mims recipe uses a much higher proportion of liquid, so it shouldn't spoil this recipe to increase the amount used, although it might need an extra egg too. I thought there was still a touch too much sugar in the recipe, so will cut it down even more in future. My next attempt will be to try a version of this recipe which is dairy-free too.

Tuesday, 1 September 2015

Almond, Raspberry and Rose Polenta Cake

- both gluten and dairy free

This was my second attempt at this recipe; the first being this cake, where I changed both the nuts and fruit used. The outcome was delicious, but the fruit sank and spoiled the look of the cake. This time, I made even more adaptations (naughty me!) because I wanted the cake to be dairy-free as well as gluten-free, and I also didn't want to use any citrus fruit. While I was making changes, I decided to replace half the polenta with fine cornmeal, to reduce the graininess of the texture

Ingredients
225g dairy-free spread (I used Pure sunflower spread)
225g caster sugar
3 large eggs
60g fine cornmeal (not cornflour)
65g polenta (the instant kind is all I can get)
125g ground almonds
1 teaspoon gluten-free baking powder
1/4 teaspoon salt
1 teaspoon rose water (or more, depending on strength*)
a few drops of almond extract*
50mls water*
200g raspberries

* The rose water, almond extract and water replaces the citrus juice and zest in the original recipe. 50mls is less than the juice of 2 lemons, but I felt the batter was too sloppy the first time I made this cake. 

I only used 1 teaspoon of rose water as the brand I use is quite concentrated. I often see recipes using a lot more, so the strength must vary from brand to brand. I once made the mistake of adding more of the Neilsen-Massey rose water, and the result was inedible because of the overpowering rose flavour.

Method
Grease and line the base of a 23cm springform tin. Pre-heat the oven to 160C.
Cream together the spread and sugar, in a large bowl, until light and fluffy.
In another bowl, mix together the cornmeal, polenta, almonds, baking powder and salt.
Add the rose water and almond extract to the fat and sugar mix, then beat in the eggs, one at a time, adding a tablespoon of the dry ingredients with each egg.
Fold in the rest of the dry ingredients, in portions, alternating with a splodge of the water, until all ingredients are added.
Let the batter stand for 5 minutes (I was distracted by a phone call at this point, and the batter thickened a little while I was away - I think this may be an advantage, so I'll be adding this stage to the recipe in future!).
Spread half the batter in the baking tin, then sprinkle with half the raspberries (I used the small and broken fruit in the middle). Gently spread over the remaining batter, then arrange the rest of the raspberries on top, spacing them evenly.
Bake for 50-60 minutes, until the cake is golden brown and just firm in the centre (I use a colour-changing cake tester, as a probe isn't always reliable when there's fresh fruit in  a cake).
Cool the cake in the tin, and if desired, dust with icing sugar before serving.

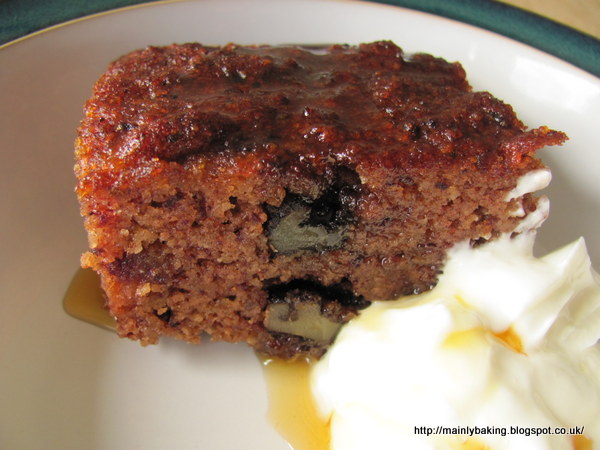
I think this cake is one of the best gluten and dairy free cakes I've ever made, and possibly the most delicious seasonal fresh fruit cake I've eaten this summer! That's really saying something, because, as you know, I'm quite critical of my baking and can usually find something wrong.

Unfortunately, I was taking this cake to a friend's house for lunch, and only managed to photograph the cake still in it's baking tin, and the leftovers, so for such a great cake, I'm not showing it at it's best! As you can see, though, the fruit didn't all sink (hooray - main objective achieved!).

The rose flavour was subtle and well balanced against that of the raspberries and almonds. The addition of a few drops of almond extract really brought out the flavour of the nuts - sometimes ground almonds on their own don't have a very strong flavour, which is OK if you're just interested in adding moisture and texture, but not good enough if you want a cake to taste of almonds. The texture was good too - moist, but still quite light, with an even close crumb, and not too gritty from the polenta. I think the only improvement I could make would be to add another 50g of fruit - 200g in such a large cake is quite sparsely distributed.

Late decision - rather than miss the next round of Formula 1 Foods, run by Caroline, from Caroline Makes, because I will be on holiday for most of the first half of September, I will enter this cake. The next F1 GP race takes place in Italy, during the first weekend in September. Almonds and polenta seem to crop up frequently in Italian cake recipes, so this could be said to be an Italian inspired cake, although I'm not sure raspberries and rose flavour really fits the bill! It's this or nothing, Caroline!

Another late decision - as this is by far the best cake I've made for ages, I'm also adding it to the Simply Eggcellent link-up over at Belleau Kitchen. Dom's theme this month is cakes, so I'm looking forward to seeing all the entries and getting some new ideas!
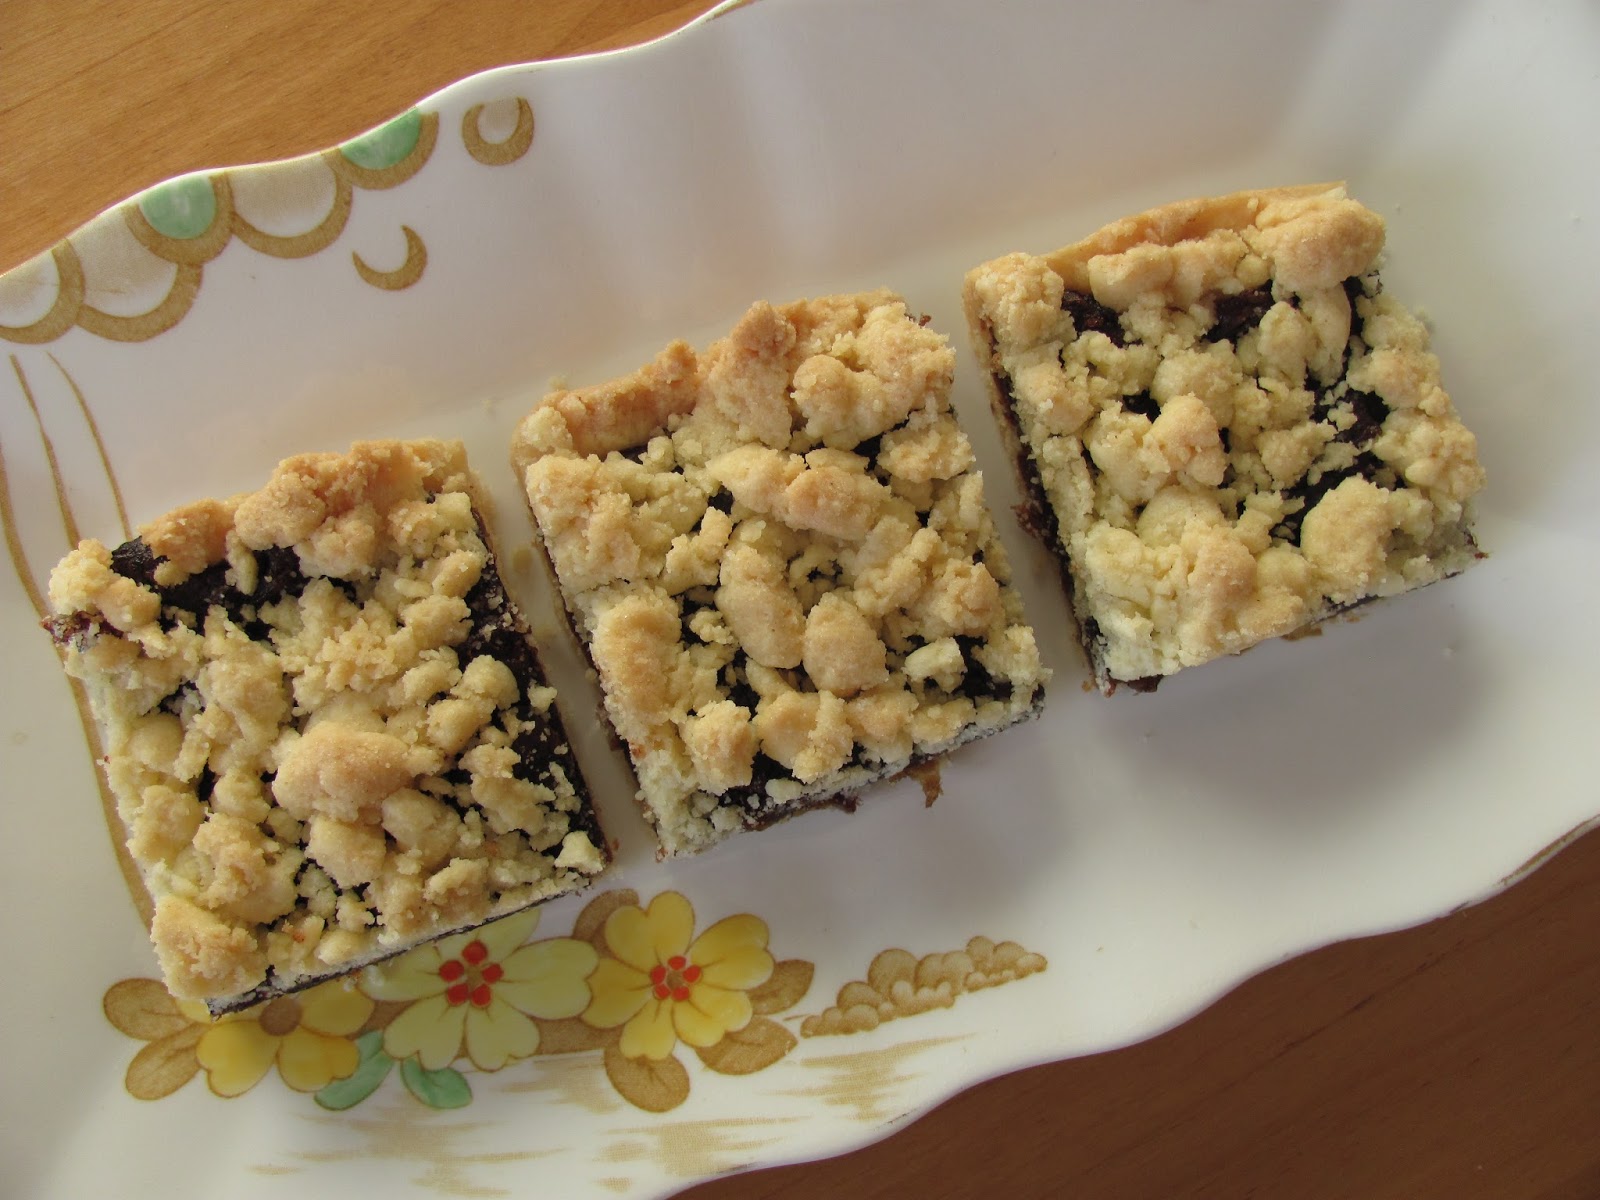

Thursday, 20 August 2015

Blackberry and Hazelnut Polenta Cake (gluten-free)

Several weeks ago I bookmarked a gluten-free cake recipe that I wanted to try, but for various reasons I hadn't got around to making it. After we'd been blackberry picking, I remembered the cake, and even though it was made with raspberries, I thought the recipe would work well with blackberries too, and make a change from apple and blackberry crumble. My husband loves a fruit crumble above all else, so he needed a little persuasion that change was a good thing!

Necessity forced a few other changes too - ground hazelnuts instead of almonds, and the zest and juice of a lemon and a tangerine, instead of 2 lemons. I really don't like making huge alterations to recipes before I try them as written, but I was confident that my changes would only affect the flavour, not the technical aspects of the recipe. I might have been wrong about that!

The cake batter looked a little strange when mixed - it was very grainy but I put this down to my home-ground hazelnuts not being as fine as commercially ground almonds. It was also quite sloppy, possibly for the same reasons - I hoped that once the polenta started absorbing the moisture during baking it would sort itself out. It did sort itself out in the oven, but not before all the fruit sank to the bottom. This could have been because of the sloppy batter, or because blackberries are heavier and juicier than raspberries.

Now I'm interested in trying the recipe exactly as written, to see if my changes affected the outcome, or whether it wasn't such a good recipe in the first place, and the fruit will sink even when raspberries, and finely ground almonds are used.

None of this stopped the cake being absolutely delicious. Hazelnuts and blackberries are a good flavour combination, and the subtle hint of citrus blended in well without overwhelming everything. If the fruit had stayed evenly distributed throughout the cake, I'd have said that 200g wasn't really enough, but more sinking fruit would have made the bottom of the cake too moist.

The Great British Blackberry Recipe Round-Up
Karen, over at Lavender and Lovage, and Janice at Farmersgirl Kitchen are co-hosting a round-up of blackberry recipes until mid-September, so I'm submitting this recipe for it's deliciousness, even if the technical execution wasn't perfect! 

Friday, 7 August 2015

Baking with Coconut Flour: 3 - More Brownies

Although I was pleased enough with the previous batch of brownies I made with coconut flour, they were a little on the cakey side, rather than dense and chewy. The brownies I usually make are dense and chewy - my definition of a perfect brownie - so I wanted to see if I could adapt that recipe to use coconut flour.

My usual recipe contains both melted chocolate and cocoa for great depth of flavour, and butter. I decided to make my trial recipe dairy-free, as well as using the gluten-free coconut flour. To achieve this I used coconut oil rather than a vegetable oil. Although it is a more saturated fat, I like the results of using coconut oil better than using vegetable oils - it's similar to the results when baking with butter.

I was working mainly on instinct, combined with my limited experience of cooking with coconut flour, as well as what I'd read about baking with coconut flour. This is how I changed the recipe:

Original:                                                                   Coconut flour recipe:
140g plain chocolate (around 70%)                            140g plain chocolate
140g butter                                                                100g coconut oil
300g light muscovado sugar                                       300g light muscovado sugar
2 teaspoons vanilla extract                                        2 teaspoons vanilla extract
3 large eggs                                                               4 large eggs
160g plain flour                                                         40g coconut flour
3 tablespoons cocoa                                                  3 tablespoons cocoa

(If it's important that the recipe is completely dairy-free, then remember to check the ingredients in the chocolate that you choose.)

In both cases the method was the same - melt the chocolate and fat together, stir in the sugar and vanilla extract, then beat the eggs in, one at a time. Sift in the flour and cocoa, and fold into the wet mixture. Spread into a 8 x 8" square tin, lined with baking parchment, and bake at 180C. The original recipe takes 30-35 minutes to bake, depending on how gooey you like your brownies, but the coconut flour brownies were cooked in 25 minutes.  Cut into bars or squares while still warm but cool completely before removing from tin.

I was really pleased with these  brownies. Using melted chocolate and more sugar made the brownies moister and more chewy (less cakey) than the first recipe, as I'd hoped, although they were still quite light. I think this lightness is a feature of any baking with coconut flour as you need so little compared with wheat flour. The use of coconut oil, as well as coconut flour, added a touch more coconut to the flavour, but nothing too overwhelming.

What made it more pleasing to adapt my own recipe successfully was that only a few days previously I'd tried an online recipe for chocolate chip bars with coconut flour and had produced something so disastrous that it had to be thrown away - and things have to be really awful before I bin them, as I'm reluctant to waste food if it's at all edible!

Tuesday, 21 July 2015

Baking with Coconut Flour: 2 - Brownies

As I mentioned in my first post about baking with coconut flour, it's quite difficult to find basic recipes that are similar to wheat flour recipes. Although coconut flour can be used for it's gluten-free properties it's more commonly used by those on a 'paleo' diet, who have given up all forms of grains, as well as dairy and processed foods (often including refined cane and beet sugar). This means that anyone on a 'paleo' diet who still wants to bake has to come up with viable alternatives to most people's baking staples such as flour, butter and sugar, which makes it hard to find recipes where just the wheat flour has been substituted with coconut flour. It's made more difficult because recipes using coconut flour need a higher proportion of liquid, as the flour is very absorbent; this is often solved by using more eggs, but liquid fats and sweeteners are often used too.

Still, the internet is a vast place, and I eventually found a recipe for chocolate brownies (on Bob's Red Mill site) that didn't stray too far from the sort of recipe I would usually use. It used a mixture of vegetable oil and butter, ordinary sugar and cocoa and chocolate chips for the chocolate hit. A 20 x 20cm (8 x8") tray of brownies only used 60g of coconut flour compared to 100-160g of flour in other recipes I've used. The recipe also used 4 eggs, compared to the 2-3 usually used in the same sized tray. I left out the optional nuts, as I wanted to get the full effect of the coconut flour flavour when used with chocolate.

The recipe was really quick and easy to make, as everything could be mixed with a spoon in one big bowl. As the recipe used cocoa, then stirred in chocolate chips, there wasn't even any chocolate to melt.  I baked in a 20 x 20cm tray as I like deep brownies. Here's the ingredients, converted to metric weights: 75g softened butter, 75mls (5 tablespoons) sunflower oil, 200g light muscovado sugar, 4 eggs, 60g coconut flour, 50g cocoa, 175g plain chocolate, roughly chopped (or chocolate chips).

I was quite pleased with how these brownies came out. They were more cake-like in texture than the perfect brownie - moist but light and a little crumbly, rather than dense and chewy  - but had a good chocolate flavour. I thought that I could taste the coconut flour when the brownies were freshly made, but that seemed to fade over the next few days. I'm not sure whether someone who disliked coconut would notice the flavour or not! This recipe is definitely worth making again when gluten-free baking is needed, although I'd also like to try a recipe with melted chocolate, to try and get a more chewy brownie.

Wednesday, 1 July 2015

Baking with Coconut Flour: 1 - Blueberry Coconut Cake

Coconut flour seems to be a fashionable ingredient at the moment. It is popular with those eating a Paleo diet, as they avoid any type of grain, so have considerable difficulties when it comes to needing flour for baking. It is also gluten-free, but it's cost would probably rule it out as the sole alternative to grains containing gluten for most coeliacs. Those on a Paleo diet are usually doing so because they fear modern diets are harming our health. I'm sceptical about these sort of claims, and think the new breed of 'well-being' bloggers and cooks could do more harm than good if others follow their restrictive diets, but it's not a point I want to argue about here.

I was asked to try coconut flour by Nuts.com, and was interested in taking up their challenge to try it in my baking because I've already tried, and liked, coconut oil and sugar. It was the gluten-free aspect of the flour that most interested me, as I do need to bake gluten-free goodies occasionally.

When I looked into coconut flour more closely, it seemed a very interesting product - lower in carbohydrates, higher in fibre and protein than wheat flour, as well as being gluten-free, and containing several important vitamins and minerals. This appears to make it a more nourishing ingredient to use than wheat flour, although, because it is extremely absorbent, much less of it is needed when baking, compared to flours from grains and pulses.

This absorbency presents problems when baking, as coconut flour can't be substituted weight for weight for other flours - less than half is typically needed in most recipes. Additionally, recipes advise increasing the number of eggs used (doubling the usual number seems popular), although some use oils and syrups instead of solid fats and sugars, as well as extra liquid. The main advice is to initially use recipes specifically written for coconut flour, rather than trying to adapt your own favourite recipes, until you are more familiar with how it works. This is fine, if you can find a trusted source of recipes - they aren't exactly mainstream; Paleo recipes often use ingredients that I just wouldn't want to put in my baking! Coconut flour is also extremely expensive compared to wheat flour - I paid £6.99 for 500g of Tiana coconut flour in Holland and Barrett - so I didn't want too many failures when trying recipes, even if the recipe uses only 50g! It is, however cheaper than ground nuts, which I tend to use a lot, and in larger quantities, in gluten-free baking.

The first recipe which appealed to me was a blueberry and coconut cake from the Great British Chefs website, devised by Victoria Glass. I liked the look of this because it didn't seem too extreme - it used basic white sugar, a reasonable number of eggs (I found one chocolate cake recipe which used 12!) and made a product which looked comparable to 'normal' cakes, even though it was both gluten- and dairy-free. I tried not to deviate too far from the recipe, although I did add a little vanilla extract, and only had 150g of blueberries.

This cake worked out very well - it was  moist but surprisingly light, and tasted strongly of coconut, which wasn't surprising in a cake containing coconut three ways - flour, oil and desiccated. The texture of the cake wasn't any different to cakes made with grain flours, so I don't think anyone would notice that it was made with such an unusual ingredient. Despite the number of eggs used, I didn't find the flavour or texture 'over-eggy' which is a complaint about some coconut flour recipes.

The very fact that the cake was so coconutty made me want to try the flour  in a recipe where the coconut flavour isn't really needed, such as a chocolate cake or brownies. The search for a suitable recipe for one of those is ongoing - the recipes I've found so far are either too 'paleo' or add other coconut products to make sure there's a strong coconut flavour.

I don't think coconut flour is likely to become one of my 'everyday' baking ingredients, but I can see that it will be useful for gluten-free baking, and that it might appeal to those who feel guilty about eating cakes and other baked goods, and want to make them a little more nutritious.

If you are interested in trying coconut flour, here's a few links to nutritional and baking guides that I found useful. Note that I'm not endorsing any health claims written therein - I don't have the expertise to either agree with or challenge them - you'll have to make up your own mind!

Retailers:
Nuts.com
Tiana-coconut.com
Sukrin Coconut Flour

Blogs:
All Day I Dream About Food
Nourished Kitchen
Elana's Pantry

Disclaimer  - Although Nuts.com asked me to try coconut flour, I have received nothing from them as an inducement to either endorse their product, or give a favourable review of coconut flour in general. All opinions expressed are my own.