Sunday 29 December 2013

Mincemeat Streusel Slice

This is the last of my festive baking; after this there are bought Christmas goodies which must be eaten before I do any more baking.

I based this Mincemeat Streusel Slice on this recipe from Mary Berry, shown on this year's Great British Bake Off Christmas Special. The only part of the recipe I took exactly was the streusel topping - I used my own sweet shortcrust pastry recipe and used 500g bought mincemeat with 100g chopped apricots and a grated eating apple added to it.


Once I had lined the baking tray and spread the mincemeat over the pastry, I decided not to waste the excess pastry at the sides of the tin, so folded it down over the filling. This worked very well as it gave most of the slices a solid edge to hold onto after they were cut.


I liked Mary's recipe for the streusel topping - I often similar topping from Martha Stewart, I think, which first brought the tip of using melted butter to my attention. Using melted butter and bringing the ingredients together into a dough, for later crumbling, makes the topping less powdery. The semolina in this recipe adds a little extra crispness. I found that the streusel dough couldn't be grated as Mary suggested, but crumbling it evenly over the mincemeat was just as effective, and probably quicker than grating.


HAPPY NEW YEAR to YOU ALL!

Friday 27 December 2013

Amaretto Truffle Cake

Christmas tradition in this house dictates that there is always one chocolate dessert. It dates back to when the children were smaller and didn't like the dried fruit in Christmas puddings, cake and mince pies. To be honest, they still don't like much of the traditional stuff, although FB will eat mince pies!

This dessert (based on a recipe from Wicked Chocolate by Jane Suthering) was made from a layer of chocolate truffle mixture set on a genoise sponge base and topped with crushed Amaretti biscuits. The sponge cake was sprinkled with coffee and Amaretto liqueur to add to the flavour.

The sponge base was made by beating 2 eggs and 55g caster sugar together until light and fluffy, then 30g plain flour, 2 tablespoons cocoa and 1 tablespoon cornflour were sifted together and folded in, followed by 25g melted butter. The batter was baked in a 22 cm tin, then cooled and trimmed to fit a 20cm tin. After the sponge was fitted into the base of a 20cm springform tin, it was sprinkled with 2 tablespoons each of strong coffee and Amaretto liqueur

The truffle layer was made by creaming 115g unsalted butter and 115g caster sugar together, then beating in 75g cocoa, 3 egg yolks and 200g crème fraiche. Finally a mixture of  85g plain chocolate melted with 2 tablespoons of milk was stirred in. This was spooned over the base and spread level. The top was sprinkled with 100g crushed crisp Amaretti biscuits before the cake was chilled overnight.

The cake was brought to room temperature before serving, and dusted with a mix of cocoa and icing sugar.

This was a sinfully rich chocolate dessert, with layers of contrasting textures and flavours. The Amaretti biscuits stayed crisp (despite my fears that they would go soggy on top of the truffle),  the sponge was soft and light, and in between was a rich, dense truffle layer. The almond flavoured topping and the coffee and Amaretto flavoured base  both helped to lighten the taste of pure chocolate from the truffle layer, a little.


This dessert is my entry to December's We Should Cocoa challenge. This month, Choclette from Chocolate Log Blog, set the challenge of using chocolate and alcohol together - just right for the festive season. The rules for We Should cocoa are best explained by the host, so have a look here if you think you would like to join in, in future.


Thursday 26 December 2013

Orange Marzipan Cake

My Alternative Xmas Cake

I've wanted to make this cake for years - ever since I bought Annie Bell's book 'Gorgeous Cakes' - but every Christmas something has happened to stop me making it. This year nothing interfered, not even the thought that I'd got for too much food already, and a cake wasn't really even necessary!

The cake consists of a shortbread layer, a madeira style cake flavoured with rum and dried fruit, and sandwiched between the two are layers of marzipan and marmalade. All this is topped of with a sprinkling of flaked almonds and pine nuts. It's always sounded a really delicious cake to me, perfect for those who don't like or want a traditional rich fruit cake at this time of year.

It was a delicious cake, but not perfect! One fault was mine, but if I was going to bake it again, I would make some changes to produce something even more delicious. My fault was being too enthusiastic with my new Kenwood Chef mixer, and believing the recipe book, which said that beating the eggs into the creamed sugar and butter at maximum speed would lessen the likelihood of curdling! I now know that you still need to go the traditional route of adding a little flour with each egg! The bad curdling resulted in a slightly stodgy texture, rather than the sponge-like appearance I had been expecting.

The recipe's problems, to my taste, were two-fold - firstly, there was not enough marzipan (although you could taste the marzipan, you couldn't really see it as a separate layer). I think the layer either needs to be thicker or it needs to be made from a better quality marzipan. I usually use Anton Berg marzipan which is 60% almonds, but it has disappeared off the shelves this year, possibly due to the much publicised almond shortage. Using a standard supermarket marzipan which was only 25% almonds might explain why it seemed to melt into the cake mixture. I guess a good alternative would be a homemade marzipan, although most of the recipes I've seen are less than 50% almonds when the sugar and binder are factored in

The second problem was not enough orange flavour. I think the cake needs at least the zest of an orange in the cake batter, and I would probably replace the rum with orange juice, as the rum flavour wasn't very noticeable. I used sultanas and dried cranberries in the cake, and these could be plumped up first in orange juice, if you wanted to keep the rum.

Apart from those problems, it was a really good cake. Having a crisp shortbread layer, and the marzipan only at the bottom of the cake, and pieces of nuts only at the top, made it interesting to eat, as there was a variety of textures and flavours depending on where you took a bite. Definitely a good alternative to a rich fruit cake - even FB, who avoids most dried fruit, liked it!

A few recipe details, to make a cake in a deep 20cm tin with a loose bottom - the shortbread layer was made from 90g butter, 40g golden caster sugar, 75g plain flour and 50g ground almonds. This was pressed into the cake tin and chilled. A circle made from 200g marzipan, spread with 75g coarse-cut marmalade was placed on top of the shortbread before the cake batter was added. The cake batter was made from 225g golden caster sugar and 225g unsalted butter, creamed together. 4 whole eggs and one egg yolk were added next, followed by 90mls rum. 225g SR flour plus 1 teaspoon baking powder was folded in, then 75g each of sultanas and dried cranberries (raisins in the original recipe) was stirred in gently. After this was transferred to the cake tin and spread evenly, 20g each of flaked almonds and pine nuts were scattered on top. The cake took around 70 minutes to bake at 170C, and was cooled in the tin.

AlphaBakes, a monthly baking challenge based on a randomly chosen letter of the alphabet is running out of easy letters. Providentially, December's letter is X, and X-mas is considered an acceptable choice of word to use as part of the name of what we produce. Hence I am entering this as my alternative X-mas cake! AlphaBakes is jointly hosted by Caroline of Caroline Makes, and Ros of The More Than Occasional Baker. The rules can be found here, and Ros is the host this month. There will be a festive round up at the end of the month, although I wonder if there will be any entries that found an alternative to X-mas!

Saturday 21 December 2013

Walnut and Fudge Brownies

Giving in to the excesses of the season, I used my 'best' brownie recipe, which gives dense, sweet and chewy brownies. The recipe comes from a 2000 edition of Good Food magazine, but I've never seen it on their website.

For a 7"(18cm) square tin, you use a large bowl over a pan of simmering water to melt together 100g each of 70%+ chocolate and unsalted butter, then take the bowl off the heat and allow to cool slightly, so that the chocolate mixture isn't so hot that it scrambles the eggs. Stir in a pinch of salt, 2 teaspoons vanilla extract and 300g of caster sugar. Next beat in two large eggs, one at a time, and then 125g plain flour and 2 tablespoons of cocoa, sifted together. Beat the mixture for about 1 minute, until smooth, the transfer to the lined baking tin. Bake at 180C for about 40 minutes, or until a probe comes out with a few damp crumbs still sticking to it.

I doubled the recipe and stirred 100g of chopped walnuts and 100g of chopped fudge into the batter. This was so that CT could have half the batch, to start his Christmas eating with some home cooking. I used Lindt cooking chocolate which gave a really dark colour to the brownies. I'd forgotten how good these brownies are! And how rich - I could only eat half a portion at a time!

Wednesday 18 December 2013

Kenwood Chef Classic (KM330) – A Review

Disclaimer   This post is written in association with Argos but the views and opinions expressed are my own.

The Kenwood Chef Classic

Although I’m a cake baker with many years of experience, and at times have had a pretty prolific output, I’ve never used anything more powerful than a hand-held electric mixer to make things with. So it was with some trepidation, as well as excitement, that I started to unpack the huge box containing the Kenwood Chef Classic (KM330) from Argos. The sturdy box, along with the inner polystyrene padding which protected the machine, ensured that everything arrived from the courier undamaged.

 The Kenwood Chef Classic, which has an 800W motor, comes with a plastic bowl, K-beater, balloon whisk and dough hook, as well as a splash-guard, and there are output sockets on the machine for various attachments, including blenders and food processors, which can be bought separately. There is a very basic manual, but there is nothing complicated about using the machine, so I think the instructions are adequate. One of the most important things to know when using this type of machine is the maximum amounts of ingredients that can be used, and this is covered in the instruction manual. There are enough recipes in the included recipe book to give a guide to the capabilities of the Chef as well as an idea as to how to adapt your own favourite recipes for use with the mixer, but many of the recipes are designed to use the extra optional attachments, so aren’t much good for the basic model Chef Classic.
 
The splashguard, open for additional ingredients
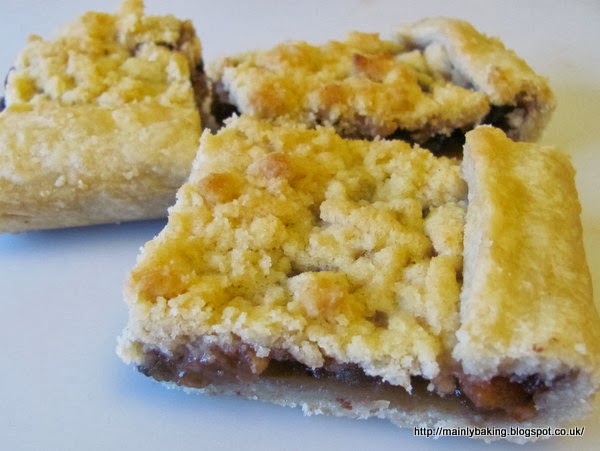
The food mixer arrived on the day I was planning to make a special dessert for my daughter’s birthday dinner, so I was able to use it straight away to make short crust pastry. I used 500g of flour, roughly 2/3 of the maximum capacity of the mixer, plus 250g butter cut into small cubes and water to mix. I was very impressed at how well the butter was cut into the flour; the shape of the K-beater doesn’t look as if it would be efficient at this stage of pastry making. (Before getting the food mixer, I had no idea it could actually be used for pastry!) The machine struggled a little as the water was added and the flour and butter mixture formed a ball of dough, but I realised later that I should have been using a lower speed.

I couldn’t detect any difference between this pastry and my usual hand-made pastry, and it was a lot easier on my hands, which often suffer from arthritic pains after  too much repetitive movement, such as rubbing fat into flour. I certainly wouldn’t have made such a large amount of pastry in one go, by hand, so the machine will be a definite bonus at busy times of the year.

I also used the Kenwood chef to whisk double cream successfully; after reading through some of the recipes I was surprised again to see that it could whisk as little as 150mls. Whisking the cream didn’t take long but I was a little apprehensive about missing the optimum point and over-whipping, so there was a lot of stopping and starting. More experience will make this easier, I’m sure.

The dough hook (left) and balloon whisk (right)
The next thing I made was a classic all-in-one sponge cake mixture, as cake making is the area where I think the Kenwood chef will be most useful to me. I used three eggs and 150g of each of SR flour, fat and sugar, plus some flavouring. I needed to stop once to scrape the mixture down from the sides of the bowl, to make sure everything was evenly incorporated, but this happens with a hand-held mixer too. The cake was as light as expected, so I can mark down another success.

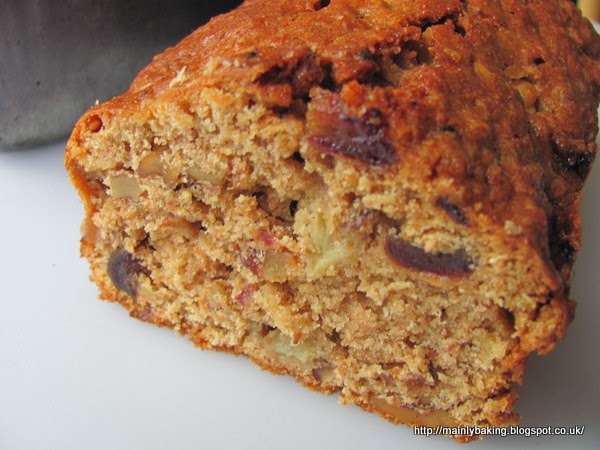
Finally, I decided that I really should use the dough hook to get a full idea of the Kenwood Chef’s performance, even though I don’t often have much success with yeast dough. I followed the instructions in the recipe book to make a batch of enriched dough for Chelsea buns, but instead of making 12 large buns, I cut the filled and rolled dough into 16 smaller buns. The buns had a really good texture, and using the food mixer involved much less work on my part as all the mixing and kneading was done by the machine, and I could even put the bowl of dough into my Neff oven, which has a dough proving setting.

Overall I’ve been very satisfied with the results obtained with the Kenwood Chef  Classic KM330, although there was one little niggle about the construction which would have been inexpensive to improve. Initially, the machine tended to vibrate and move about on the work surface when in use, particularly when the motor struggled or was unbalanced by a ball of dough. There are points on the base where rubber feet could easily have been fitted, and when I fitted stick-on feet at these points all movement stopped and the machine seemed much more stable! The motor also seems very noisy, although that might just be my perception, as I don’t have anything similar to judge it against.

The K-beater, for general mixing
As I said earlier, the various attachments are easy to fit and remove. The splash guard can stay in place while the bowl is removed, or the tools changed, and the tools themselves are easy to clean, even if they have been left standing a while so that any remains of cake batter have dried on – a real bonus with my tendency to avoid washing up! The tools and bowl can also be cleaned in a dishwasher.

One point which I have come to realise is that I need to find room somewhere in the kitchen to have the mixer out all the time. It’s quite heavy to move about, so unless it’s on show and ready to use, the temptation will always be to use either the hand-held mixer or even a bowl and spoon method for cakes, which forms the largest part of my baking repertoire. It would have been useful if the standard kit included some sort of cover, rather than having to buy one as an accessory, as the mixer is obviously going to need one if it is left out in the greasy, steamy atmosphere of the kitchen. A cover is not really expensive to buy separately but could easily have been included without raising the price or lowering the profit too much.

Having initially been reluctant to believe a stand food mixer was necessary, I’m now convinced that the Kenwood Chef Classic KM330 will save me both time and effort. I’m not expecting a great improvement in the quality of my baking, except perhaps with yeast dough, but I do think that the major part of the preparation will be quicker and easier.

Tuesday 17 December 2013

Mincemeat Chelsea Buns and a Bread and Butter Pudding

I've been determined to give my new food mixer a good work out, to test it's capabilities and to see if it's a worthwhile addition to the kitchen. After making pastry and cake batter, the next thing to try was yeast dough. This is something that I don't have consistent success with - a recipe which works well once can fail miserably the second time round. I've also been a fan of Dan Lepard's breadmaking method, which advocates a few, very brief, kneading periods before leaving the dough to rise, not least because I know my hands are not strong enough to knead dough for up to ten minutes.

I chose an enriched dough for Chelsea Buns, from the recipe book that came with the food mixer. It didn't look a lot different to many other recipes I could find online and in my cookery books. The dough was made from 500g strong white flour, salt and dried yeast, enriched with one egg, a little butter and sugar, and mixed to a soft dough with warm milk. After mixing with the dough hook for 4 minutes, the dough was left to rise in the mixer bowl, with the hook left in place. I am lucky that my oven has a dough proving setting, to ensure a constant warmth, as my kitchen can be quite cold - this is a new feature for me, as the oven is only a few months old. When the dough had doubled in size the mixer was used to knock back the dough, and it was then ready for shaping.

Instead of following the recipe and making 12 large buns, with the traditional filling of sugar, butter, spices and dried fruit, I rolled the dough out to make a longer thinner roll which could be cut into 16 smaller pieces and filled it with 200g mincemeat. These were placed in a 10" cake tin which had been greased and base lined with parchment. After the second rising the buns were baked at 200c for 20 minutes, then glazed with honey as soon as they came out of the oven.

I was really pleased with the texture of the buns, although I'm not sure how much was down to using the food mixer and how much was due to being able to prove the dough in a warm enclosure. I used a really basic marmalade which just tasted of vine fruit and spice, so the buns weren't much different to traditional Chelsea Buns in flavour.

Despite freezing 6 of the buns, we couldn't eat them fast enough, and those leftover were stale by the second day after baking. I used them in this 'light' Bread and Butter Pudding recipe from the BBC Good Food website. I used the custard part of the recipe, along with a handful of chopped apricots and some gooseberry jam, with the sliced Chelsea buns replacing the bread and the other dried fruit. I didn't use any brandy in the recipe, either. I really loved the addition of lemon zest to the custard, and wouldn't have guessed it was a low-fat recipe, but in future I would make it in a deeper smaller dish to get a softer centred pudding..


Friday 13 December 2013

Upside-down Pineapple and Ginger Cake

This cake was thrown together in just a few minutes, as I needed a cake and had a pineapple lurking in the fridge which needed using. Unfortunately I'd already cut into the pineapple, so couldn't have the usual pattern of rings; instead I put together a mosaic of pineapple pieces, cutting pieces where necessary to fill the gaps. I kept the slices to around 0.5cm in thickness, as I wasn't sure how long the fruit would take to cook. I laid them on a base of 50g butter and two heaped tablespoons of muscovado sugar, melted together, then cooled in the baking pan - which was a 22cm skillet pan (no loose bottoms for this sort of cake!).

The cake batter was an all-in-one sponge based on 3 eggs and 150g of each of SR flour, softened butter and light muscovado sugar. To this I added 2 teaspoons ground ginger, 1 teaspoon mixed spice, 1 tablespoon black treacle and 30g chopped glacé ginger. The batter was spread gently over the pineapple pieces, and baked at 180C for around 35 minutes, until it felt firm and springy, and a cake probe came out clean of any damp crumbs.

After cooling for only a few minutes, the cake needed turning out, before the base cooled and stuck to the pan. This was when I realised I didn't have any plates large enough to turn the cake out onto. I hastily tore a double thickness of aluminium foil and laid it on a board. Using the foil meant I could transfer the cake to a storage box later, without having to lift it again. Happily the cake turned out of the pan without a single piece of pineapple being dislodged. I have memories of lots of juice at this stage, with previous cakes, but all I had was a nice sticky surface holding the pineapple down. Perhaps that's the difference between using fresh and tinned pineapple.

The pineapple was nicely cooked and the ginger sponge added a warm kick to the flavour without being too overwhelming. The cake wasn't very deep, but it was just right for the two of us, lasting for three days.

Wednesday 11 December 2013

Mincemeat and Marzipan Pies

I recently acquired a stand food mixer, and the first thing I did was to make a large batch of short crust pastry, some of which was used for this Chocolate Ricotta Tart. With the rest of the pastry, I made these two mincemeat and marzipan pies.

The pies  were about 18cm in diameter, giving six small portions each - just right with the evening cup of coffee. After lining the disposable pie cases with pastry, I put a layer of grated marzipan into each one - about 150g between the two cases. Then I mixed a standard sized jar of mincemeat with a finely chopped eating apple, to cut some of the sweetness of the mincemeat, and divided this between the two cases. I topped one pie with a lattice made from pastry strips, and the other with the last of the pastry trimmings rolled into a ball, then chilled before grating over the top using a coarse grater.

I had room to fit one of the pies into the freezer - it might be the full extent of baking ahead for this Christmas, as there's not much freezer space to spare! Apologies for the quality of the photo too - there's so little natural light at the moment, with the dull weather we've been having!

Tuesday 10 December 2013

Fig, Pistachio and Honey Balls

These could almost be considered guilt-free Christmas treats - no dairy, no gluten, no refined sugar, no added fat. There's just a tasty mixture of dried fruit, nuts and honey, with orange zest, orange flower water and cinnamon for flavouring. The recipe comes from the December 2013 issue of Good Food magazine, but isn't available on the website yet.

Here's a brief overview of the recipe - it isn't difficult, but you do need at least a mini-chopper, if not a full sized food processor.  My mini-chopper was big enough to process all the dried fruit in one batch.

200g soft dried figs and 100g dates are processed to a purée with 40g of well-flavoured honey (I used wild thyme), 1/2 teaspoon of cinnamon, the finely grated zest of an orange and 2 teaspoons of orange flower water, then 100g chopped pistachios and 50g of chopped blanched almonds are worked into the paste. The mixture is rolled into cherry-sized balls and placed on baking parchment to be chilled. I found it easier to roll the very sticky paste by chilling it first, and got the recommended 25 balls out of the mixture.

There is an option in the recipe to roll the fruit balls in cocoa before serving, but I was taking them to a dinner party where one of the guests could not eat chocolate, so decided not to do this. A tempered dark chocolate covering might be a tasty, sophisticated finish too. For presentation I put each ball into a petit four case before filling a shallow box with a single layer.

I'm entering this into this month's Tea Time Treats challenge, the last to be hosted by Kate, of What Kate Baked. The theme she has chosen is one which fits well into December - Festive Foodie Gifts. The rules for the Tea Time Treats challenge can be found here, on co-host Karen's blog (Lavender and Lovage). Karen will be carrying on setting TTT challenges in the new year.

Sunday 8 December 2013

Chocolate Ricotta Tart

Would you believe I've been too busy cooking (and eating) to write up any of my recent efforts? My sister visited for a week, which distracted me from the routine of life, then it was a birthday dinner for my daughter and the arrival of a new food mixer, which needs a good work out before I can form an opinion on it's usefulness.

This Chocolate Ricotta Tart was the dessert I made for my daughter's birthday dinner. It's very similar to a cheesecake in a pastry case, and is a classic Italian or Sicilian dessert. There are dozens of recipes online and many add chopped nuts, mixed peel and citrus flavours (with or without the chocolate), but I was drawn to this version in one of my recipe books, which added only finely chopped chocolate and coffee to emphasize the flavour.

The recipe quantities in my book (The Essential Dessert Cookbook) were huge, making a deep 25cm pastry case filled with a mixture which used well over 1 Kg of ricotta. For our humbler needs,  I made a 22cm case and adapted the filling, using half quantities of the ingredients and adding some coffee flavoured liqueur. I didn't halve the amount of chocolate though - I just cut down from 125g to 100g - there's rarely such a thing as too much chocolate in this type of dessert!

I used standard shortcrust pastry for the case, although the classic recipes use a type of pastry called Pasta Frolla. The filling consisted of 625g ricotta, 2 egg yolks,  65g caster sugar, 1 tablespoon plain flour, 100g finely chopped dark chocolate, one teaspoon instant coffee dissolved in 1 tablespoon of hot water and 1 tablespoon of Tia Maria liqueur, mixed together and chilled in the raw pastry case for an hour before baking at 180C for about an hour, until firm. After cooling slowly in the slightly open oven, the tart was decorated with drizzles of melted chocolate and chilled.

The tart was not as good as expected, unfortunately. The flavour was great, but the cheese mixture was very dense  - I had expected something lighter, as ricotta is such a light cheese. I originally picked the recipe because it didn't contain extra cream, but perhaps this is needed to keep the texture lighter. Although it's considered a classic recipe, there are so many versions around that it's difficult to decide which is going to be the best.

I'm hoping to have time to make something specially for the We Should Cocoa baking challenge this month, but if I run out of time, this will be my entry, as the remit this month is to use chocolate and alcohol together. One tablespoon of liqueur hardly counts, but it might have to! More later if necessary!

Tuesday 26 November 2013

Wholemeal Pear and Ginger Cake

A while ago, I made a wholemeal apple, marmalade and cranberry cake from this Nigel Slater recipe, and speculated that a pear and ginger version, made with ginger preserves instead of marmalade might work well. I can now report that it worked very well indeed!


I followed the basic recipe exactly, using ground ginger instead of cinnamon, ginger preserve instead of orange marmalade, lemon zest instead of orange zest and three diced 'fun-sized' pears instead of chopped apples.


Once again, I was surprised at how light a cake made from all wholemeal flour turned out, especially as there wasn't a great deal of baking powder in the recipe. The ginger made it's presence felt, without being overwhelming, which is just as well, as pears are quite a delicate flavour.

Sunday 24 November 2013

Chocolate Supreme Cookie Bars

This recipe comes from an Australian chef called Aaron Maree. No - I wouldn't have heard of him either, if I hadn't picked up one of his books, called "Biscuits, Pastries and Cookies of the World", from one of the local charity shops

The ingredients make these cookies seem typically Australian, although if there is anything similar online, it's going by another name. Basically it's a shortbread-type base which is baked, and then covered with a mixture of chocolate chips, desiccated coconut, macadamia nuts and condensed milk. This is then baked again until the milk is lightly caramelised  - when cooled this then sets and holds everything together.

For a 20x 30cm pan, the base was made from 135g flour, 75g butter, 55g icing sugar and an egg yolk, made into a shortbread-type dough. This just about covers the base, with a lot of hard work spreading it to the edges with fingers!  I think half as much dough again would have been an improvement - easier to work with and giving a more substantial base. The dough is then baked at 160C for 15 minutes until set and beginning to colour.

The topping is a whole 400g can of condensed milk, 60g desiccated coconut, 60g chopped macadamia nuts and 200g chopped plain chocolate, or chocolate chips if you would prefer a more uniform looking topping. Half the milk is poured fairly evenly over the cooked shortbread base, then the nuts, coconut and chocolate are scattered over. The rest of the milk is then poured over. After baking for 45 minutes at 145C, the cookie sheet must be left to cool for at least 2 hours before cutting into 24 bars - I had to put it in the fridge for 10 minutes as the whole thing was still quite sticky after 2 hours.

As you can imagine, the topping was very rich and sweet, which is another reason I think a thicker cookie base would be an improvement, as it would give a better balance of sweet topping and plainer base. It was also one occasion when I wouldn't recommend cutting into larger bars - I had a houseful of guests for tea and no-one ate more than one, although everyone thought they were delicious!

I'm entering these into this month's We Should Cocoa challenge. As you probably know, WSC is a challenge originally started by Choclette at Chocolate Log Blog and Chele at Chocolate Teapot. This month the challenge is hosted by BakeNQuilt, and the theme is cookies.

Friday 15 November 2013

Apple Cake with an 'Eccles' filling

Despite the Good Food website taking liberties with the name of this cake, I really don't think I can bear to call it an Eccles Cake. The term Eccles Cake conjures up only one thing - a puff pastry  shell completely encasing a spicy currant filling; it's one of those traditional, iconic British things, like Bakewell Tarts, Cornish Pasties and Melton Mowbray Pork Pies, that shouldn't be messed with.

However, despite my misgivings over the name, this recipe made an exceedingly good cake - two layers of apple-studded cake enclosing a spicy
layer of dried fruits (sultanas, currants and candied peel). The cake layers were moist, but tender and light, and tasting slightly of caramel due to the use of brown sugar. The apple pieces kept their shape during cooking, adding to the range of textures in the whole cake. The dried fruit layer was spicy, sweet and buttery, with the flavour of the ground cloves and candied peel really standing out. Having said that, I know that many people do not like these particular flavours, but I think the cake would be just as good without them - perhaps adding something like cranberries instead of the peel, to keep the weight of filling correct.

The only changes I made to the cake recipe was to use sultanas instead of raisins, and to bake the cake in a 23cm tin rather than a 20cm one - the comments on the website, about the cake, suggested a larger tin would make a better proportioned cake - and I think I agree with them. The use of sultanas was purely to take advantage of what was in the storecupboard, but I did buy the currants especially for the recipe - currants are essential for a real Eccles Cake filling. I simplified the decoration by just using a drizzle of lemon glacé icing, although I have to confess that this was partly due to not reading the recipe properly, and having neither sugar cubes to crush nor an extra lemon to take zest from!.

I am entering this recipe into this month's Tea Time Treats baking challenge. The remit this month, in the run-up to Christmas, is to use dried fruits when producing something suitable for the tea table. This cake fits the bill quite nicely, as it is full of seasonal flavours and ingredients, and I think it would make a lovely Christmas cake for anyone not completely sold on the idea of a traditional fruit cake. 

Tea Time Treats is hosted alternately by Karen at Lavender and Lovage, and Kate at What Kate Baked - Karen is hosting this month and, as usual, will present a round-up post at the end of the month.

Tuesday 12 November 2013

Blueberry Almond Bars

These tasty fruit-topped bars, made using this recipe from Dan Lepard, are a good way of stretching a little fruit to feed several people.

The recipe, although simple enough to follow, is quite time consuming and uses a lot of equipment - a saucepan for each of the two upper layers plus a bowl for the base, as well as mixing and weighing utensils.

The results were delicious, but rather fragile. The base was quite crumbly and the almond topping stayed soft and sticky. Although this gave some lovely contrasts of texture, it made the bars difficult to cut and handle, and they needed eating with a fork.

The almond layer was very sweet and tasted of caramel, but this sweetness was offset by the tartness of the fruit and the plainness of the bottom layer, which was a cross between a shortbread and a cake.

Sunday 3 November 2013

Blackberry-glazed Apple and Hazelnut Cake

The inspiration for this cake came from watching Hugh Fearnley-Whittingstall's new TV series, River Cottage to the Core, in which he is trying to get us to eat more fruit, particularly in savoury dishes. He hasn't entirely converted me yet, although the pear, spinach and blue cheese pizza looked delicious. However, he also made this lovely looking cake to reward his little blackberry pickers, and I thought the idea of a fruit purée topping was very effective.

H F-W topped a plain sponge cake with blackberry purée, but I decided to go a step further and pair the blackberries with one of their natural partners - apples. I also decided to add ground hazelnuts to the cake batter to bump up the flavour and make the cake as seasonal as possible.

For the cake, I made an all-in-one batter, using 150g each softened butter, caster sugar and SR flour, 50g ground hazelnuts,  3 eggs, 1 teaspoon baking powder, 1 teaspoon vanilla extract and two tablespoons of milk. To this I added a large apple, peeled, cored and sliced. I used one of my home-grown apples which are suitable for cooking and eating - you need an apple which keeps it's shape when cooked, which are usually eating apples. I cut the peeled apple into 8 wedges, then sliced these across to give pieces about 2 cm square and 3mm thick.

I cooked the batter in a 18cm (7") tin, lined with a paper case. I started the cake at 180C but lowered the heat half way through as the cake was browning too quickly; I also covered the cake with foil at this point. Altogether the cake was in the oven for 75 minutes - the batter was quite deep in a 18cm tin. I followed the usual advice to cook until an inserted cocktail stick comes out clean - no wet crumbs adhering to it.

While the cake was cooking, I made a smooth fruit purée from 250g blackberries and 50g sugar, cooked briefly and sieved to remove pips. When the cake came out of the oven, I made holes all over the surface with a skewer and slowly spooned on as much of the still-hot purée as I could get on, then cooled the cake still in the tin. Despite quite large holes being made, the purée didn't really soak in very far, but it still looked very striking. The cake itself was very light, and both the apple and hazelnut flavours came through well. The tart blackberry purée was a good contrast to the sweet, tender cake, and the pieces of apple added to the texture.

I used the cake as a dessert, served with natural Greek yogurt and more blackberry purée.

Thursday 31 October 2013

Spiced Date Crunchies

The  recipe for these Spiced Date Crunchies is taken from Delia Smith's Book of Cakes, an old book I rescued when clearing my mother's house earlier this year. I love dates, especially as the filling in chunky, chewy oat slices. This recipe looked similar, but Delia promised the use of semolina would make the bars crisp rather than chewy.

The date filling was made from 225g chopped dates simmered with a tablespoon of dark brown sugar, 4 tablespoons of water, 1 tablespoon of lemon juice and half a teaspoon of cinnamon, until the dates were amalgamated into a soft spreadable mixture.

The biscuit dough was made by melting 175g butter with 75g Demerara sugar, and mixing this into 175g SR flour and 175g semolina.

Half the dough was pressed evenly into a 30 x 20 cm baking tin, lined with parchment, and the date filling was carefully spread over this (tip - don't let the date mix get too cold, and if it's very thick, stir in a splash more water). The remaining dough was crumbled over the filling and spread evenly with a fork. Cook at 190C for 30 minutes, then cool in the tin before cutting into bars.

These date bars were crisp, as promised, but also very thin and delicate. Although this made them the right sort of biscuit to put on the tea table, I think I prefer the chunkiness of an oat based slice. It would be interesting to use the same quantity of ingredients in a smaller baking tin, say 20 x 20cm, and seeing how things turned out. They would probably need baking for longer, at a lower temperature.

The flavour was just right - neither the dough nor the date filling had much extra sugar added, so all the sweetness came from the dates - and there was just a hint of cinnamon.

Wednesday 23 October 2013

Ginger Brownies

 We don't see or hear much from CT these days. He's never been very communicative. Weekly emails while he was at university usually received the reply 'All is well.' and things are much the same now that he's away from home again. Having said that, he often didn't say much more while he was living at home!

However, he doesn't drive, so dear old Dad is still useful for things like keeping hospital appointments. After his last appointment, he had dinner with us, and I made these Ginger Brownies for dessert. He took the remainders home with him, of course!

I used this recipe for Marmalade Brownies, using ginger preserves instead of marmalade, and adding two teaspoons of ground ginger with the flour. They were quite light, cakey brownies but with a good chocolate flavour; I used a mix of 1 part 85% and 2 parts 74% chocolate. There was a pleasant tingle from the ginger, with soft pieces of ginger from the preserves to bite into, and a nice crunch from the walnuts.

I managed to get a few hasty photos, in poor light, before I had to wrap the brownies for transport.

Tuesday 22 October 2013

Date, Apple and Walnut Loaf

 After the success of Nigel Slater's cake recipe recently, which was loosely based on traditional proportions of fat, sugar and flour, I decided that maybe I've been too experimental recently and that a return to more traditional cakes would ensure better results.

This was also partly prompted by re-finding an old Delia Smith book - Book of Cakes - which I'd dropped into the bottom of a crate while clearing out my mother's house. I've just got round to emptying out the crate here, four months later! Looking through the book, which I think was published in 1988, I found several recipes which I've bookmarked to try, but all required some additional ingredients before I could bake.

However, I did have all the ingredients for the Date, Apple and Walnut Loaf featured in Delia's Complete Cookery Course (p600 of the 1982 edition). This Apricot, Apple and Pecan Loaf recipe from her website is similar, except that a small apple, 110g walnuts and 75g dates are used instead of the larger quantities of apricots, pecans and apple - the old recipe is much more frugal with it's additions. There is also no cinnamon in the Date Loaf, and no sugar topping - I said it was frugal! The old recipe also uses soft margarine, but I substituted very soft butter - there are limits!


The plainer Date Loaf cooks in an hour, but as I divided the batter between two small loaf tins, they were cooked in 50 minutes. I used some very lush sticky dates, which, with the apple, made the cake moist and chewy and also gave it a spicy toffee flavour. This seasonal cake was a real treat of old fashioned flavours which are often overlooked these days.

Thursday 17 October 2013

Apple, Guinness and Cheese Soda Bread

How could I have been so stupid as to make this recipe, from Hugh Fearnley-Whittingstall without reading any of the comments attached to the published online recipe? On both the River Cottage site and the C4 site there are comments stating that there is too much liquid in the recipe as printed and that it should be 250mls of Guinness or buttermilk, not 250mls of each, and several bloggers who have also made it picked up on the published error.

Anyway - this idiot used both, and ended up with a sloppy batter which couldn't be shaped by hand. I scraped it into a large casserole dish lined with scrunched up baking parchment and got a decently shaped cob-like loaf out of it. However it didn't cook properly, even after more than an hour in a very hot oven, and the cut loaf showed both a dense, too moist texture and a line of under-baked dough at the bottom of the loaf.

The flavour combination of cheese and apple should have been great, but the loaf had a bitter after-taste which neither of us found pleasant to eat. Guinness is notorious for bitterness but I don't usually find it a problem, so I'm wondering if there was a weird interaction between the Guinness and the buttermilk.

There's a lot of potential in this soda bread so I really want to try it again, with just one of the suggested liquids, but can't really find an occasion to do so, as neither of us are eating bread at the moment, except for Saturday lunch, when I don't think Hubs would give up his crusty baguette.

I was going to enter this quick soda bread into this month's Tea Time Treats challenge, which is for breads, but as the recipe was a failure, and we didn't even like the flavour of the finished loaf, it hardly seems right to do so!